If you have some BPAV files form a Sony XDCAM EX camcorder like Sony EX3, you may want to edit them in Adobe Premiere Pro besides playback. Generally, in Adobe Premiere Pro, importing BPAV sources with Media Browser is usually workable. Whereas many people always found that the MP4 within the BPAV file is unreadable to Premiere. If you've copied the complete BPAV directory to hard disk and used Media Browser to import your BPAV clips to Premiere Pro, but still failed, you'd better seek for an alternative way. And there is an easy way to fix the issue. And the practical way we recommended is transcode BPAV files to Adobe Premiere Pro editing-friendly codecs like MPEG-2.
To convert BPAV files to Premiere Pro, you can adopt EaseFab Video Converter for Mac for help. With it, you can effortlessly encode BPAV .mp4 files to Adobe Premiere friendly MPEG-2, which ensures maximum editing quality and efficiency when working with Premiere Pro CC, CS6, CS5.5 and older versions. Meanwhile, this video converter can create files compatible with more non-linear editing systems like Final Cut Pro, Avid Media Composer, iMovie, After Effects, etc. By the way, if you are on Windows, Video Converter is the alternative choice. Just download it and follow the tutorial below to solve BPAV and Adobe Premiere Pro incompatible issues.
By running the program, there is no need to set the codec yourself, it has optimized presets for Adobe Premiere Pro as well as other NLEs like Avid, Final Cut Pro, iMovie, etc. If you're facing problems editing BPAV folder (XDCAM EX) files, just download the program and follow the step-by-step guide to achieve your goal smoothly.
Read More: Convert BPAV files for Editing in Final Cut Pro
Convert BPAV files for Editing in Adobe Premiere Pro Smoothly
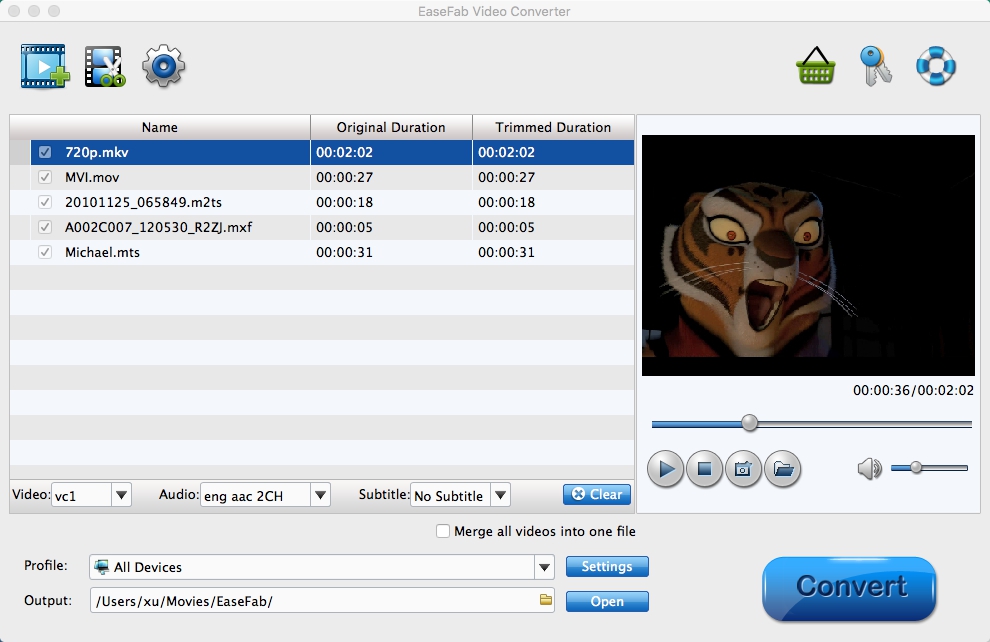
Step 1. Add source files
Launch the BPAV file converter and click "Add File" button to locate the BPAV .mp4 file(s) you want to add.
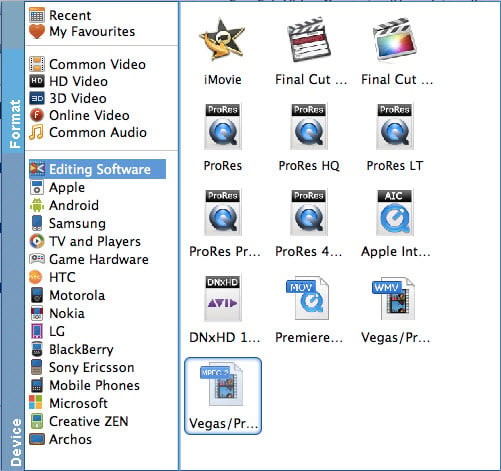
Step 2. Selec output format
The program has three already optimized the video settings for Adobe Premiere. You can select MOV, WMV or MPEG-2 from "Editing Software" as the output format. Here we recommend you choose MPEG-2. The output videos will keep the original quality of the BPAV MP4 video and seamlessly fit Adobe Premiere CC, CS6, CS5.5, CS5, CS4, etc.
Step 3. Set Advance Settings (Optional)
The default setting works well. Of course, if you want to customize video and audio encoding settings, just click the "Settings" button to customize these settings. You can adjust the output video/audio resolution, frame rate, bit rate, etc. to customize the output files to get the best quality you want.
Step 4. Start transcoding BPAV videos to Adobe Premiere
Click the big "Convert" button at the bottom right corner to finish encoding BPAV files to MPEG-2 for Adobe Premiere Pro.
Once the conversion finished, you can find the output files by clicking "Open" button on the main interface, then you can transfer the encoded BPAV files to Premiere Pro CC/CS6/CS5/CS4 to do further editing.