"Has anyone worked with media from the Sony A7S camera. Looking for some tips regarding post workflow and getting the media into FCP 7. Import XML isn't working, it asks for a navigational file and gives us an error. I have h264/mpeg4s of the footage which I'd rather not use since its a compressed codec that doesn't always get along with fcp."
The Sony A7S is a 12MP full-frame mirrorless camera designed for both stills and video. Beyond the standard AVCHD format, the Sony A7S also supports the XAVC S codec (rewrapped in MP4 format), previously found only in Sony's high-end Handycam professional camcorders. The XAVC S codec was designed to be able to accommodate 4K video, but in the case of the A7S provides high-bitrate full HD, at 50 Megabits/second. While enjoying the stunning videos recorded of HD image quality, many users are having problems importing Sony A7S XAVC S media into Final Cut Pro 7 even FCP X for editing. Fortunately, there is an easy way to fix the issue. Let's find it out here.
The basic reason why we can't work Sony A7S XVAC S with Final Cut Pro is that XAVC S codec is a new one, and is not widely supported. To make the XAVC S compatible with Final Cut Pro 7 , the easy workaround is to convert XAVC S to ProRes codec, which Final Cut Pro works best with. This artile would show you how to convert Sony A7S media to Final Cut Pro on Mac step by step with a professional Video Converter for Mac (Yosemite, Mavericks, Mountain Lion, Lion included), by running it, there's no need to set the codec by yourself: the Mac program has optimized presets (Apple ProRes) for FCP. Besides, its also exports advanced encoders like Apple Intermediate Codec, DNxHD, etc. allowing you to convert video to seamlessly fit iMovie, iDVD, Adobe Premiere, Avid Media Composer, etc. Just download the program and follow the steps on converting XAVC S to ProRes for Final Cut Pro.
Guide: Converting Sony A7S XAVC S to Final Cut Pro 7/X
Step 1. Add XAVC S videos
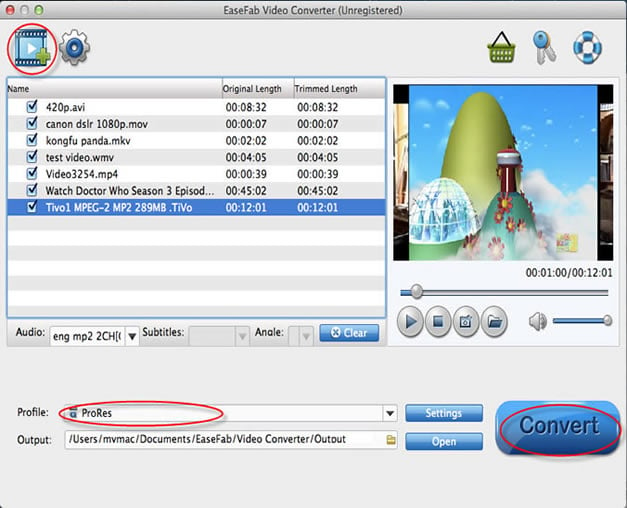
Install and launch the XAVC S to FCP Converter on your Mac. Then click "Add Video" button on the top of the main interface to import video to the program. You can also driectly drag and drop your A7S media to the software.
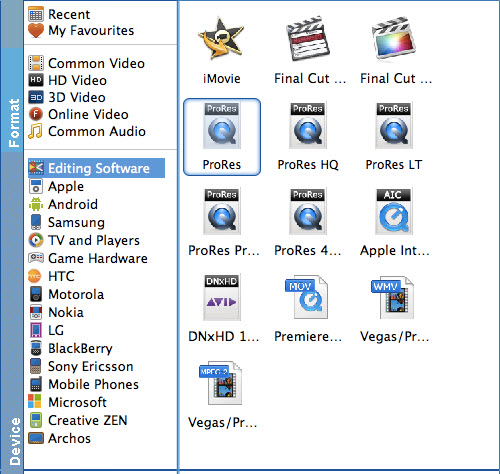
Step 2. Set the ProRes as the output format
Click on the "Editing Software" and you will see options to convert your XAVC S video for certain video editing software. Since you will be importing the video to Final Cut Pro after the conversion, have "Apple ProRes 422" be your selected output format. You can also choose "Apple ProRes 422 HQ" or "Apple ProRes 4444" as the output format.
Tips: Adjust video, audio settings
Click the "Settings" button and customize proper video/audio parameters including Video size, bitrate and fame rate and mroe. Usually 1920*1080 video size and 30fps video frame rate are recommended for FCP editing.
Step 3. Start XAVC S to ProRes conversion
After all necessary settings, hit the convert button to start the XAVC S video to ProRes conversion on Mac OS X. Once the conversion process shows in 100%, click Open to get the output videos. Create a project and start editing Son A7S XAVC S video in Final Cut Pro 7 or FCP X with light speed.
Open Final Cut Pro. To import your converted video files, head to the menu bar and click on File > Import, then "Files". A small window will appear and allow you to browse through files in your Mac to locate and import your video. You also have an option to drag-and-drop your file to the left pane of the Final Cut Pro window. Once your video is imported successfully, you can do all you want with Sony A7S media in Final Cut Pro X/7/6.