1. Get Started
 2. Basic Operation
 3. Settings
 4. Edit
 1. Get Started
Notes:
① We have both Windows version and Mac version for EaseFab LosslessCopy. For the whole guide of EaseFab LosslessCopy, we will mainly introduce the Windows version, and the Mac version has the same functions if there is no special remark.
② A Blu-ray Drive is needed for ripping or copying Blu-ray discs. And please make sure that all the DVD/Blu-ray ripping are just for personal use.
1.1 - Download
Click the button below to download a setup file of EaseFab LosslessCopy on your PC or Mac.
1.2 - Install
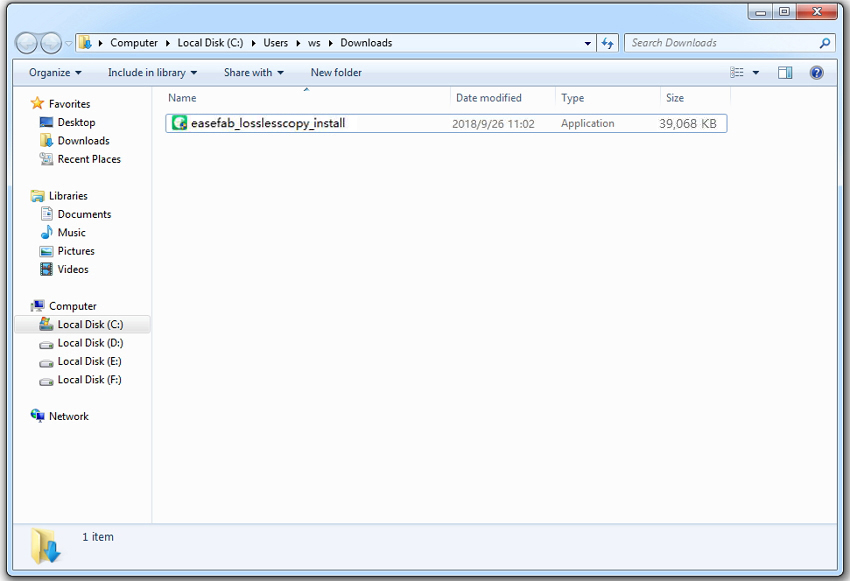
① Double-click the setup file.
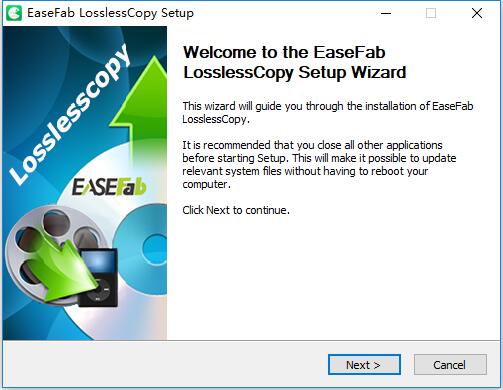
② From the pop-up window, click Next to go ahead.
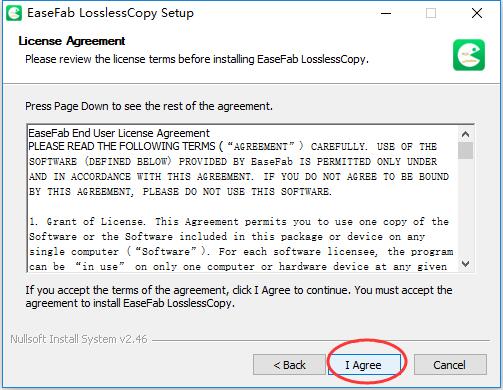
③ In the coming window, read the end user license agreement carefully and click I Agree to go ahead.
④ Then, browse the destination folder to save your installation files.
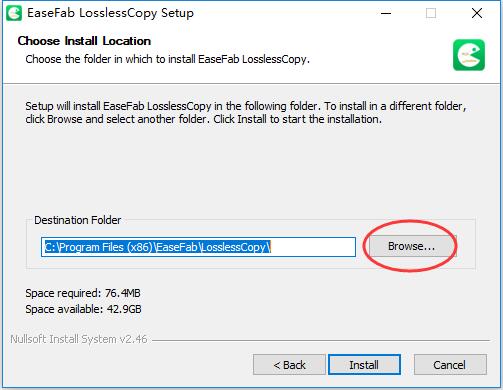
⑤ After that, click Install to finish the installation.
⑥ It will take seconds to install EaseFab LosslessCopy successfully. A window like below will prompt you that you can click Finish button to open EaseFab LosslessCopy at once.
<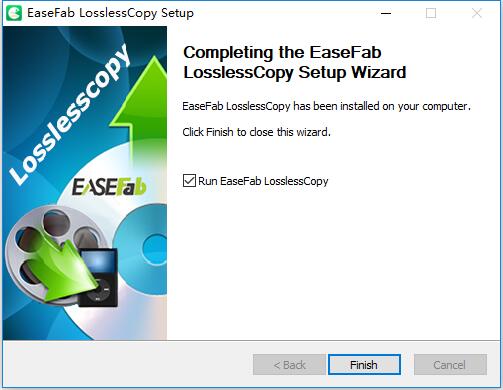
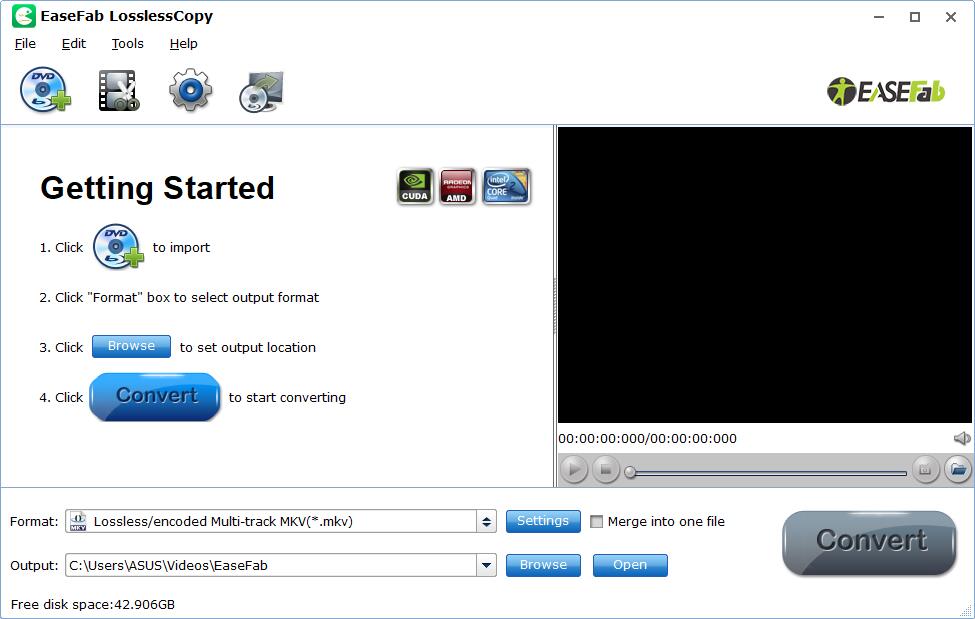
⑦ After clicking Finish button, you will enter the main window of EaseFab LosslessCopy shown as below.
1.3 - Trial Limits
With the trial version of EaseFab LosslessCopy, you'll have the following limitations: At most of 3 minutes of every Blu-ray or DVD file will be converted.
Note: This is the only difference between the trial version and registered version.
1.4 - Register
※ You will receive product information with license code via email once you complete the order.
① Launch EaseFab LosslessCopy, Move mouse cursor to Help menu at the upper corner and then click Register to enter the Registration window.
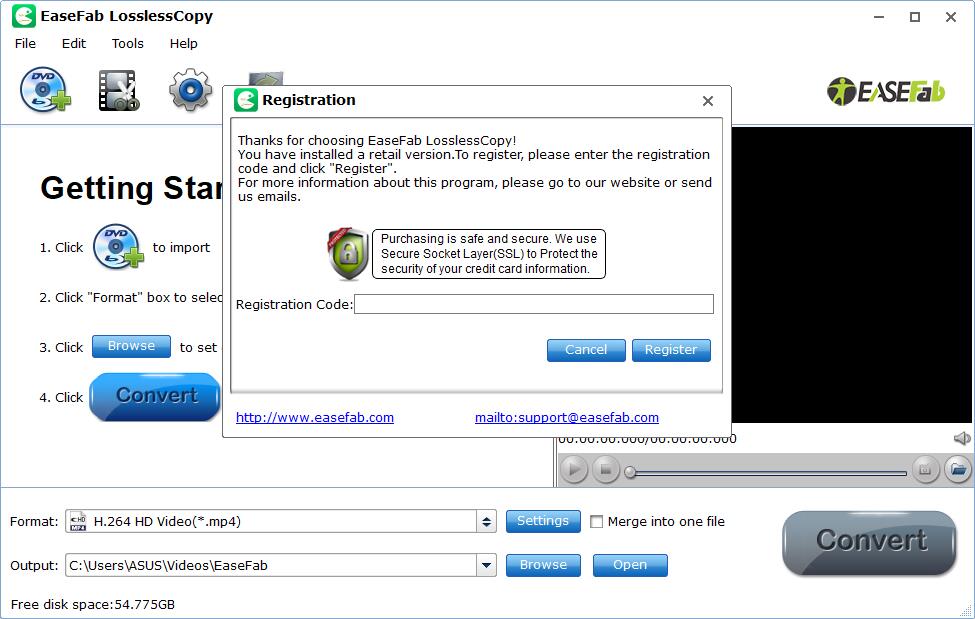
② Copy and paste the registration code to avoid any typos, then click the Register button to go ahead. Once EaseFab LosslessCopy is registered successfully, you'll see a pop-up registration successful page.
1.5 - Update
If you want to check if your LosslessCopy is the latest version and update it, you can follow the steps below to update automatically.
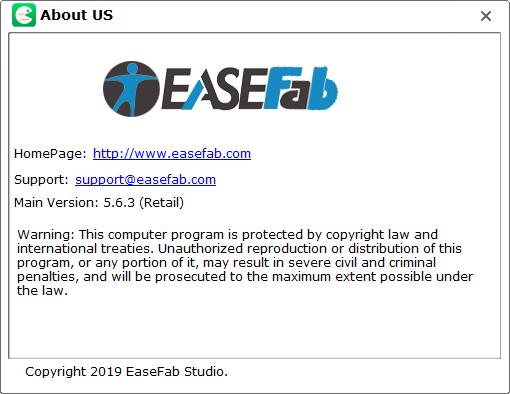
Go to the Menu icon > Help > About, After that, the About Us page will pop up to show you current version of EaseFab LosslessCopy. The latest retail version is 5.6.3. You can go to LosslessCopy's History Page to see if you're using the latest version. And you can always download the latest version from the following link:
https://www.easefab.com/download/easefab_losslesscopy_install.exe
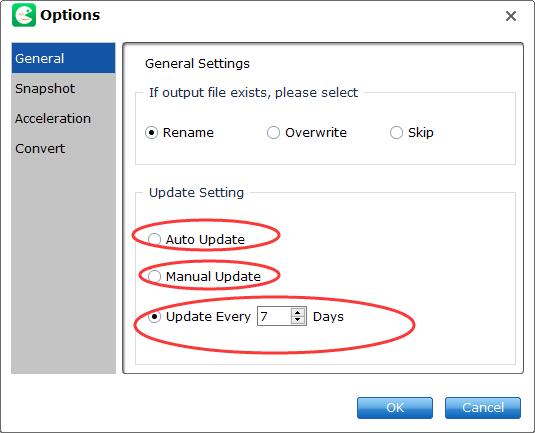
You can change updae setting by clicking Tools > Options Window in the Options Window. As you see, you can select Auto Update, Manual Update or according the days you set.
Note:If you're used to using the same version all the time, please choose Manual Update to stop the automatic update. Whenever you need an update, please click Update under Help Menu to make an update manually.
 2. Basic Operation
After launching the software, you can operate DVD or Blu-ray ripping in 3 steps easily. Just do as following: Load Blu-ray or DVD > Select Output Profile > Start ripping..
2-1. Load Blu-ray or DVD
Insert the Blu-ray disc to the Blu-ray Disc drive or DVD to the DVD-ROM and click the ![]() button to have movies uploaded to EaseFab LosslessCopy. Here you can also import BD/DVD folders, ISO files and IFO files to convert.
button to have movies uploaded to EaseFab LosslessCopy. Here you can also import BD/DVD folders, ISO files and IFO files to convert.
Note: A DVD or a Blu-ray may contain many titles more than the main movie, such as the trailers or commercials. By default, EaseFab LosslessCopy choose the longest title which is usually contains the main movie. And this helps ripping without converting unnecessary titles.
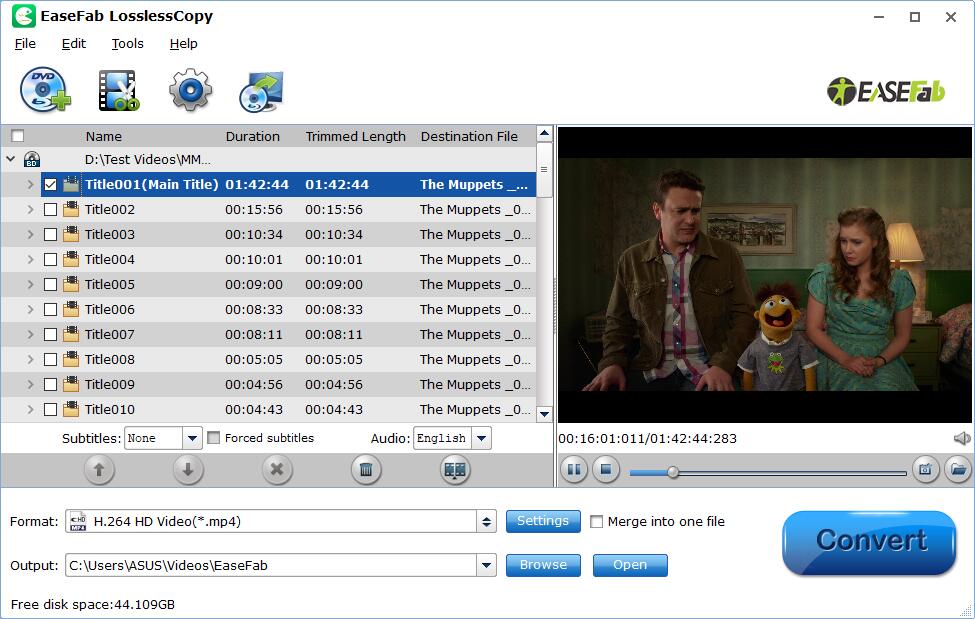
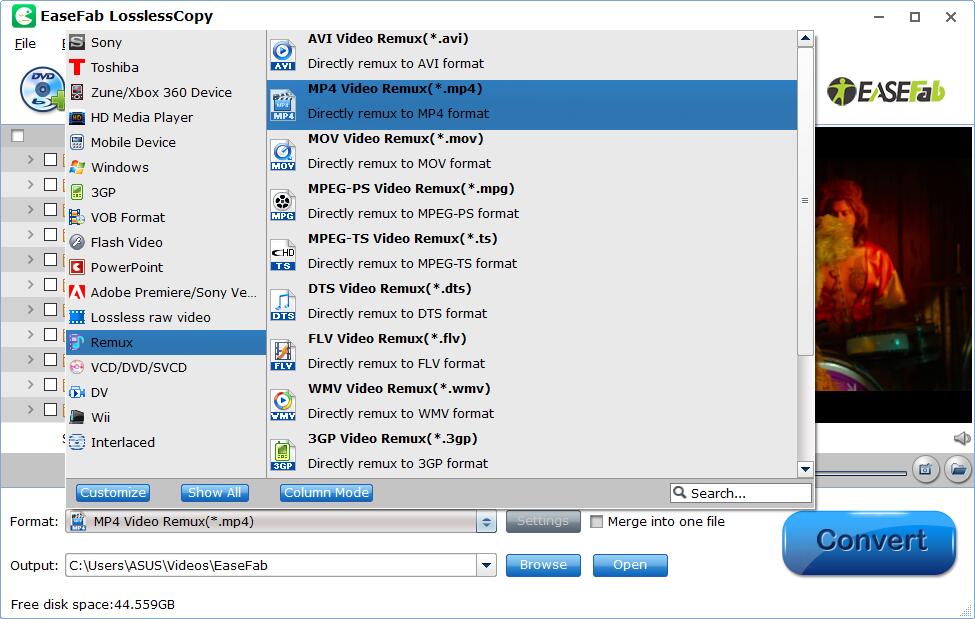
2-2. Select Output Profile
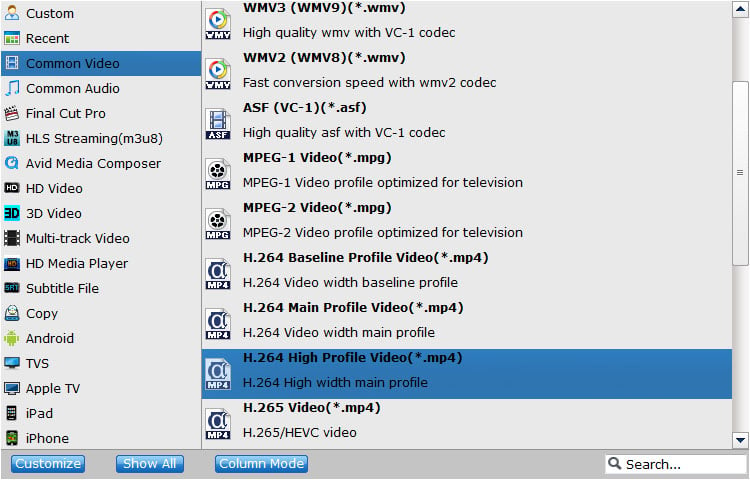
Click Format (located below where your Blu-ray's or DVD's files are displayed) and select the format you want from the drop-down list. All regular video/audio formats and devices like MP4, MOV, MKV, WMV, AVI, FLV, MP3, WMA, WAV, M4A, iPhone, iPad, Android, etc. and multi-track video like MKV, MP4, MOV & AVI are provided.
![]() Option 1: Regular Video Format Ouput
Option 1: Regular Video Format Ouput
As you see, all regular video and audio formats like MP4, MOV, MKV, WMV, AVI, FLV, MP3, WMA, WAV, M4A, etc. are provided.
![]() Option 2: Device Profile
Option 2: Device Profile
If you want to convert your Blu-ray/DVD movies for play on portable devices, including iPhone, iPad, iPod, HTC, Samsung Galaxy, Nokia, Sony, PSP, Xbox 360 and more, you can simply browse to find the icon of your device and select it as the output format to get videos with optimized settings. All Idevices output files can be synced to iTunes automatically.
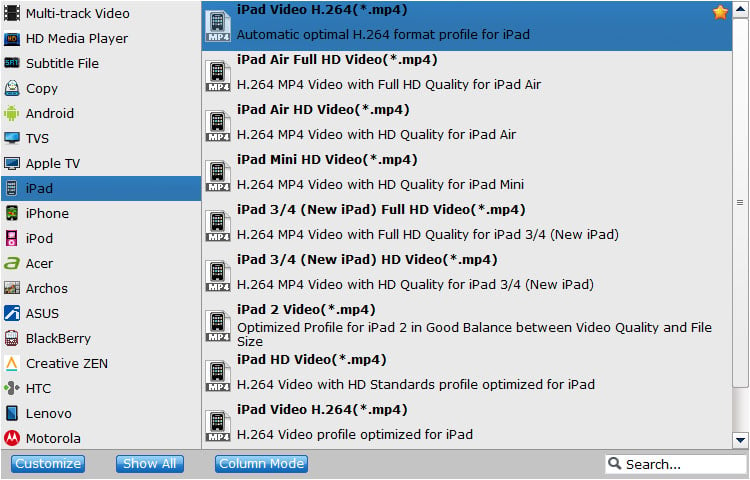
Tips: By clicking the Settings button beside Profile, you can adjust the output video/audio resolution, frame rate, bit rate, etc. to customize the output files to get the best quality you want.
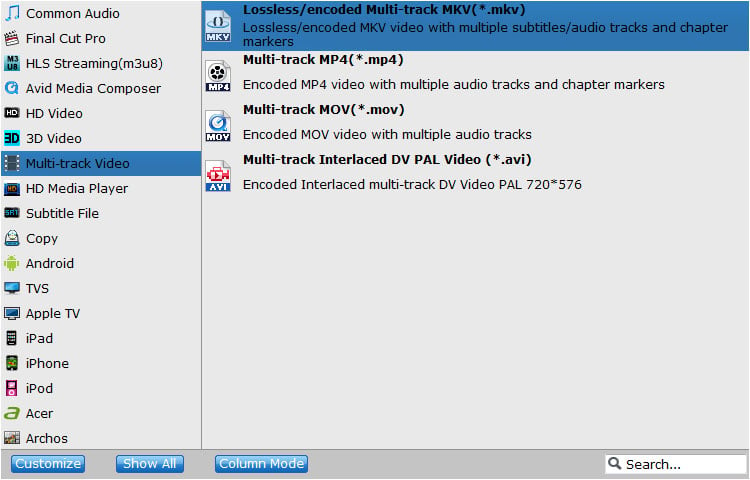
![]() Option 3: Multi-Track Output
Option 3: Multi-Track Output
This is the unique feature of EaseFab LosslessCopy. There are four multi-track output formats available for you to choose from – Lossless/encoded Multi-track MKV, Multi-track MP4, Multi-track MOV and Multi-track Interlaced DV PAL Video (*.avi).
![]() Lossless/encoded Multi-track MKV
Lossless/encoded Multi-track MKV
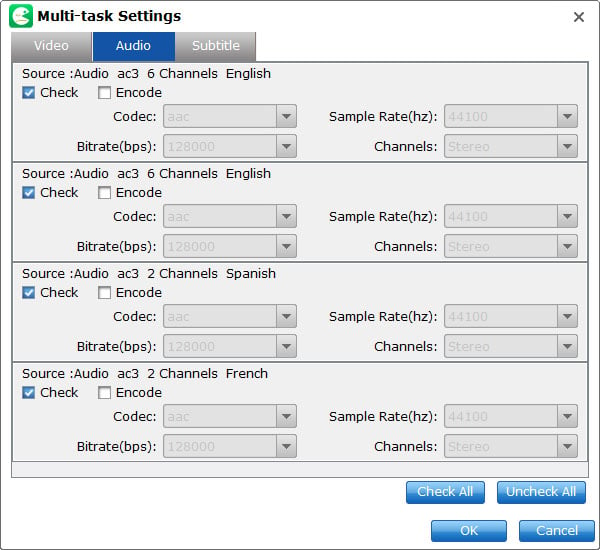
EaseFab LosslessCopy transfers video from Blu-ray/DVD to MKV container in two ways, lossless output and encoded output. Both the two ways enable users to preserve wanted audio tracks and subtitles streams in the source movie.
By default, all audio & subtitles tracks in a source file are checked to be saved in the MKV container by default, if there are some tracks you don't like, you can click Settings button and go to Multi-task Settings window to uncheck and remove them under Audio tab and Subtitle tab.
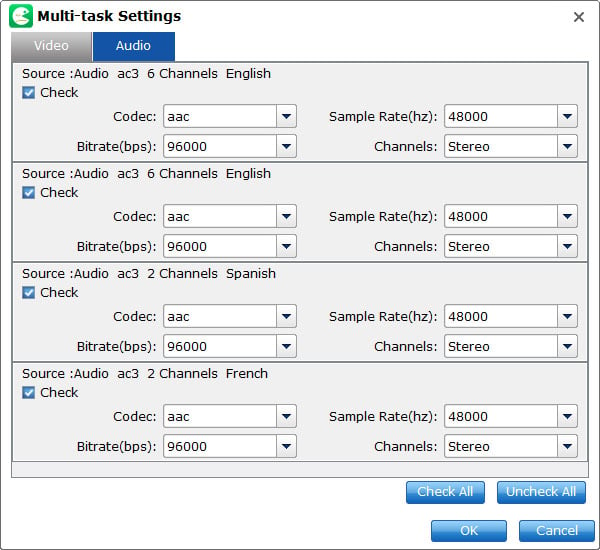
![]() Multi-track MP4/MOV and Multi-track Interlaced DV PAL Video (*.avi)
Multi-track MP4/MOV and Multi-track Interlaced DV PAL Video (*.avi)
Unlike multi-track MKV, the three formats only support encoded output. Users can choose their desired audio tracks to be kept in the output file, but subtitles streams are banned to choose from.
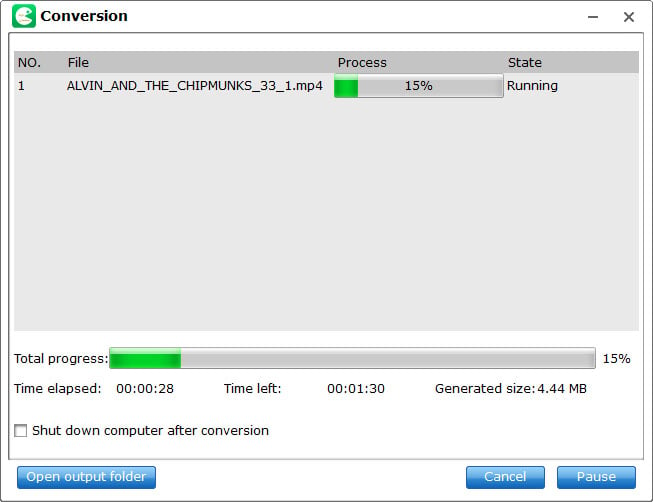
2.3 - Start the Ripping
Optional: Just below Format is Output, here you can click Browse button to browse your computer for a better destination folder for LosslessCopy to save your converted movies.
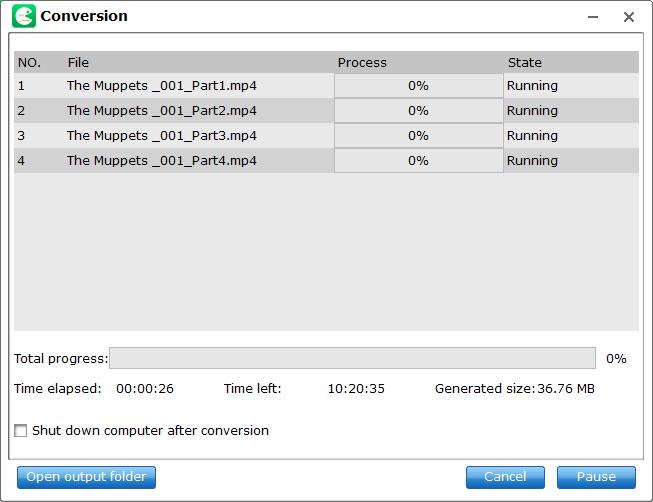
Once you've selected the output file format you want, you're ready to rip. Simply click the ![]() button to let the software start converting your Blu-ray or DVD files. The ripping time depends on the quality and duration of the output movie. Wait for the conversion to be done and click Open ouput folder to get the converted video files.
button to let the software start converting your Blu-ray or DVD files. The ripping time depends on the quality and duration of the output movie. Wait for the conversion to be done and click Open ouput folder to get the converted video files.
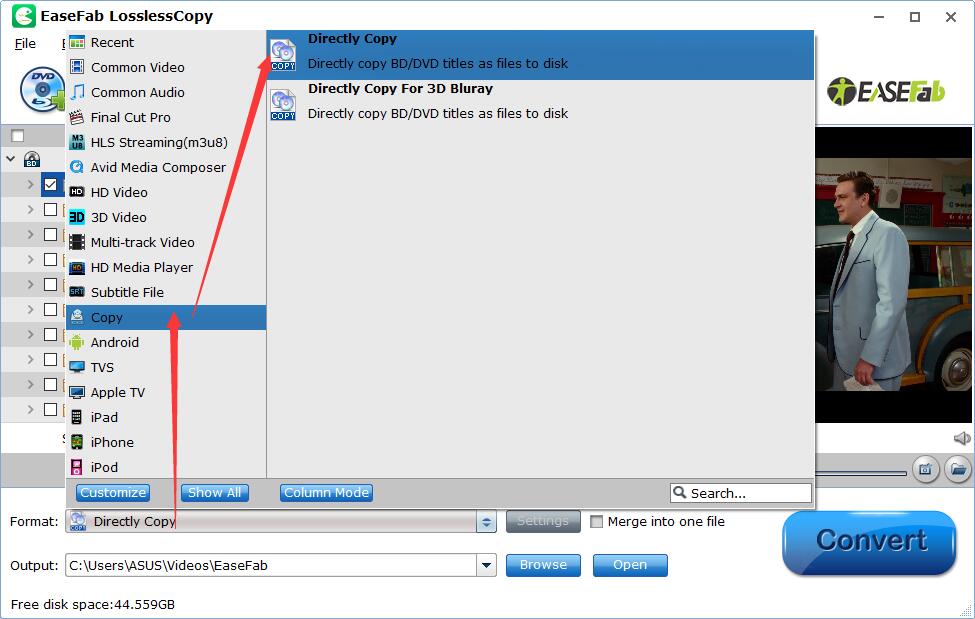
2.4 - Copy Main Movie
After loading your Blu-ray or DVD movie, click on the Format bar and choose Copy > Directly Copy format from drop-down list. Finally, click Convert button to start the process.
This will allow you to copy main movie title from Blu-ray/DVD discs and leave out extras.
2.5 - Copy Entire Disc
After loading your Blu-ray or DVD movie, simply click the ![]() button and LosslessCopy will directly start to make a 1:1 copy of original Blu-ray or DVD disc with all all audio streams, subtitle tracks, extras, etc.
button and LosslessCopy will directly start to make a 1:1 copy of original Blu-ray or DVD disc with all all audio streams, subtitle tracks, extras, etc.
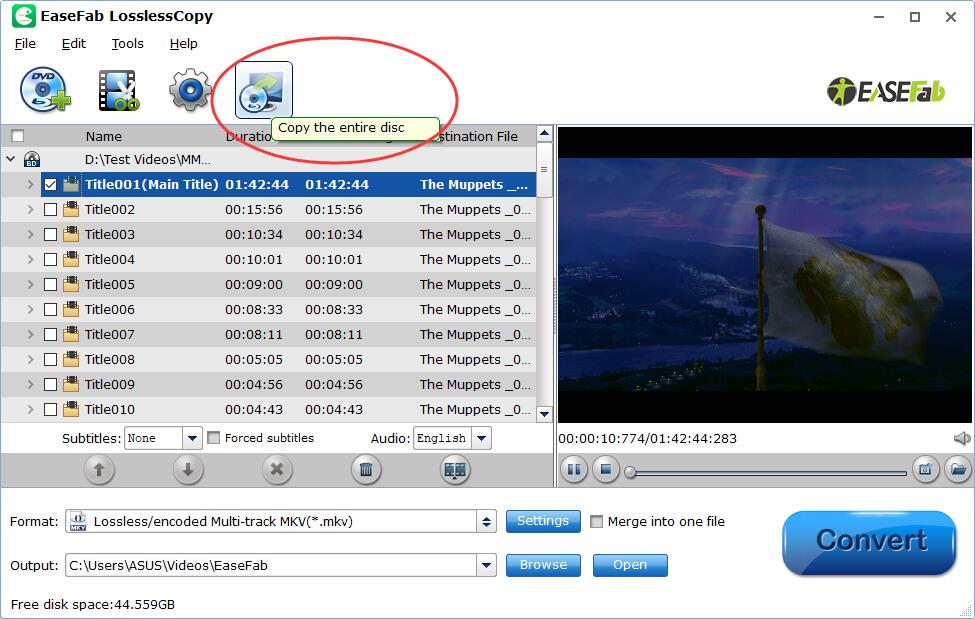
EaseFab LosslessCopy cracks Blu-ray copy-protection in a super fast speed and sends the Blu-ray folder to your specified output patch with everything in the original disc preserved. Practically speaking, even running a slower PC, it costs only about 1 hour and 10 minutes to copying a 39.40GB disc to your HDD as a standard Blu-ray folder.
2.6 - Remux Blu-ray/DVD
EaseFab LosslessCopy can directly decrypt remux Blu-ray/DVD to MKV, AVI, MP4, MPG, TS, etc container without any picture and sound quality loss. Remuxing is quick and retains the full quality of the original BD/DVD files, but the resulting files can be quite large. So you also can rip BDMV folder to MKV, AVI, MP4, etc format with adjusting video and audio codec, bitrate, resolution to change the output video size. In the remux process, you can keep your Dolby Truehd DTS Ma, Dolby DTS 7.1/5.1 audio in original Blu-ray or BDMV folder and multi-track subtitles, chapter makers.
For remuxing Blu-ray/DVD discs, you're recommended to choose Lossless MKV from Multi-track video catelog to create uncompressed files from Blu-ray or DVD.
If you want to remux Blu-ray/DVD to WMV, MPEG, FLV, etc. video format, you can choose the container from Remux catelog.
 3. Settings
Here you can learn general preferences of LosslessCopy and advanced settings of output video.
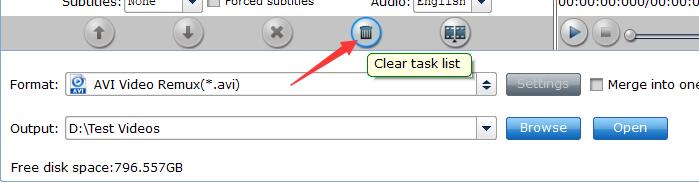
3-1. Clear
This icon will remove all the titles in file list window and go back to the initial interface directly.
3-2. Options
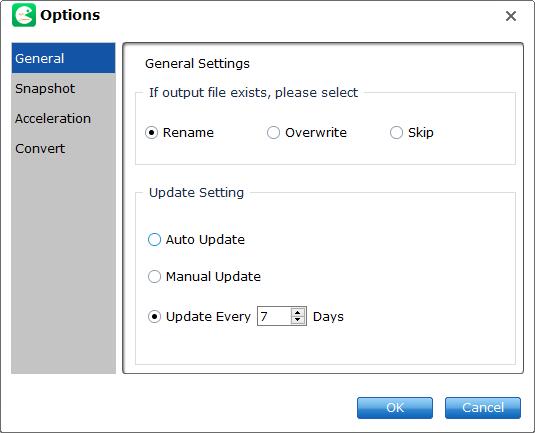
There are four options in the Option window: General, Snapshot, Acceleration and Convert.
You can launch Options window by clicking Options button. It can also be launched from Tools menu.
General
In General tab, you can choose what to do if the output file name already exists and set update frequency.
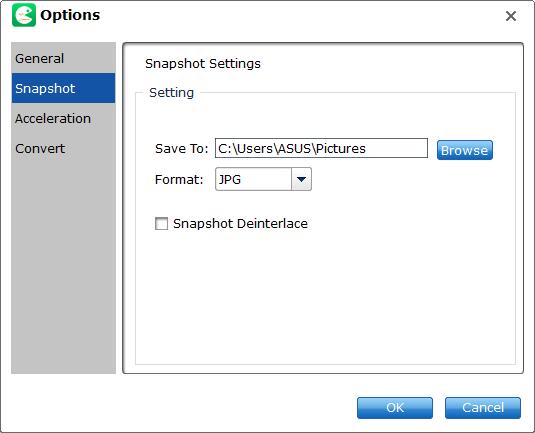
Snapshot
In Snapshot tab, you can set the output folder to save the pictures and the format of the pictures. You can choose from JPG, PNG, TIFF, and BMP. And you can deinterlace the snapshot.
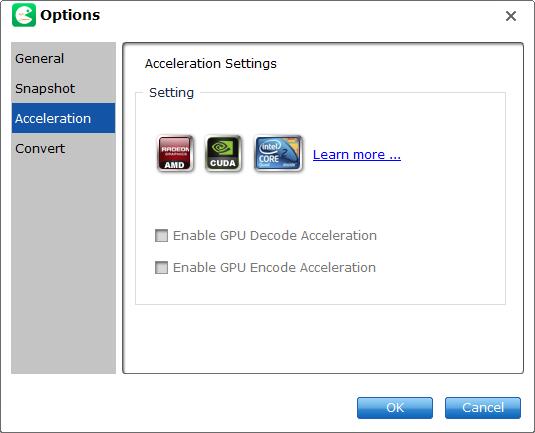
Acceleration
Under Acceleration tab, you can choose to enable GPU Decode or Encode Acceleration if your computer supports.
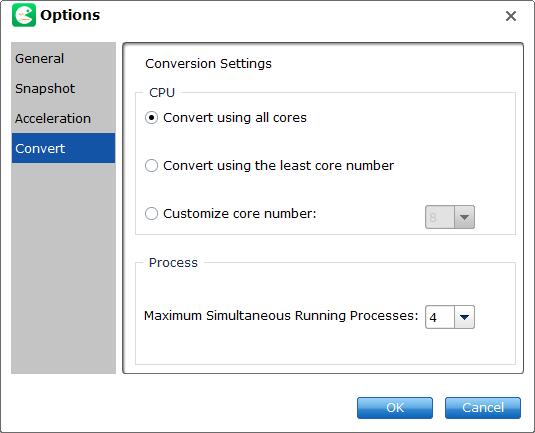
Convert
In Convert tab, you can set how many cores to use and how many tasks to process while converting.
3-3. Output Settings
After selecting an output file format, e.g. H.265 Video(*.mp4). Click Settings button enter Profile Settings Window. Here you can customize video audio codec, bitrate, frame rate, aspect ratio, resolution, audio codec, audio channel number, sample rate, bit rate, etc.
※ Please note: Adjusting these variables have some effect on the re-encoded video quality. Remember the file size and video quality is based more on bitrate than resolution which means video/audio bitrate higher results in big file size, and lower visible quality loss.

3-4. Preview & Take Snapshots/Thumbnails
Preview Window is composed of Playblast Window, Process Bar, Play & Pause, Stop, Capture (Snapshot), Volume and Open Output Folder buttons.

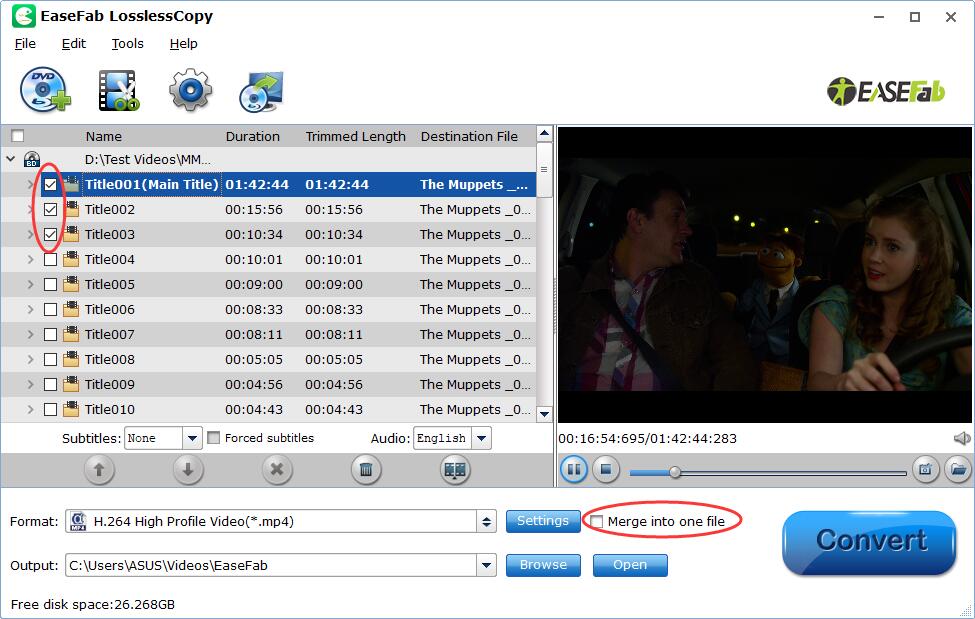
3-5. Merge Into One
Select the movie titles you want to merge and then tick the Merge into one file option behind Settings button, you can merge the ticked files in list into one single file.
3-6. Split into Small Pieces
Besides combining files, EaseFab LosslessCopy can be also used as a great video splitter/cutter for you to split large Blu-ray or DVD file into several small pieces.
Select the file you want to split and then click the ![]() button on file list, or from Edit menu, you can launch the Video Split window. Ticking Enable to enable it, and then you can split the file by file count, time length, or file size.
button on file list, or from Edit menu, you can launch the Video Split window. Ticking Enable to enable it, and then you can split the file by file count, time length, or file size.
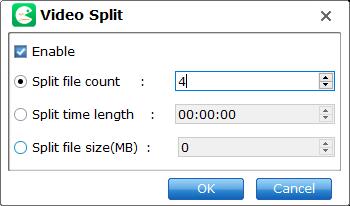
After the settings is OK, click the Format bar and select and output format for the splitted movie titles. Finally, just click the Convert button to start splitting the selected titles into several small pieces.
 4. Edit
EaseFab LosslessCopy is not only a Blu-ray/DVD ripping and coying software, but also a simple and easy video editor, which enables you to personalize and touch up your Blu-ray and DVD videos in clicks. By default the ![]() icon is grayed out. To activate the Edit menu, you have to select an item first. When a movie title or chapter is selected, you can click the Edit icon on the tool bar of main interface to edit selected file.
icon is grayed out. To activate the Edit menu, you have to select an item first. When a movie title or chapter is selected, you can click the Edit icon on the tool bar of main interface to edit selected file.
![]()
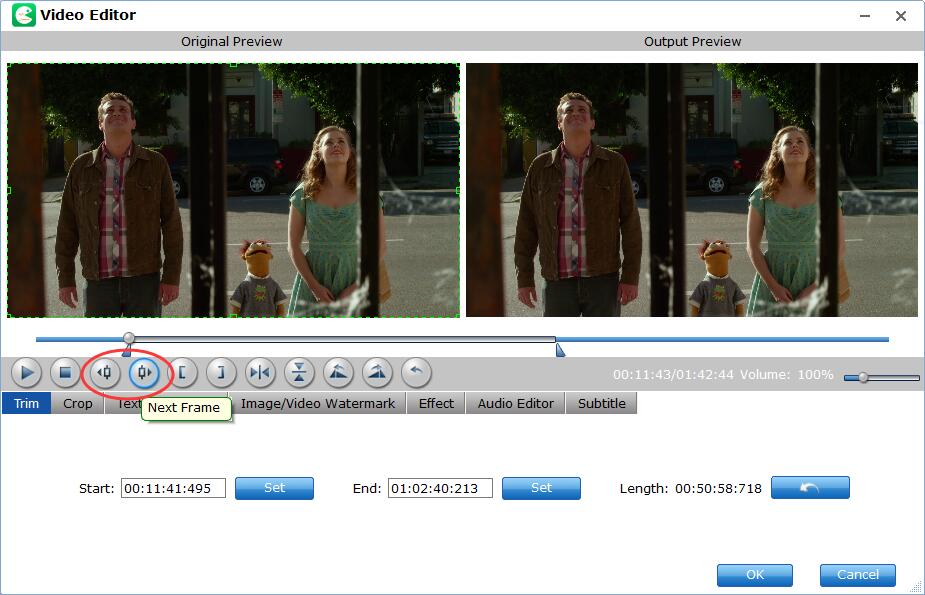
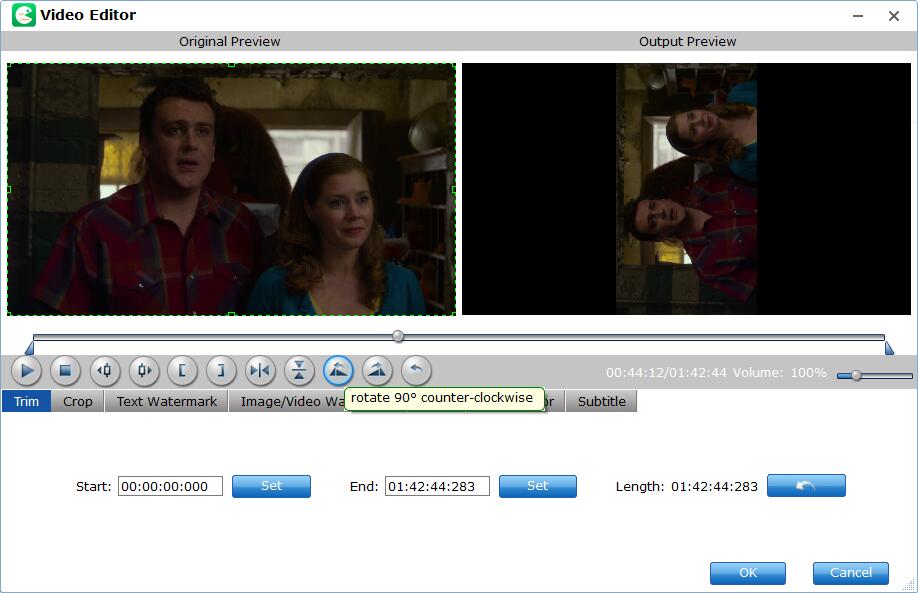
4.1 - Trim
The Trim feature allows users to decide where to start and where to end when converting the selected clip, so that unwanted segments will be cut out after conversion.
In the Video Editor window, switch to Trim tab in Video Editor Interface and follow any of the methods below:.
1. Drag the control sliders to include the segment you want to remain.
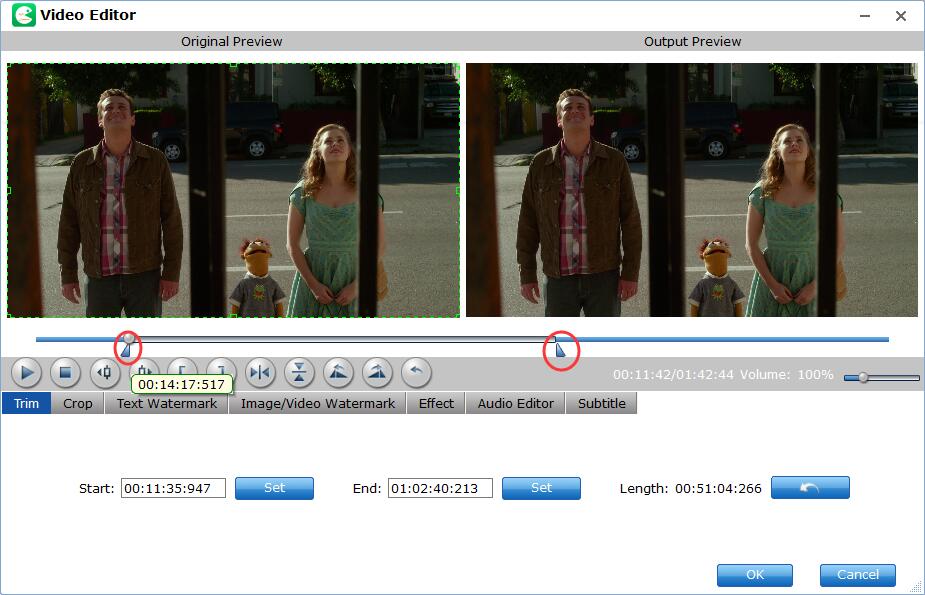
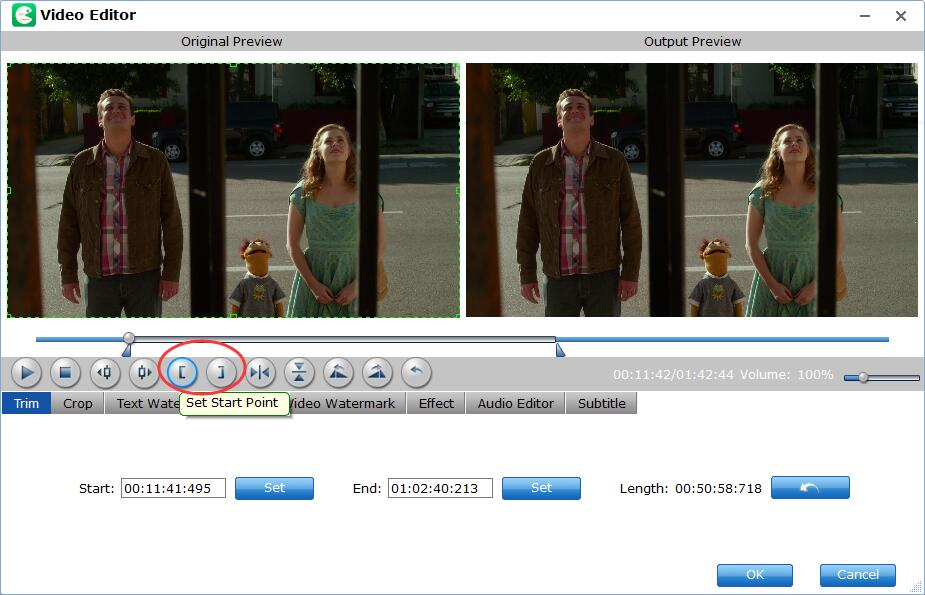
2. Click the left square bracket to set start point, and click the right square bracket to set end point when previewing the video.
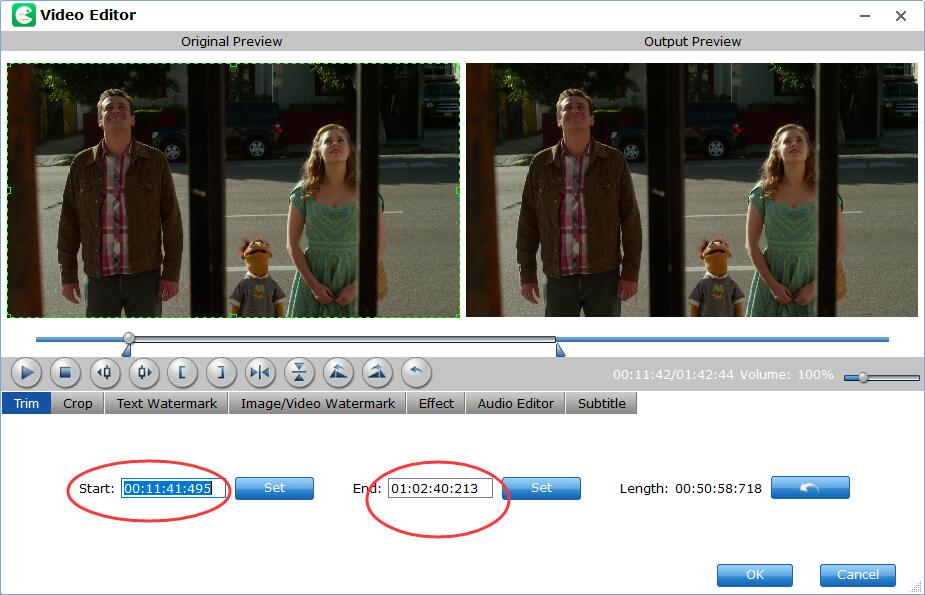
3. Input specific values to "Start" and "End" box.
Adjust frame by frame
Use the Previous Frame or Next Frame Button to make sure you get the correct point.
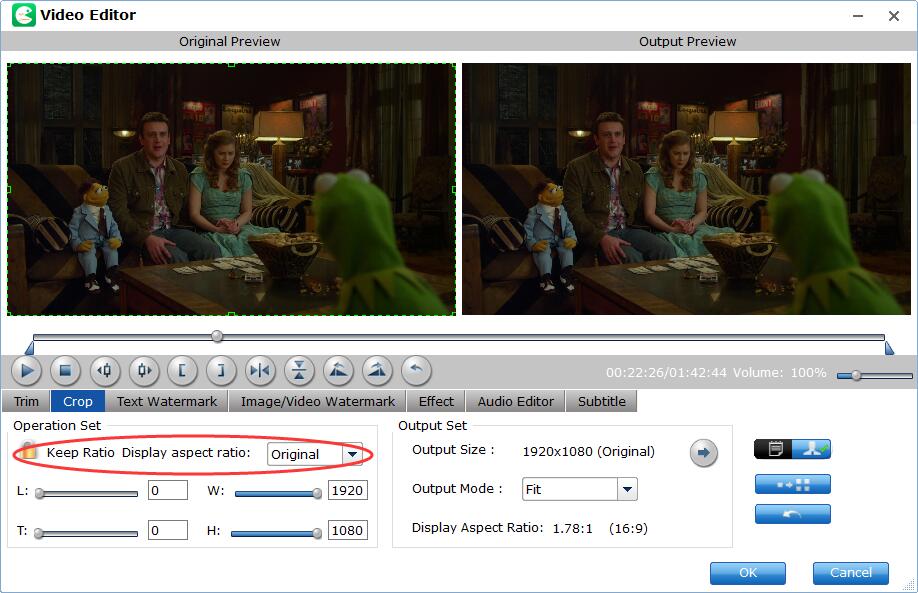
4.2 - Crop
The Crop facility enables users to get rid of the black edges and unwanted area of the image.
Enter the video editor Window, and switch to Crop tab and then use either of the two modes below:
Simple Mode
Drag the corner of the video frame or enter the specific width and height to set the crop area size. You can see the output preview simultaneously. You can also customize values in the box of "Left", "Top", "Crop Size" to to make your crop decision. You can also zoom your videos by keep fit and stretch.

Advanced Mode
Click the human button to switch to advanced mode. And then you can set display aspect ratio as well as output ratio and output mode.
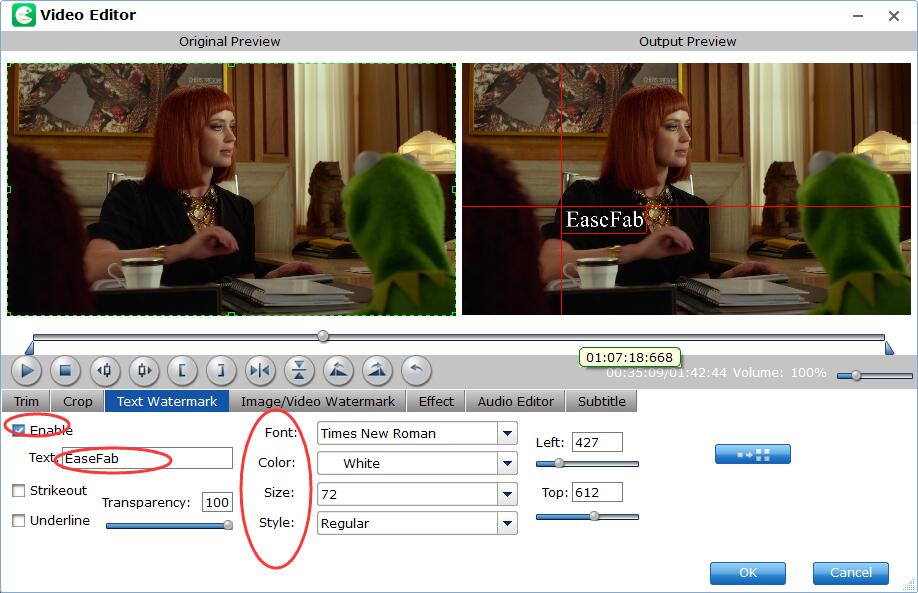
4.3 - Add Text Watermark
If you want to stamp your videos with your name, you can add a text watermark via the simple tutorial below.
Enter the video editor Window, and switch to Text Watermark tab. Under Text Watermark tab, you can create a text watermark to personalize your video. Type whatever text you want in the blank input field next to it. You can also adjust the font, transparency, vertical and horizontal position of your watermark.
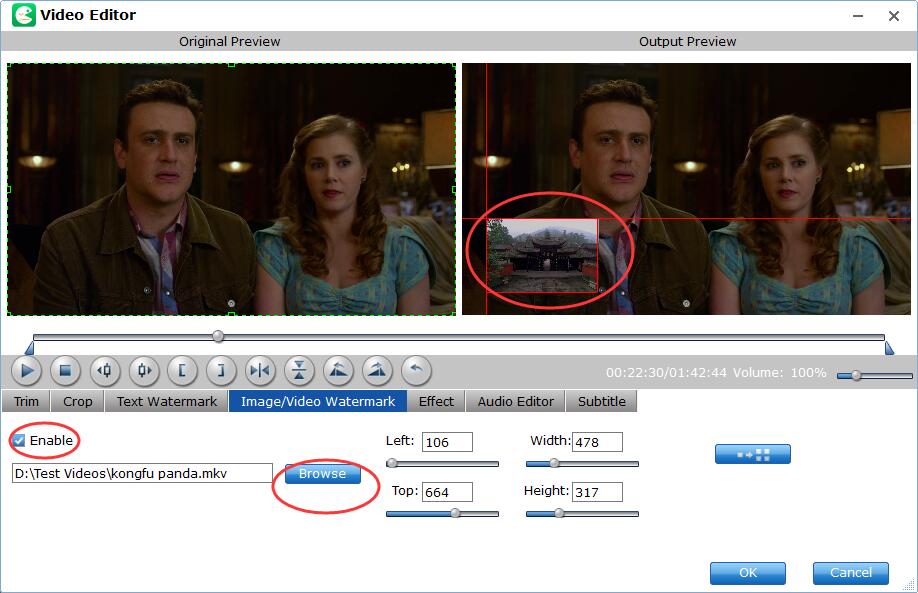
4.4 - Add Image/Video Watermark
Besides adding text watermark, you can also add image watermark or video watermark via the simple tutorial below.
Enter the video editor Window, and switch to Image/Video Watermark tab. Check Enable, you can add images or videos as watermark onto selected video file. The location can also be set by dragging on the preview screen.
4.5 - Add Effects
EaseFab LosslessCopy allows you add special effects to make your Blu-ray or DVD video more stylish. Let's take a look at the simple tutorial.
Click ![]() button to enter the video editor Window, and switch to Effect tab. Check Enable, you can add special effects like Simple Gauss Blur, Flip Color, Invert, Aged Film to your source video. In Color Control section, you can correct color by by adjusting brightness, contrast, and saturation. Deinterlacing is checked by default to keep good image quality.
button to enter the video editor Window, and switch to Effect tab. Check Enable, you can add special effects like Simple Gauss Blur, Flip Color, Invert, Aged Film to your source video. In Color Control section, you can correct color by by adjusting brightness, contrast, and saturation. Deinterlacing is checked by default to keep good image quality.

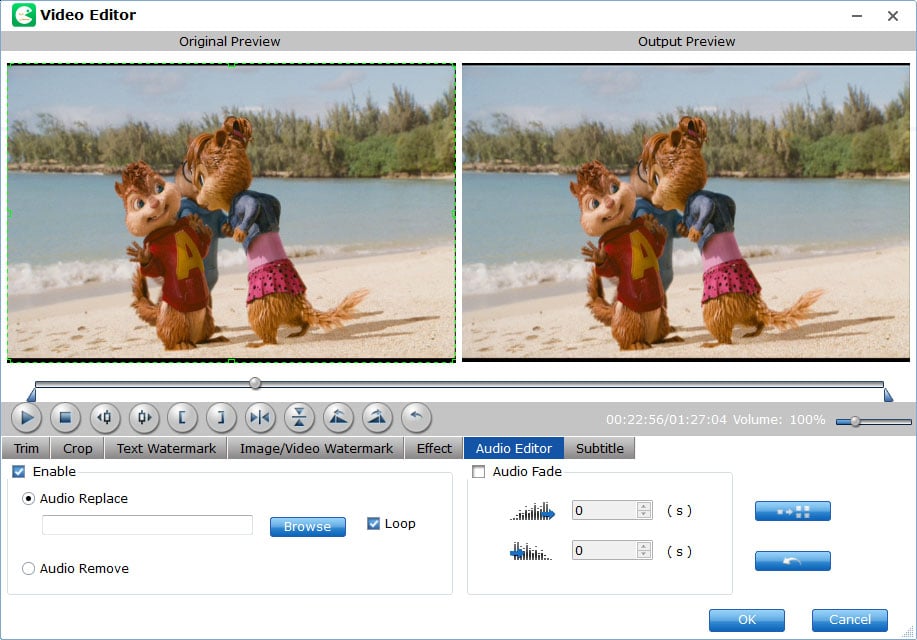
4.6 - Edit Audio Files
With LosslessCopy, you can also either replace/remove original audio, or set audio fade in/out effects.
Enter the video editor Window, and switch to Audio Editor tab. Check Enable, you can either replace/remove original audio, or set audio fade in/out effects.
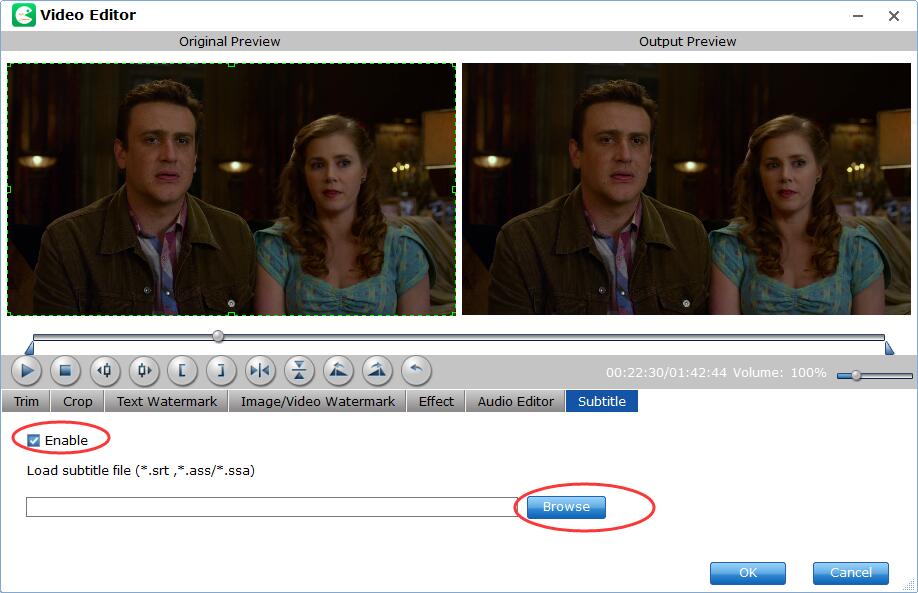
4.7 - Add External Subtitles
Movie subtitles always aid you to understand the movie plot or learn a foreign language. But what if you cannot catch and understand the alien subtitles or the subtitles are not the version you like? Fear not, EaseFab LosslessCopy can help you add external subtitles to DVD or Blu-ray movie effortlessly.
Recommended Article: Top 10 Sites for Downloading Subtitles
Enter the video editor Window, and switch to Subtitle tab. Check Enable, you can add *.srt or *.ass/*.ssa subtitle-files to the video as hard subtitles.
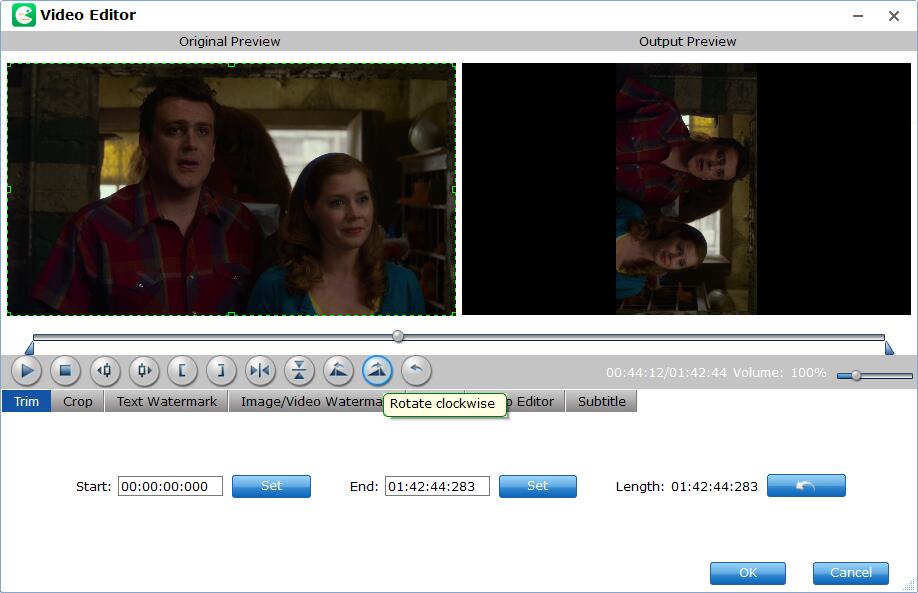
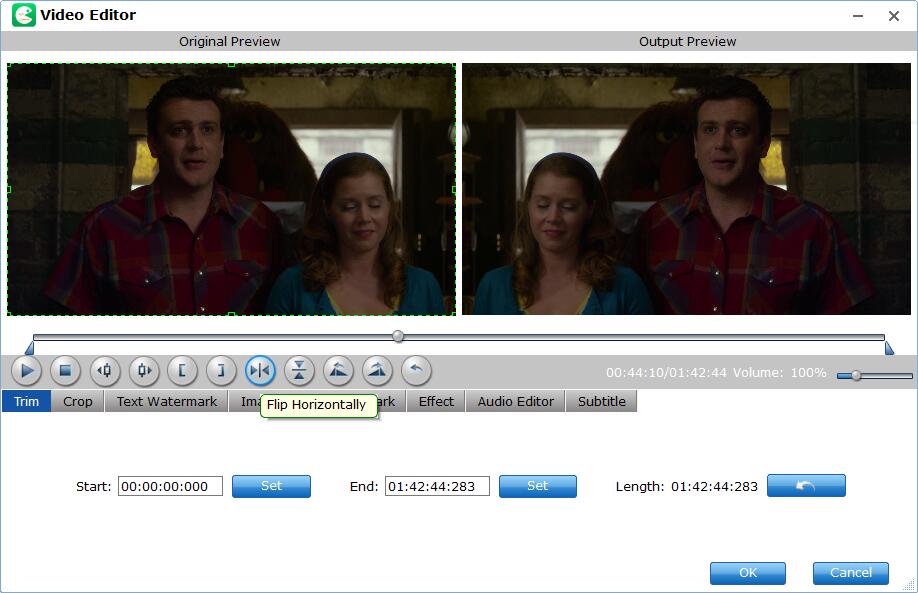
4.8 - Rotate
There're Flip Horizontal, Flip Vertical, Rotate 90° counter-clockwise and Rotate clockwise 4 options for you to rotate the Blu-ray or DVD video.
Click ![]() button to enter the video editor Window and then you can:
button to enter the video editor Window and then you can:
1. Flip Horizontal
2. Flip Vertical
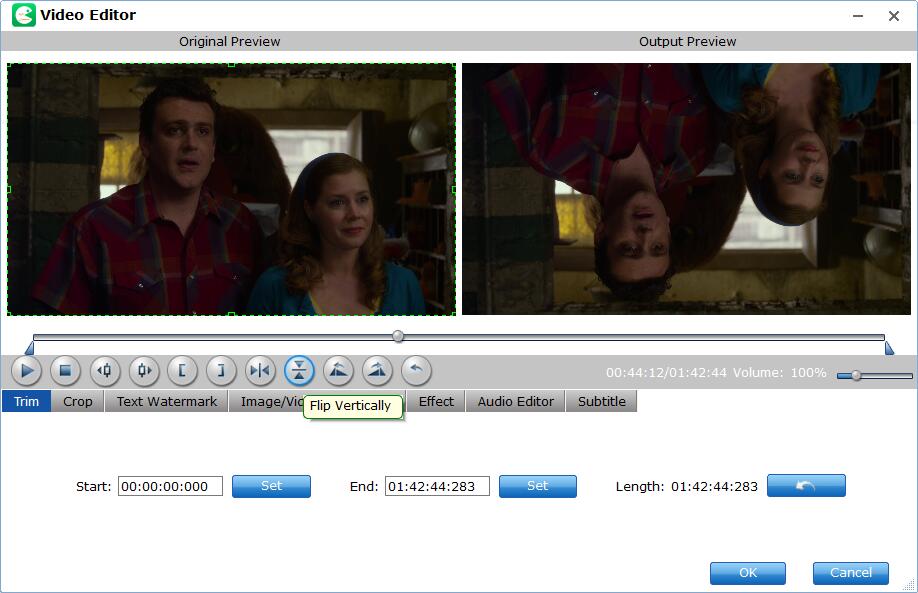
3. Rotate 90° counter-clockwise
4. Rotate clockwise