1. Get Started
 2. Basic Operation
 3. Edit
 4. Settings
 1. Get Started
Note: We have both Windows version and Mac version for EaseFab Video Converter Ultimate. For the whole guide of EaseFab Video Converter Ultimate, we will mainly introduce the Windows version, and the Mac version has the same functions if there is no special remark.
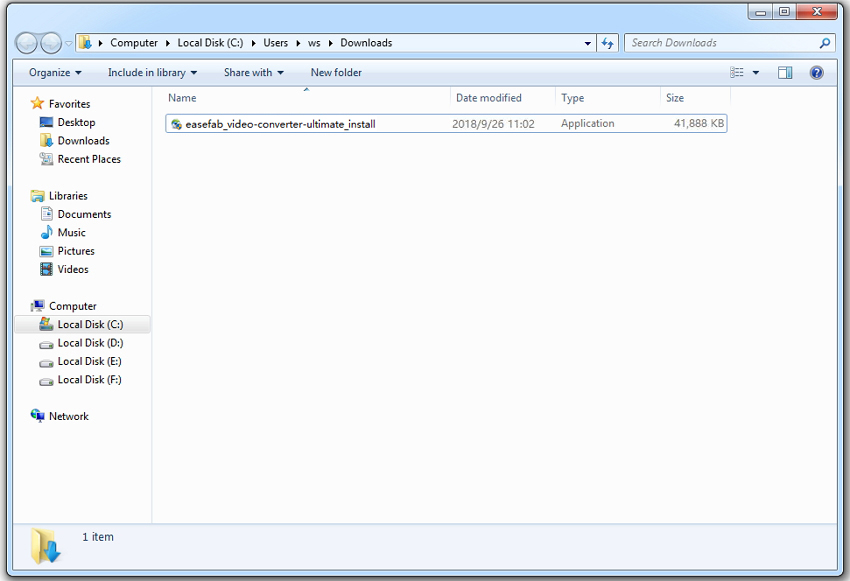
1.1 - Download
Click the button below to download a setup file of EaseFab Video Converter Ultimate on your PC or Mac.
1.2 - Install
① Double-click the setup file.
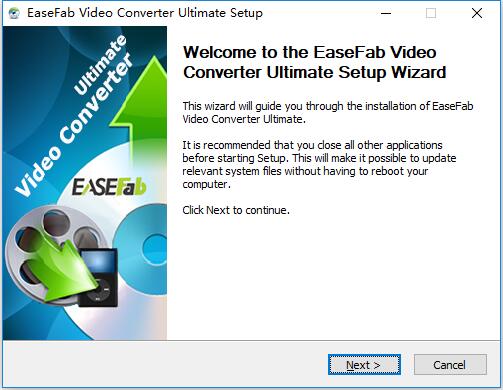
② From the pop-up window, click Next to go ahead.
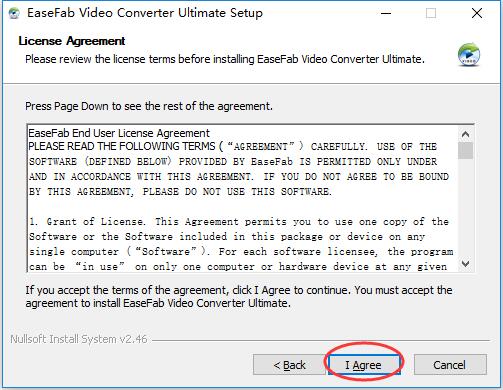
③ In the coming window, read the end user license agreement carefully and click I Agree to go ahead.
④ Then, browse the destination folder to save your installation files.
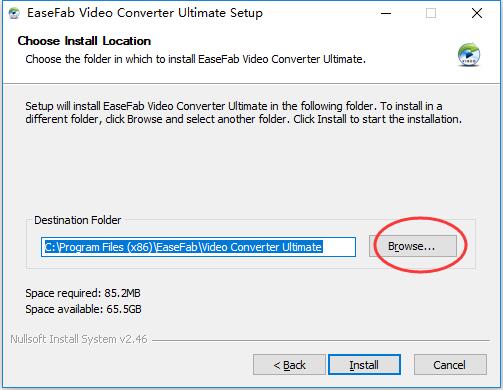
⑤ After that, click Install to finish the installation.
⑥ It will take seconds to install EaseFab Video Converter successfully. A window like below will prompt you that you can click Finish button to open EaseFab Video Converter Ultimate at once.
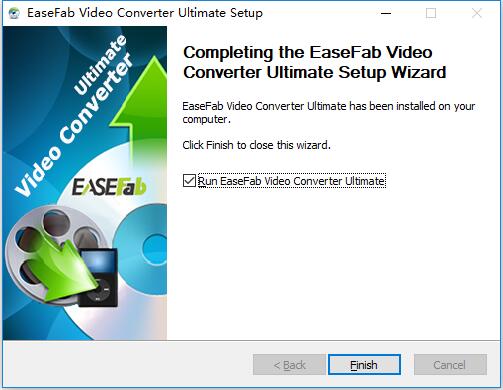
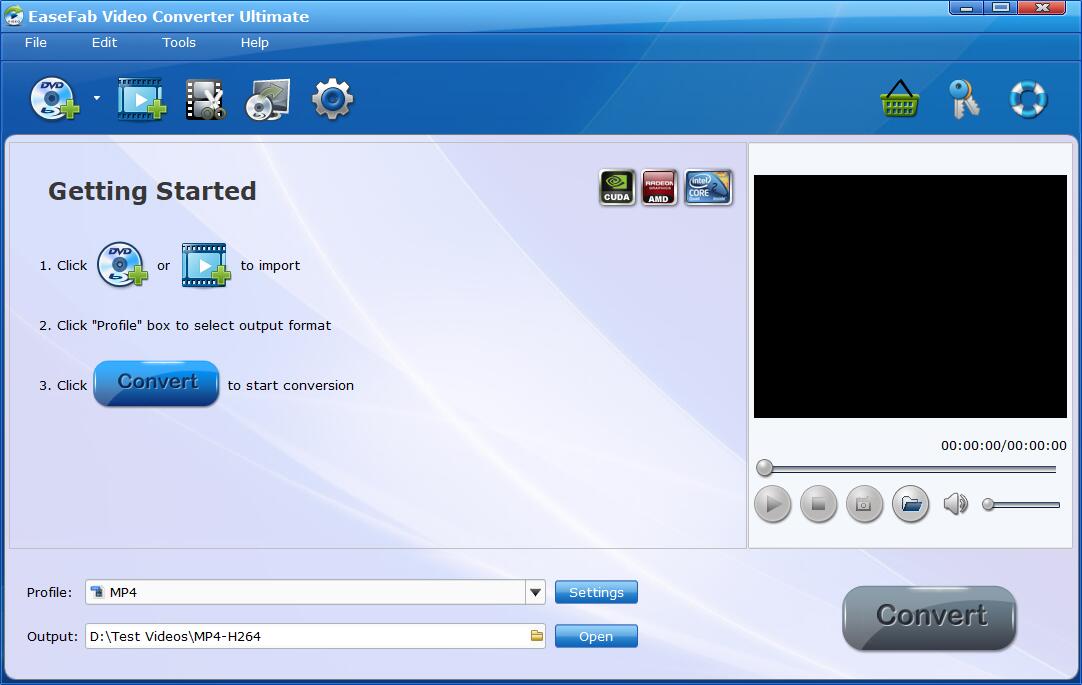
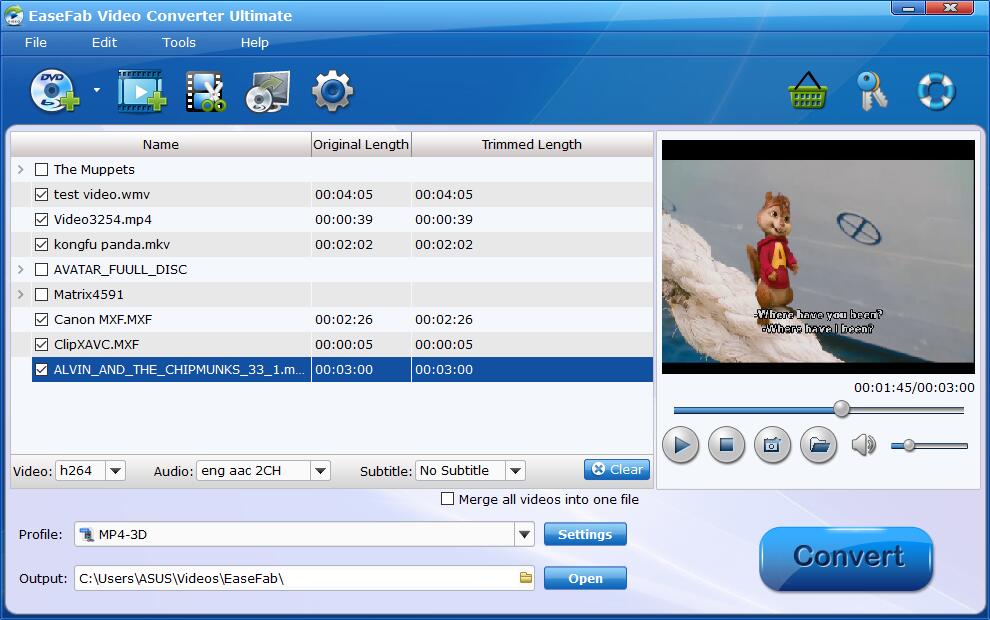
⑦ After clicking Finish button, you will enter the main window of EaseFab Video Converter Ultimate shown as below.
1.3 - Trial Limits
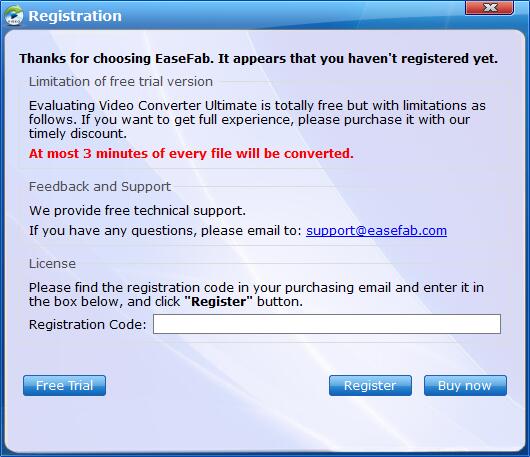
With the trial version of EaseFab Video Converter Ultimate, you'll have the limitations: At most of 3 minutes of every file will be converted.
Note: This is the only difference between the trial version and registered version.
1.4 - Register
※ You will receive product information with license code via email once you complete the order.
① Launch EaseFab Video Converter Ultimate, click key-like ![]() icon to enter the Register window.
icon to enter the Register window.
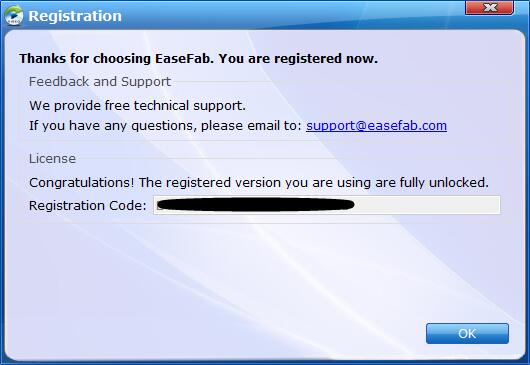
② Copy and paste the registration code to avoid any typos, then click the Register button to go ahead. Once EaseFab Video Converter Ultimate is registered successfully, you'll see a pop-up registration successful page.
1.5 - Update
If you want to check if your Video Converter Ultimate is the latest version and update it, you can follow the steps below to update automatically.
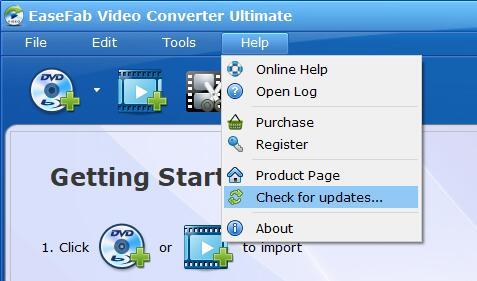
Go to the Menu icon > Help > Check for updates...,
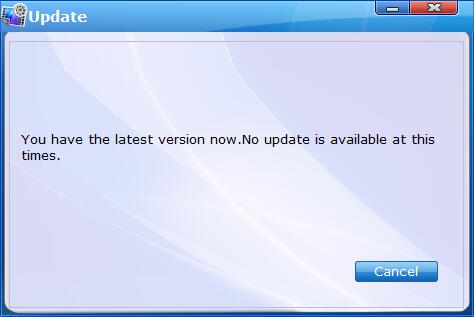
After that, a Update window will pop up to see if you need to update the program. You can also click Cancel to install it next time.
Note: In case you failed to update thru this method, you could go to our website to and press Free download button to download the latest version. Or you could click the link below to upgrade EaseFab Video Converter Ultimate directly.
https://www.easefab.com/download/easefab_video-converter-ultimate_install.exe
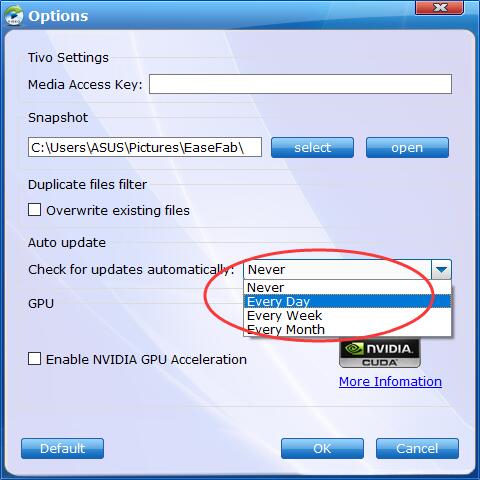
You can change Check for updates automatically to Every Day/Week/Month/Never accordingly in Options Window by moving mouse cursor to Tools > Options.
Note: If you're used to using the same version all the time, please choose Never to stop the automatic update. Whenever you need an update, please choose Check for updates under Menu to make an update manually.
 2. Basic Operation
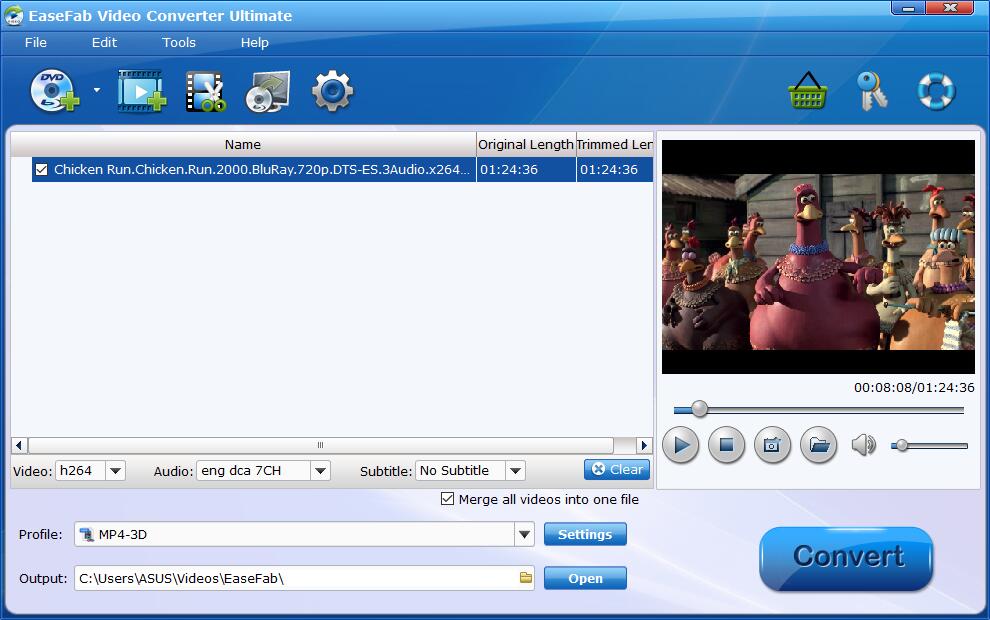
After launching EaseFab Video Converter Ultimate, you can easily convert your media files in 3 steps: Add Your Media File(s) > Select Output Format > Start the Conversion.
2-1. Import Media File(s)
① Load Source Blu-ray or DVD files: Insert your Blu-ray disc to BD drive or DVD to DVD drive, then click the ![]() button to have movies uploaded to the program. Here you can also import BD/DVD folders, ISO files and IFO files
button to have movies uploaded to the program. Here you can also import BD/DVD folders, ISO files and IFO files
② Add Video Files: Click the ![]() button to load video or audio files from your computer or other devices like USB device, camcorder, MP4 player, etc.
button to load video or audio files from your computer or other devices like USB device, camcorder, MP4 player, etc.
Note that batch conversion is supported so you can add as many files as you like at one time.
2-2. Select Output Profile
Click Profile (located below where your files are displayed), you can choose a format or device from the list of preset profiles.
Optional: After choosing the right profile, you can then click Settings button to adjust video and audio parameters. You can also click Edit button to make your own creation in minutes.
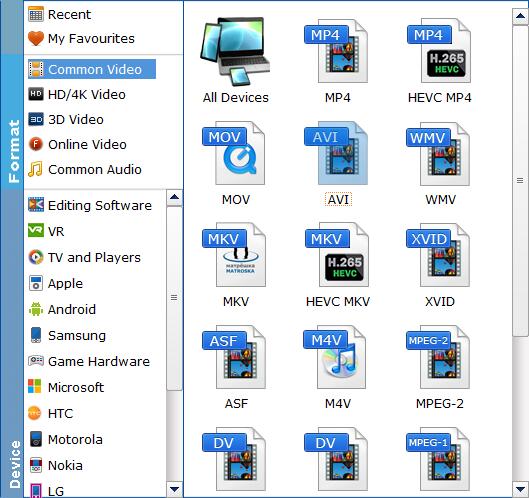
① "Common Video" & "HD/4K Video"
You can choose commonly-used output format from the format list or customize which formats to be shown on the list. As you see, all regular video like MP4, MOV, MKV, WMV, AVI, FLV, with H.264/MPEG-4/HEVC codecs are provided. Moreover, there are available 4K outputs and HD outputs, etc.
② "3D Video"
EaseFab Video Converter Ultimate can help you create your own 3D videos from common videos or DVD/Blu-ray movies. Click the Format bar, you can choose output format from the 3D Video format list or customize which formats to be shown on the list.
③ "Online Video"
Transcode media files to MP4, MPEG4 or FLV for YouTube, Facebook and other social networks.
④ "Common Audio"
If you want to extract audio from video, DVD or Blu-ray, you can directly choose an audio format here.
⑤ "Editing Software"
If you want to encode media files for smooth editing, you can directly choose a professional "intermediate" or "production" codec like Apple ProRes, DNxHD, Apple Intermediate Codec, and more. here.
⑥ "VR", "TVs/Players", "Apple"...
If you want to convert your media files for playback on iPhone, iPad, Android, smart TVs, game console, etc. you can simply browse to find device and select it as the output format to get videos with optimized settings from corresponding category.
※ This all-in-one video converter enables you upscale 2K/1080P footage to 4K and downscale 4k UHD to lower resolution at fast speed.
2.3 - Start the Conversion
(Optional) Just below Profile is Output, you can click the ![]() icon to change the location where you want to save converted video.
icon to change the location where you want to save converted video.

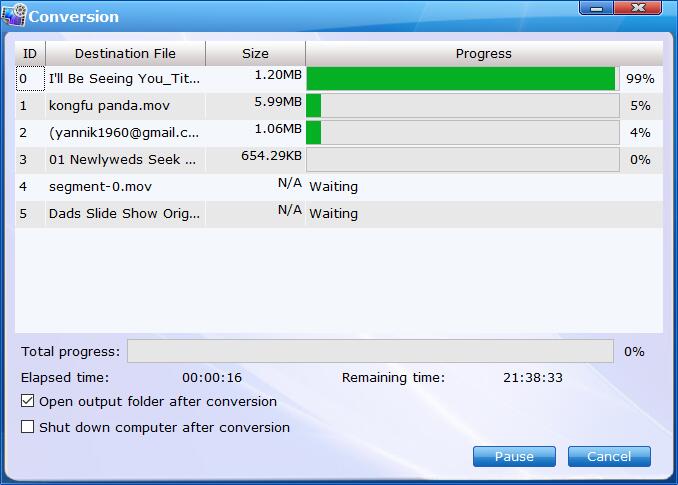
After everything is OK, hit the Convert button on the lower-right corner to start the conversion.
The converting process is shown below. You can Pause or Cancel the conversion. Also, you can choose shut down computer and open output folder when conversion completed.
2.4 - 1:1 DVD/Blu-ray Backup
Besides acting as media converter, EaseFab Video Converter Ultimate can also help you backup DVD and Blu-ray discs without any quality loss. There are two copy modes:
Full Disc Mode: Copy the whole content of disc
Title Mode: Copy the selected movie title
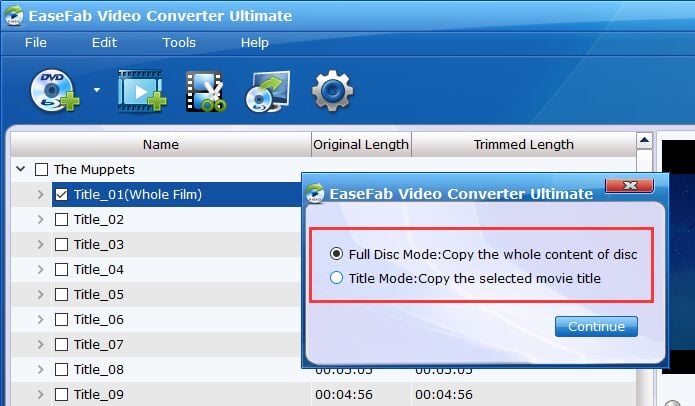
By choosing this mode, you can makes 1:1 copy of original DVD and Blu-ray disc without quality loss with all audio streams, subtitle tracks, extras, etc.
By choosing this mode, you can copy selected DVD or Blu-ray movie title as a single VOB file or a single M2TS file. If you select the longest title, then you can copy DVD or Blu-ray main movie content and leave out extras, commentary, etc.
 3. Edit
EaseFab Video Converter Ultimate integrates a full-featured video editor into the program, which enables you to make professional-looking home movies in minutes. After loading your media files, select it and then click ![]() button to pop up the Video Editor window.
button to pop up the Video Editor window.
3.1 - Trim
Trimming videos is one of the useful features to edit videos, which can remove the unwanted parts as a video shortener by trimming the unwanted part and combining the left clips together, trim a long videos into several small segments for convenient sharing or watching.
Click Edit button to enter the video editor Window, and switch to Trim tab in Video Editor Interface and follow any of the methods below:.
1. Drag the control sliders video converter slide to include the segment you want to remain.
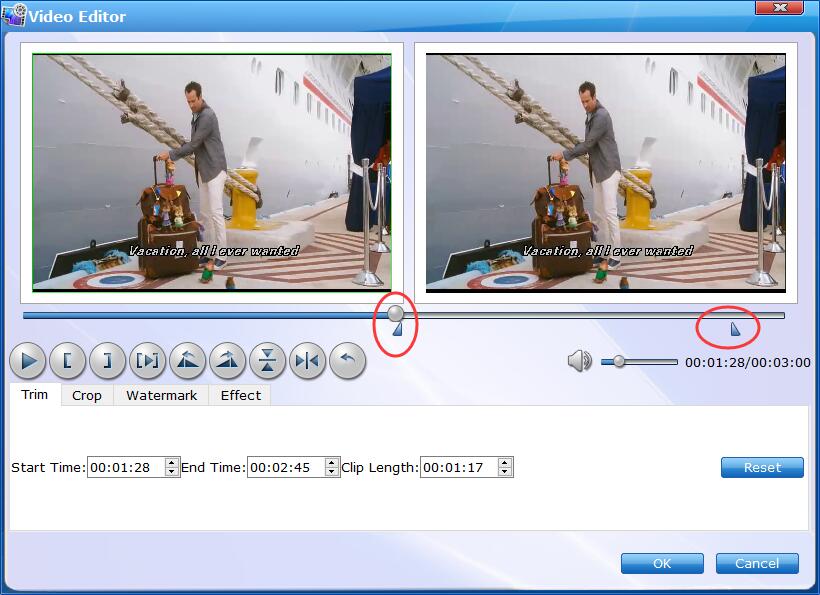
1. Click the left square bracket to set start point, and click the right square bracket to set end point when previewing the video.
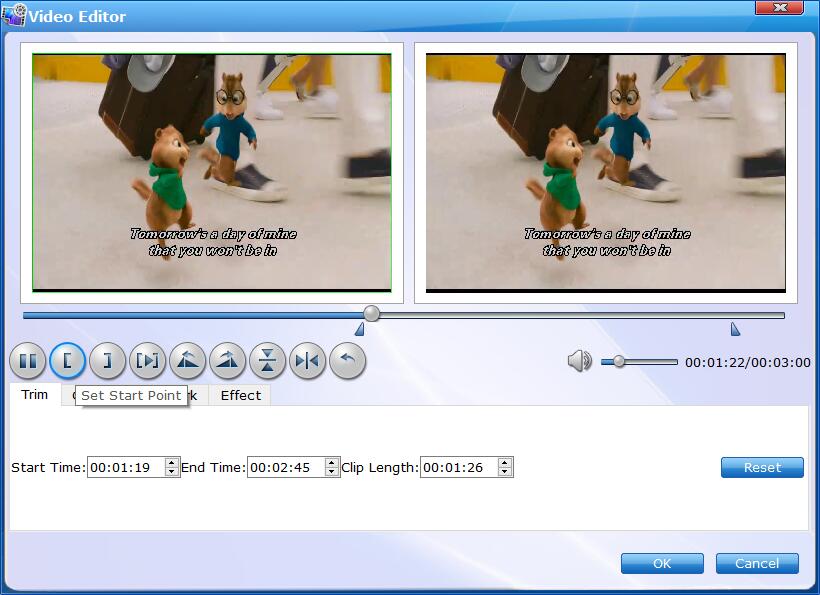
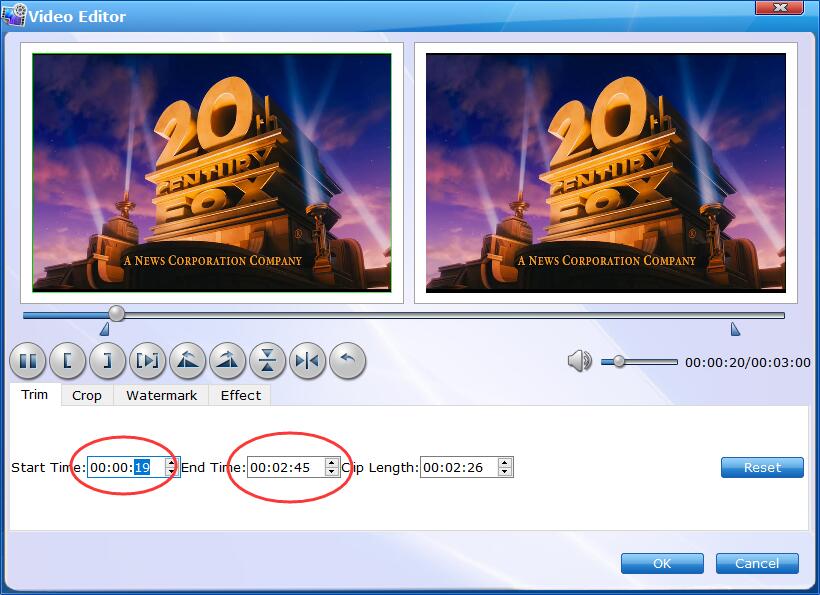
3. Input specific values to "Start" and "End" box.
3.2 - Crop
The Crop facility enables users to get rid of the black edges and unwanted area of the image.
Click Edit button to enter the video editor Window, and switch to Crop tab and follow any of the methods below:
1. Drag the corner of the video frame or enter the specific width and height to set the crop area size. You can see the output preview simultaneously.
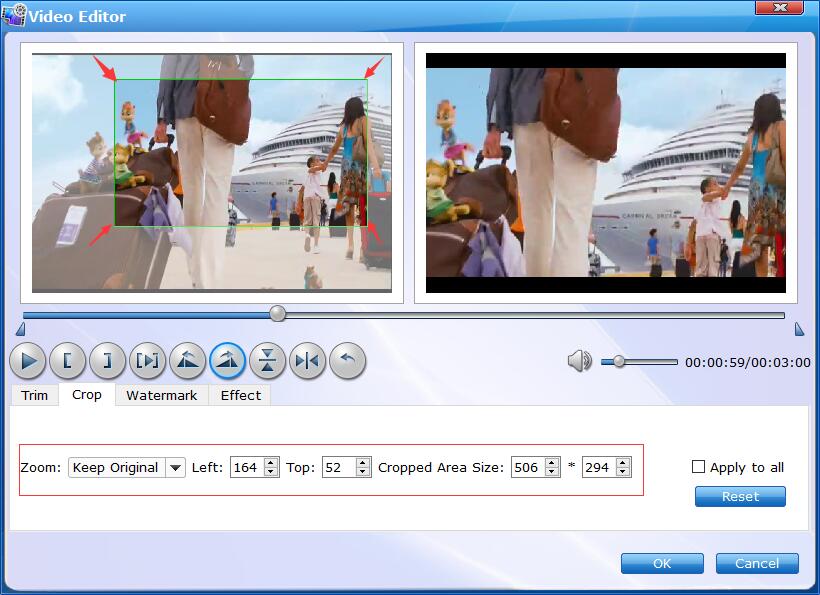
2. Crop Video by setting values.
You can customize values in the box of "Left", "Top", "Cropped Area Size" to to make your crop decision. You can also zoom your videos by keep original, stretch, Letterbox.
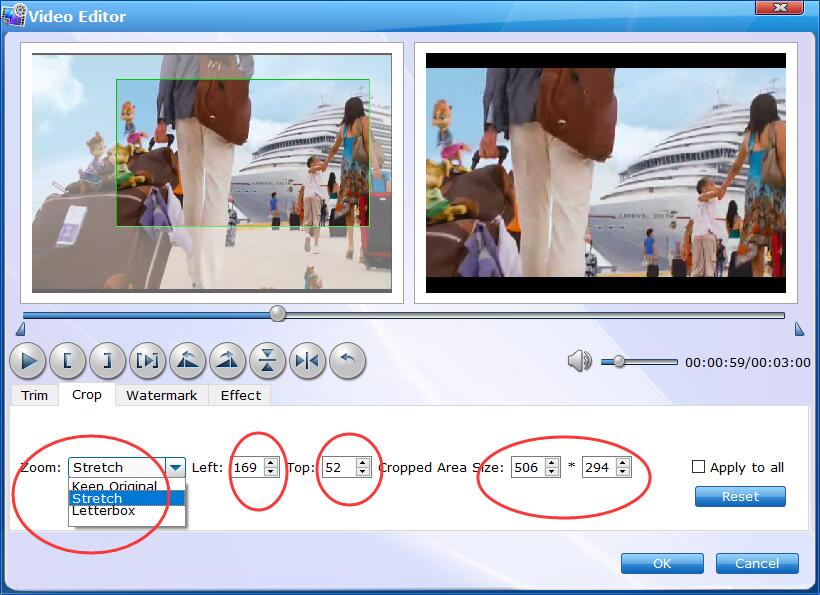
Check Apply to All and then you can apply changes to all videos you added.
3.3 - Apply Effect
EaseFab Video Converter offers brightness, saturation, contrast adjustment as well as 4 filters for you to apply stunning video effect. Now follow the simple steps to make your video more stylish.
Click Edit button to enter the video editor Window, and switch to Effect tab to apply effect to your videos. You can easily adjust the brightness, contrast, saturation settings and select deinterlace as you need. There're also 4 widely-used filters for your selection, choose a favourite one and click OK to confirm.
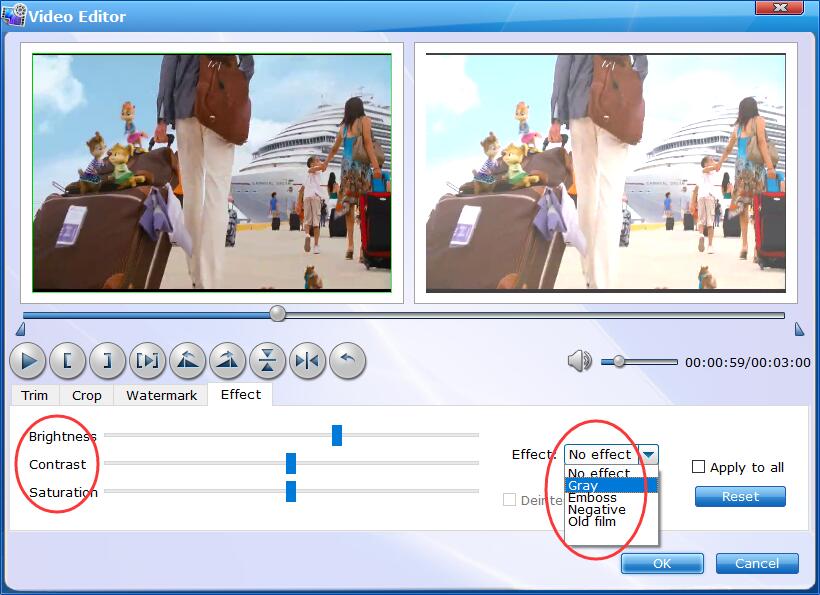
Check Apply to All and then you can apply changes to all videos you added.
3.4 - Add Watermark
If you want to stamp your videos with your name or other indentifying marks, you can add a watermark via the simple tutorial below.
Click Edit button to enter the video editor Window, and switch to Watermark. Under Watermark tab, you can create a text watermark to personalize your video. Type whatever text you want in the blank input field next to it. You can also adjust the font, transparency, vertical and horizontal position of your watermark.
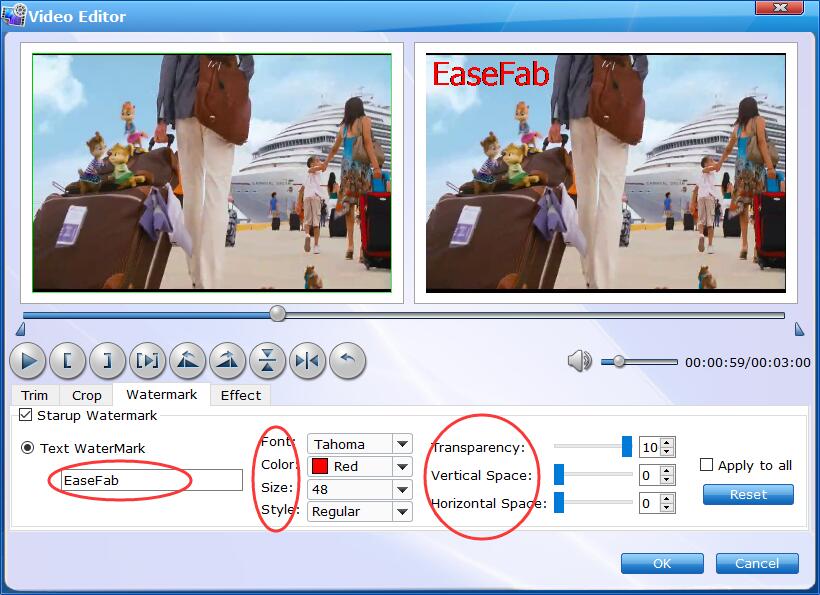
Check Apply to All and then you can apply changes to all videos you added.
3.5 - Volume & Rotate
Have you ever captured video with a cell phone or compact camera only to find it's vertically oriented and you can't view it properly? Don't worry, EaseFab Video Converter can help you easily rotate your video for wathing without problem. Moreover, you can easily increase volume in one step.
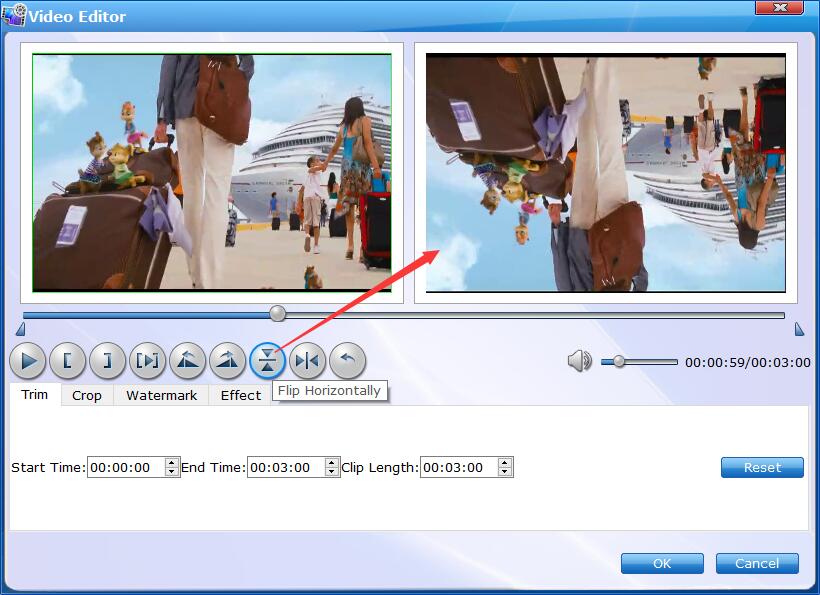
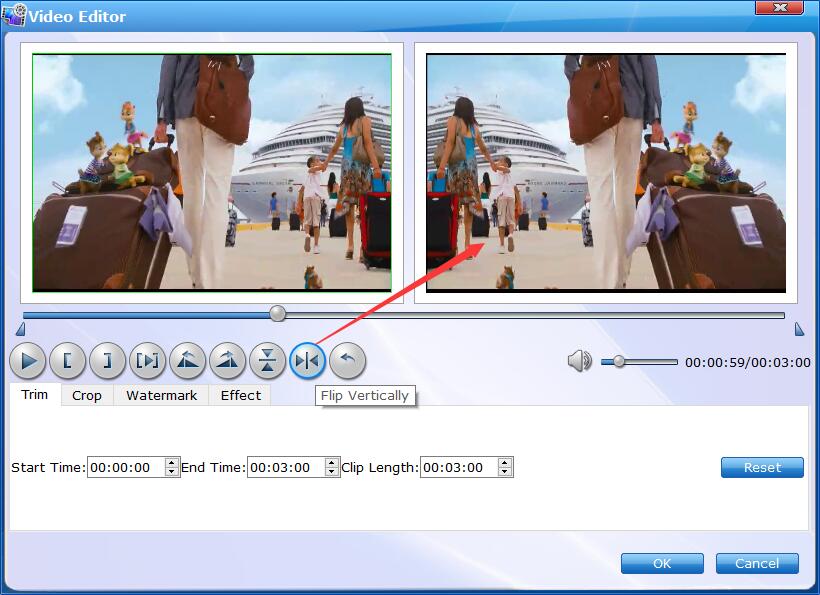
There're clockwise, anticlockwise, flip horizontal and flip vertical 4 options for you to rotate the video.
1. Rotate 90° counter-clockwise.
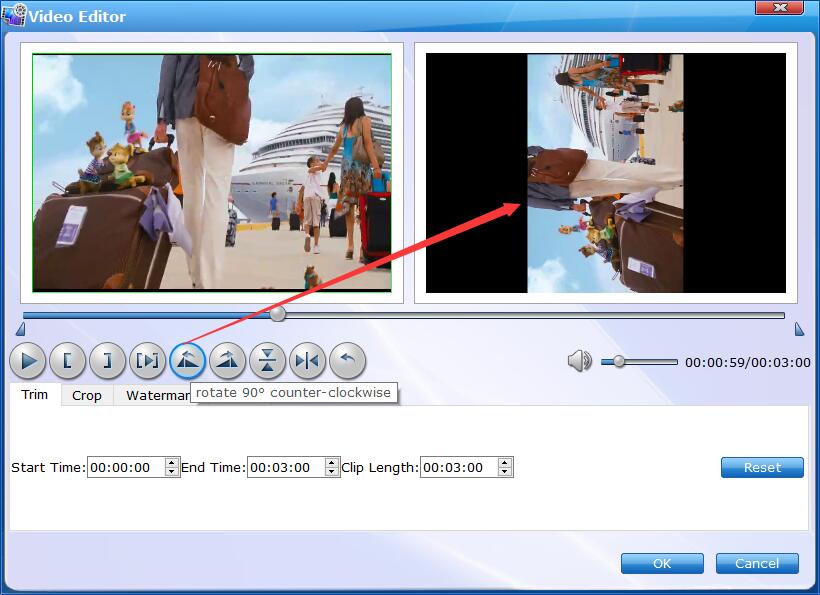
2. Rotate 90° clockwise.
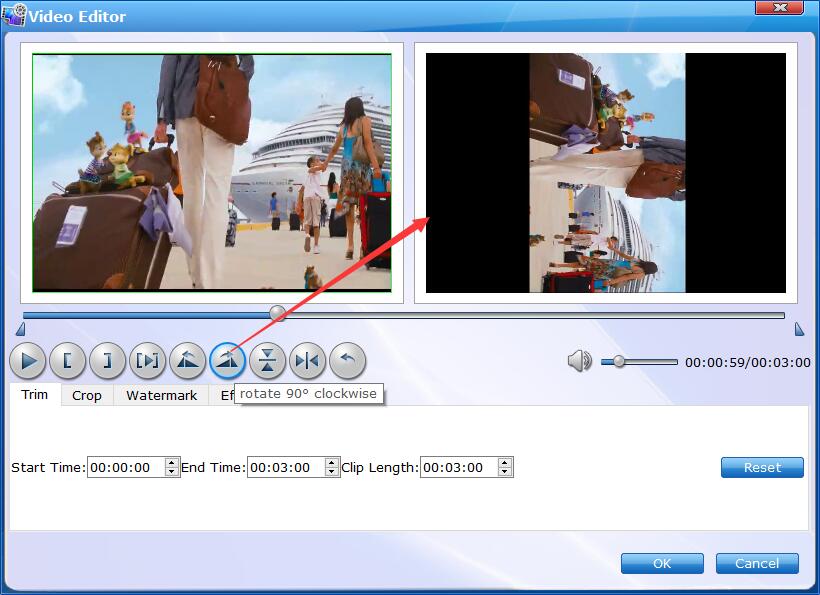
3. Flip Horizontally.
4. Flip Vertically.
Drag the bar to increase or decrease volume

3.6 - Add Subtitles
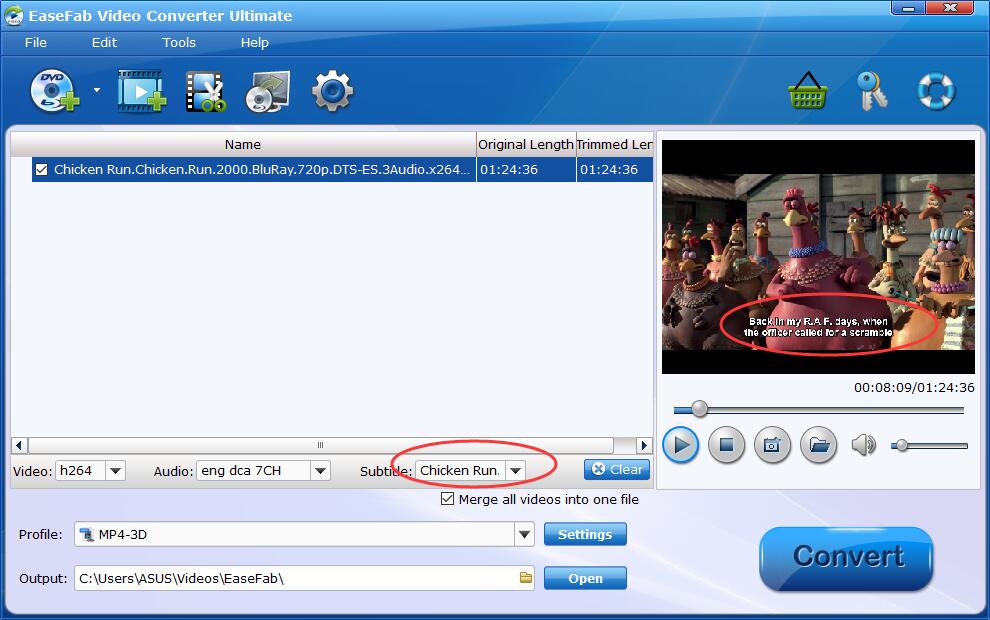
EaseFab Video Converter Ultimate also offers adding subtitles to digital files and DVD/Blu-ray movies. You can select the embedded subtitle track or add subtitle to your video in the following steps. In the following steps, we will take how to add subtitles to a MKV movie for example.
Add your media file
Before you start, you need to add the videos or DVD/Blu-ray movies to EaseFab Video Converter Ultimate.
Add subtitle
To add the subtitles you like, simply click "Subtitle" and click "Add Subtitle" tab to browse and import your *.srt, *.ass, *.ssa subtitle file you want to embed.

After that, you can have a preview of the subtitle effect to make sure all goes OK .
Start adding subtitles to your video or movie.
Before conversion, click the Profile bar to select an output format. Or, you can also directly choose a device preset to save video with subtitles to play on the device (e.g. iPhone, iPad, Galaxy Tab, PS Vita, etc). And then click the Convert button and now you have finished all steps of attaching subtitle to your videos or movies.
 4. Settings
Here you can learn general preferences of the program and advanced settings of output video.
4-1. Clear
Click Clear button to remove all sources you added in the program.

4-2. Options
Click ![]() button or from Tools > Options to enter Options Window. Here you can enter your TiVo Media Access Key, Output/Snapshot Folder, change Check for updates automatically and check Enable NVIDIA GPU Acceleration.
button or from Tools > Options to enter Options Window. Here you can enter your TiVo Media Access Key, Output/Snapshot Folder, change Check for updates automatically and check Enable NVIDIA GPU Acceleration.
4-3. Output Settings
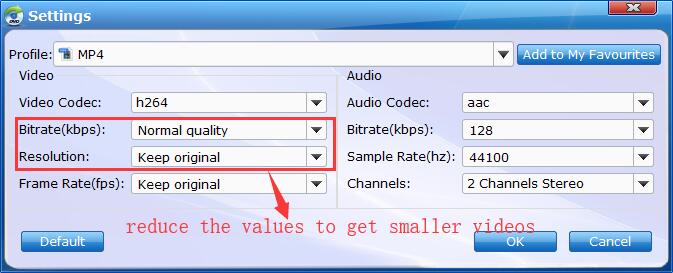
Click Settings button enter Settings Window. Here you can customize video audio codec, bitrate, frame rate, aspect ratio, resolution, audio codec, audio channel number, sample rate, bit rate, etc.
※ Please note: Adjusting these variables have some effect on the re-encoded video quality. Remember the file size and video quality is based more on bitrate than resolution which means video/audio bitrate higher results in big file size, and lower visible quality loss.
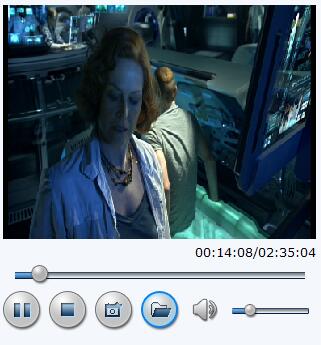
4-4. Preview Window
After importing, all video files will be listed in the program. You can preview the imported movie file by double clicking or checking one of them and click the ![]() button under preview window.
button under preview window.
By clicking the ![]() button under the preview window, you can take snapshot from the playing window as Thumbnail or for other use. By clicking the
button under the preview window, you can take snapshot from the playing window as Thumbnail or for other use. By clicking the ![]() button, you can find the snapshots you took.
button, you can find the snapshots you took.
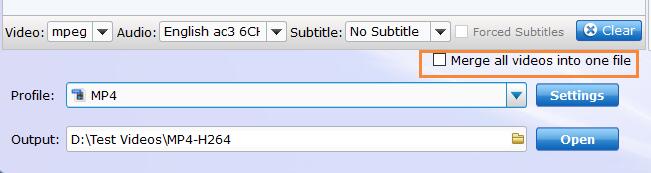
4-5. Merge Into One
Probably you want to combine several video files into a single one so that you can enjoy these videos without any interruption. More so, you can also cut the unnecessary scenes from these video files before saving them. Don't worry, with EaseFab Video Converter Ultimate which proves to be a good video combiner and cutter, you can join videos together with ease.
To join several videos together, simply tick off Merge all videos into one file.
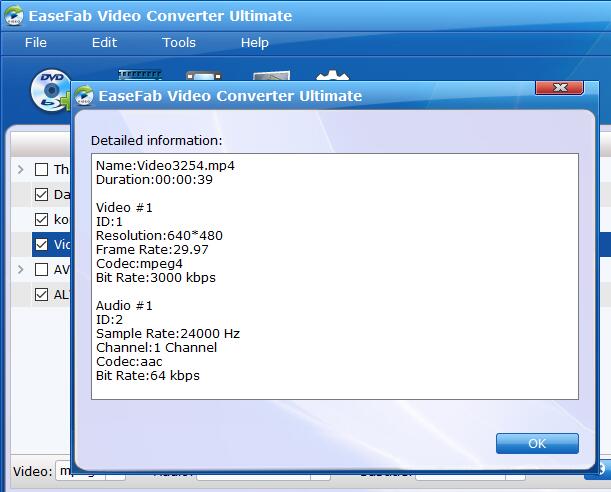
4-6. Media Information
EaseFab Video Converter also provides you with a quick access to the inner values of your media files.
Move mouse cursor to the main menu File (at the top of EaseFab Video Converter Ultimate), and select Media Information. You can easily find your video resolution, frame rate, codec, bitrate, etc..