"Anyone having an issue getting Vegas 13 to accept the XAVC Long GOP 50-mbit clips from the new Sony PXW-X70? Why oh why do the Sony camera divisions and SCS not work together to ensure that their own NLE can accept their own camera footage when a camera is released. It's crazy. Edius 7 is having no problems with accepting these 50-mbit Long GOP clips. Come on Sony, step up to the plate as quick as you can."
Although Sony states that the Vegas 13/12 supports native XAVC editing, you still encounter problems when importing XVAC clips to Sony Vegas from from a camcorder like Sony A7S, Sony PXW-X70, Sony F55, Sony HDR-AS100V, etc. Based on our testing and users feedback, we find it's not easy to edit XAVC footage(especially XAVC Long GOP) in Sony Vegas. Fortunately, there is an easy workaround to fix the issue. If you are in such issue, read on to get the quick solution.
To get Sony Vegas 13/12 work with Sony XAVC footage bautifully, the easy option is to convert Sony XAVC to a more editing-friendly format, such a Sony Vegas' MPEG-2. To do that, you can use EaseFab Video Converter, which helps convert XAVC to MPEG-2, which is the best format for Vegas to edit with ease. No expensive add-ons or plug-ins are required. With it, you may also transcode Sony XAVC video to Avid Media Composer, Adobe Premiere Pro, Windows Movie Maker, Pinnacle Studio and more NLE programs highly compatible formats for smooth editing.
Free download the XVAC Video converter:
Tutorial: How to convert Sony XAVC to Vegas compatible codecs
1. Import Sony XAVC clips
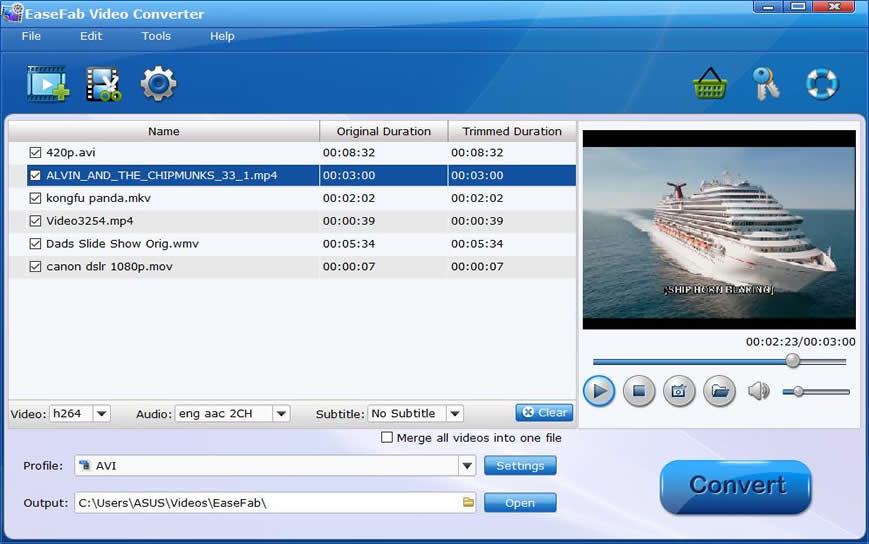
Install the XAVC to Sony Vegas converter and launch the program. Drag and drop the XAVC files to the software. Or you can also click "Add Video" button on the top of the main interface to import video to the program. It supports batch conversion and joining multiple video clips into one file.

2. Choose output format for Sony Vegas
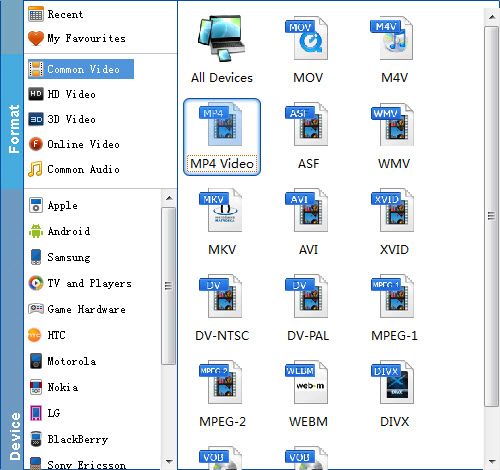
In the Profile tray, switch to Common Video category and choose MPEG-2 as the output format. The output videos seamlessly fit Sony Vegas Pro 10/11/12/13.

Tip: In case the default settings do not fit your requirement, you can click "Settings" button and enter "Profile Settings" panel to adjust video size, bit rate, frame rate, sample rate and audio channels. If you want to keep you 5.1 Audio Channels, please set ac3 as audio codec.
3. Start transcoding XAVC to Sony Vegas
Finally, simply click the big Convert button to start the conversion.
Once the conversion completes, you can click "Open" button to get the output files. Now you have got it right, just to import and edit XAVC files with Sony Vegas Pro.
