User Guide of How to Use EaseFab DVD Creator
After the download and installation of EaseFab's trial version of DVD Creator, you can simply follow the steps below in order to make and burn your DVD.
Part 1: Import Videos/Photos
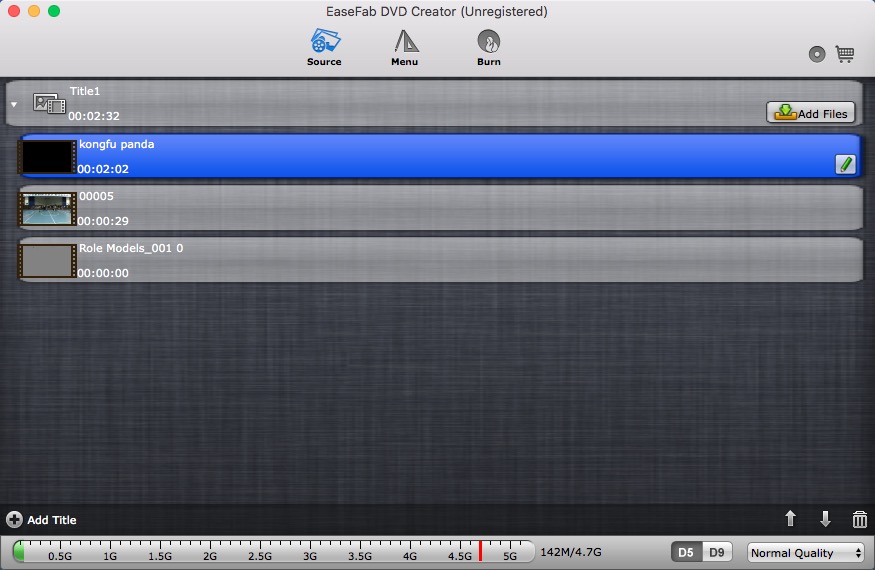
Click "Add Files" button to add video/photo files into the program. Please repeat the steps if you wish to add more files.
Part 2: Edit Videos/Photos
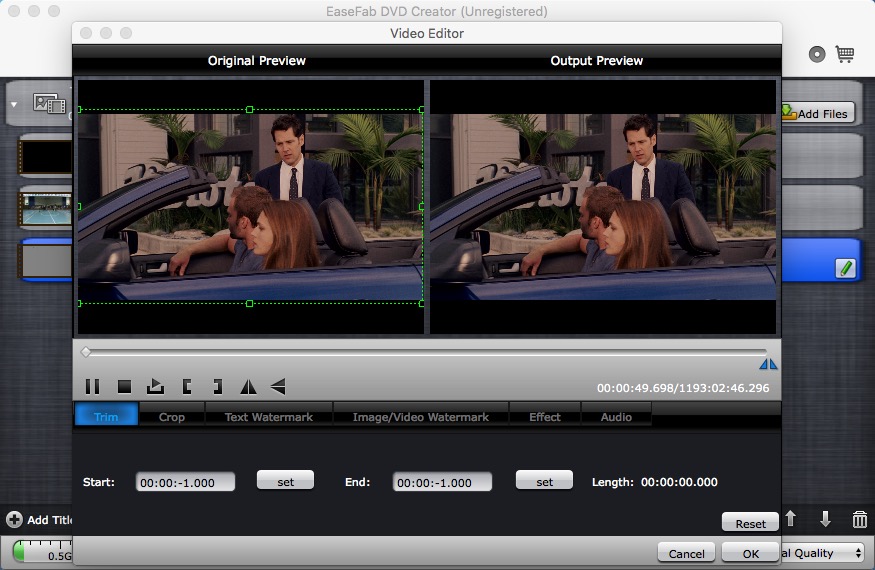
Click the 'Pencil' icon or highlight and then 'right-click' to access it's editing options.
Edit Videos:
In Video Editor there are six editing features available: Trim, Crop, Text Watermark, Image/Video Watermark, Effect, and Audio Replace. Click on the tab to switch among editing facilities.
Edit Photos:
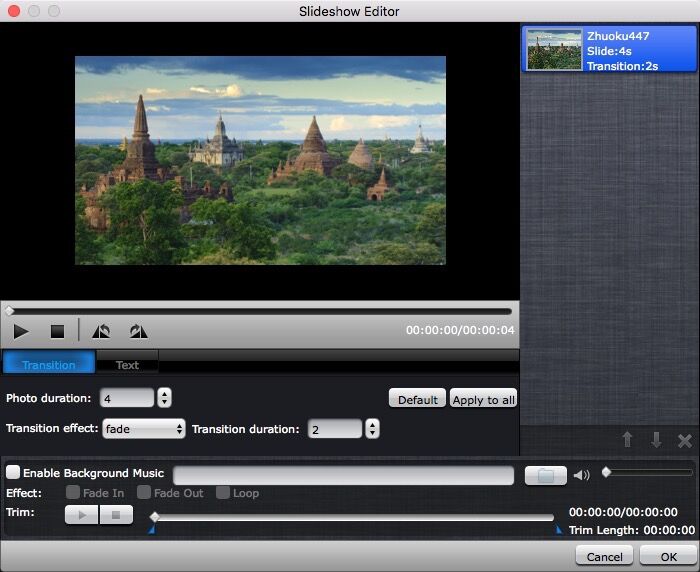
Besides being able to rotate the photos the way you like it to be, you can add text, apply transition effects as well as music!
Part 3: Customize DVD's Template & Menu
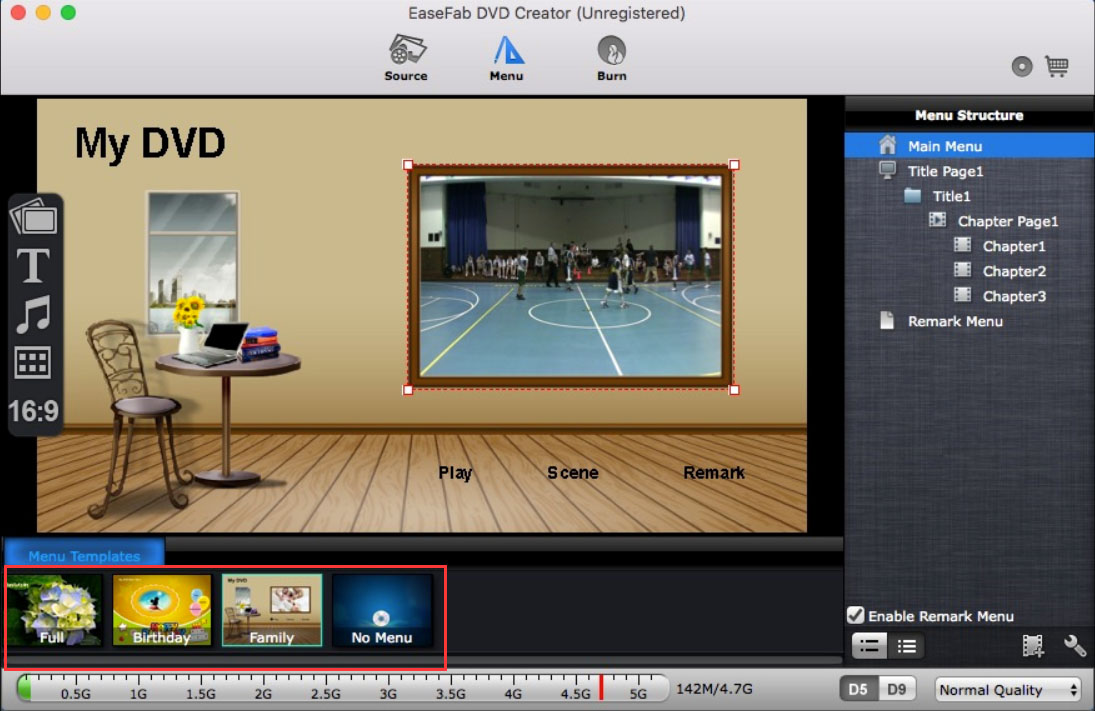
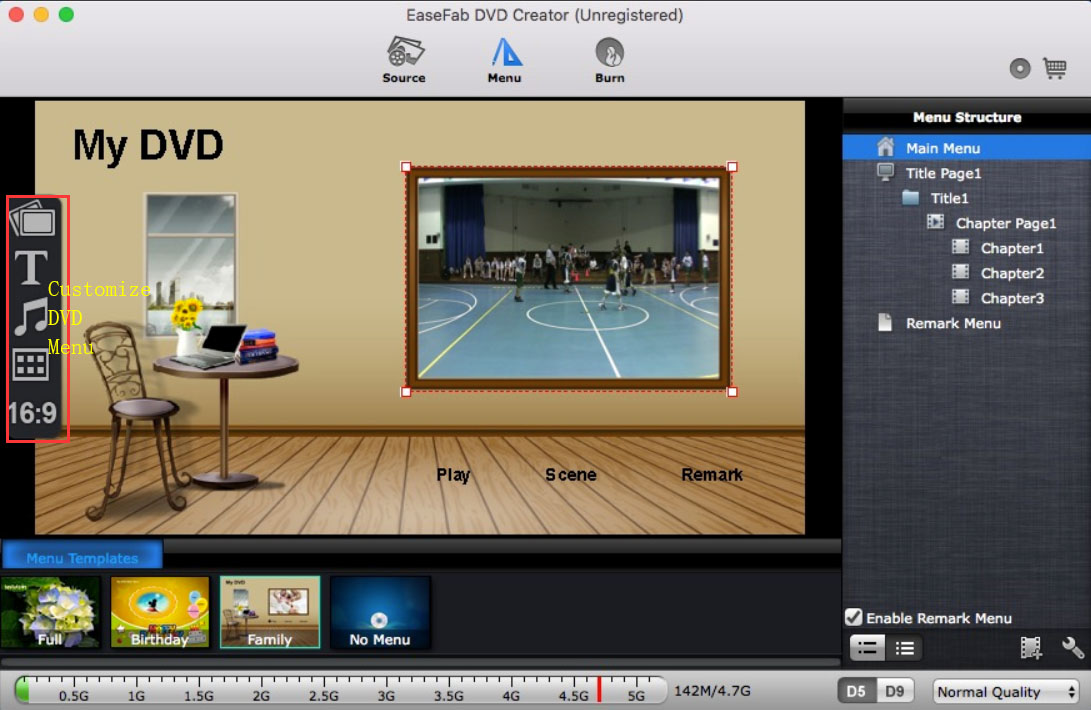
To use a preset menu template from DVD Creator, simply double-click on the template. When/if you don't need DVD menu, use "No Menu" from Menu Templates area.
Customize DVD Menu:
To customize an object, you have to select it first. Cut over in the Menu Structure area to select the page that you'd like to custom. Custom includes changing the DVD menu template/style, menu text, display aspect ratio and background for the DVD menu. You can also set chapter mark, and playback mode.
Part 5: Preset your DVD's Setting before burning
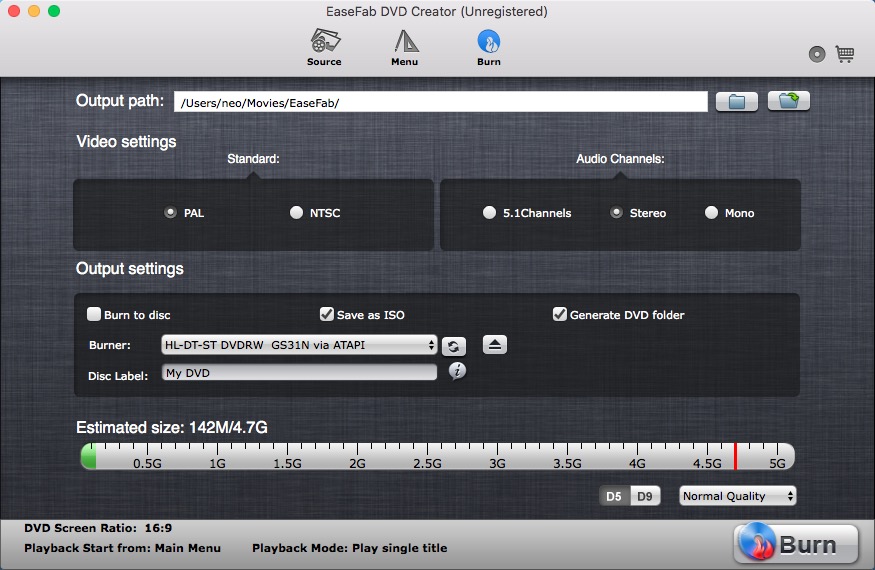
Switch to "Burn" screen when you finished authoring DVD and feel like to burn created DVD-video onto a writable DVD (or ISO image) that will plays on standard DVD player after burning.
![]() Burn DVD-Video to Disc
Burn DVD-Video to Disc
Simply check "Burn to disc" box and click the "Burn" button to burn created movie to blank DVD.
![]() Convert DVD-Video to ISO Image
Convert DVD-Video to ISO Image
To make created DVD-video into ISO file, check "Save as ISO" box and click the "Burn" button.
![]() Generate a DVD-Video File Structure
Generate a DVD-Video File Structure
To create a DVD file structure that includes menu, check "Generate DVD folder" and click the "Burn" button.
