
After updating your Mac system to OS X Yosemite 10.10, Many Mac users are encountering issues while playing WMV files. The possible reason for this is that Yosemite might not support the codecs for WMV files any more. Fortunately, there are always solutions out there. In this article, we will show you two easy ways to make your WMV files work with OS X Yosemite properly.
3 Solutions to retrieve deleted text messages from iPhone
Method 1: Play your WMV files on Yosemite Using VLC Media Player
Let's face it, Windows and Mac will never fully get along. Playing WMV (Windows Media Video) in QuickTime on Mac Yosemite is no execption. Time to plug a good alternative then ! The highly-recommended one is VLC Media Player, an open source video player that really performs well. It lets you to play any WMV files on Yosemite in high definition. Aside from WMV files, you can also play other videos in other formats with VLC for Mac.
Read More: Top 5 Free WMV Players for Mac
![]()

Although VLC includes all common codecs for video files, sometime it will also fail to play some WMV videos. In such cases, first make sure you're using the latest VLC. Secondly, make sure the WMV files are not corrupted.
Method 2: Convert Your WMV files to Mac Supported Format
Another option for playing WMV files on Yosemite is to convert them to Mac supported format with EaseFab Video Converter for Mac. This program features high efficiency and seamless conversion. With it, you can change WMV to Mac compatile MOV, M4V, MP4 without losing any quality. Here's how to do it.
Step 1: Install and launch the Mac WMV Converter, and then click "Add Video" button to load your WMV files. You can also directly drag and drop your WMV files to the program.
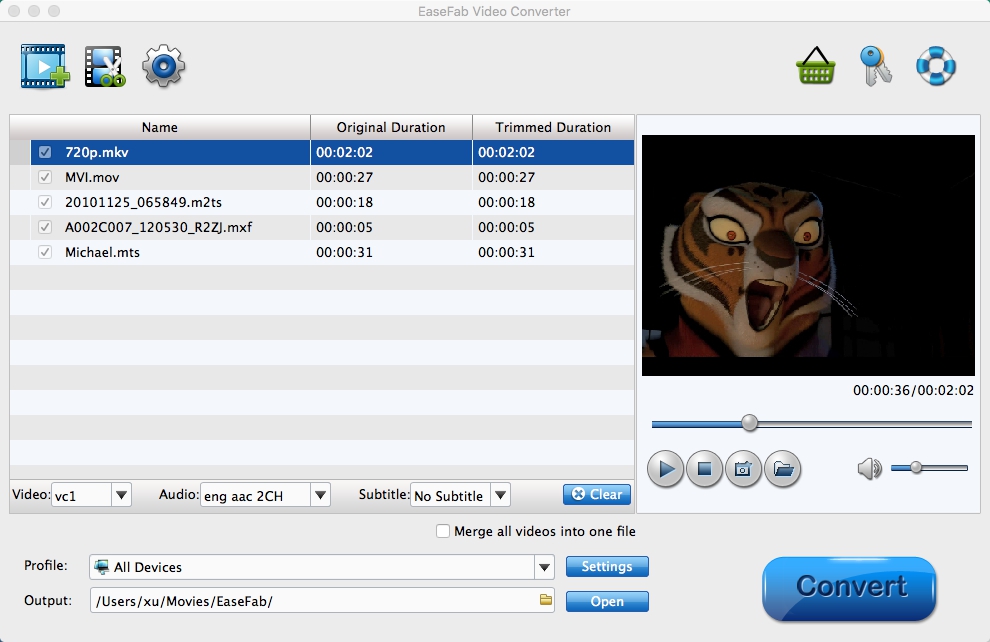
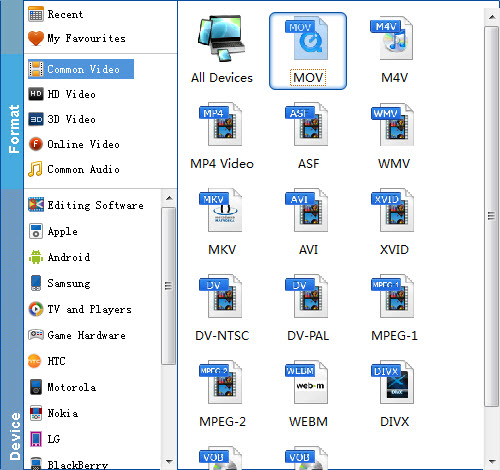
Step 2: Click the "Profile" drop down list to select MOV or MP4, M4V from "Commoon Video" category as the output format. If you want to convertWMV files to portable devices, this Mac app offers a variety of presets for iPad, iPod, iPhone, Apple TV even apps like iMovie, Final Cut Pro.
Tweak your setting: If you want to change the sample rate, resolution, bitrates, etc to better cater for your playing needs, you can click "Settings" option to access the setting window.
Step 3: Click "Convert" to start to change WMV to MOV on Mac. After that you can click "Open" to find out where the output files are saved. If you want to set where you to save the output files, click the "Output Folder" drop-down list to set it before the conversion.
After conversion, just import the converted video files to QuickTime, and you'll find they can be played with QuickTime smoothly.