Let's face it, Windows and Mac will never fully get along. Playing WMV (Windows Media Video) in iTunes or other Apple products like iPad, iPhone, iPod, QuickTime is no exception. So if you want to import WMV files to iTunes for further syncing across multiple devices, you will need to convert WMV to iTunes-compatible format. Now just follow the quick guide to get WMV and iTunes to play nicely.
To change WMV to iTunes formats, you can adopt EaseFab Video Converter Ultimate for help. It's the most appropriate tool to convert WMV files to iTunes MP4, MOV or M4V fast yet with high output video quality. Besides, if you want to view WMV videos on your iPad (iPad Air, iPad Mini, etc.), iPhone (iPhone 6, iPhone 6 Plus, iPhone 5S, etc.), iPod, Apple TV, you can directly select the device model as the output format. No manual video settings are required. The equivalent Mac version is EaseFab Video Converter Ultimate for Mac. Now just download the program and follow the step-by-step guide to finish the WMV to iTunes task in a simple clicks!
Download WMV to iTunes converter:
How to Convert WMV File to iTunes
For Windows (including Windows 10) users, just follow the detailed guide to complete your conversion. The way to convert WMV to iTunes formats on Mac (including macOS Mojave) is the same. Just make sure you've downloaded the right version.
Step 1. Import WMV files
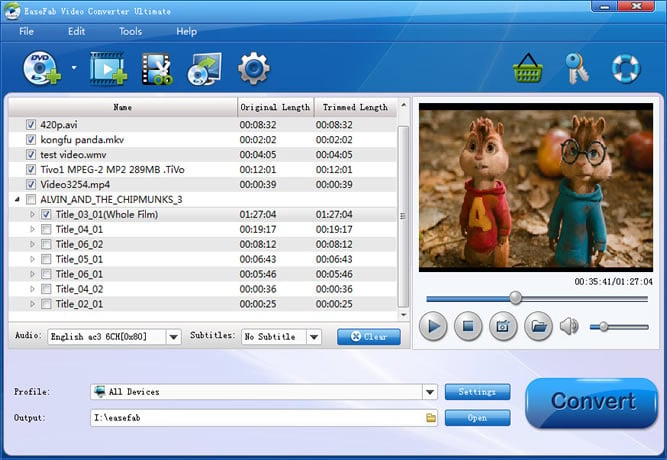
You can drag any WMV file and drop to the program or add them by clicking Add Video button. It allows you to add several video files at a time and convert them at one go.

Step 2. Select the output format
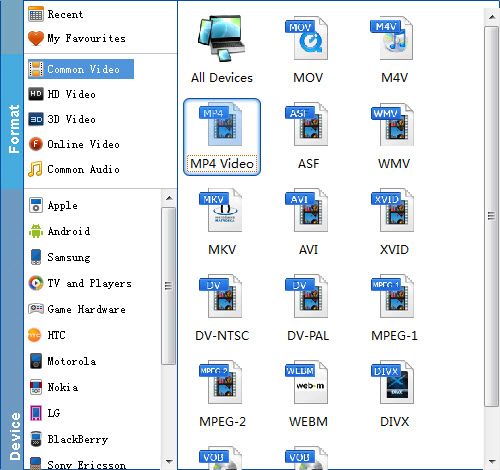
Since MP4 is an iTunes compatible format, here you can click Profile tray and switch to Common Video category and choose MP4 as your output format. If you want to sync the converted video to a specific devices like iPhone, iPad, iPod or other devices, you can choose your device model from Apple category. You can also specify an output folder. Otherwise, the default folder will be used.

Tips: By clicking the Settings button beside Profile, you can adjust the output video/audio resolution, frame rate, bit rate, etc. to customize the output files to get the best quality you want.
Step 3. Start WMV to iTunes conversion
After everything is ready, simply click the Convert button to start converting the added WMV videos to iTunes MP4. The conversion time depends on your video size. When the process is done, click Open to locate the converted MP4 videos.
You've successfully converted Windows Media Video to iTunes. Now open iTunes and click File > Add Files to Library to import the converted video files to iTunes library. Done! Now you can play the WMV files in iTunes without any troubles or just transfer them to your iPhone/iPad/iPod without any restrict. Just enjoy your videos.
