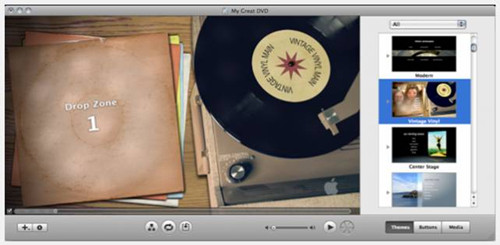
Making own movies became more simple when iDVD came out. It allows the user to add QuickTime Movies, MP3 music, and digital photos to a DVD that can then be played on a commercial DVD player. The common problem we often meet is when importing the files into iDVD, it would refuse reading the files. That's because iDVD couldn't handle such formats directly, of course including high definition AVCHD MTS/M2TS clips. Luckily, this problem is easy to solve - all you have to do is convert the MTS videos to iDVD supported QuickTime MOV files. Once you have, you can add them to iDVD and begin burning.
If your HD camera itself is compatible with iDVD, you can simply connect your camcorder to Mac and let iDVD work for you by using "OneStep DVD". Otherwise, in attempting of importing MTS to iDVD for "Create a New Project", you have to convert AVCHD MTS to iDVD workable files in advance. To do this, EaseFab Video Converter for Mac is highly recommended. It allows you to convert any video including MTS video to iDVD-recognized video codecs effortlessly. After conversion, these MTS files can be imported successfully to iDVD for further DVD burning. You can also resolve MTS AVCHD incompatibility with other any Apple products like iTunes, iPhone, iPad, iPod, iMovie and QuickTime etc. Now download the program and follow the simple guide below.
Steps: Converting MTS to iDVD Supported File Formats
Step 1. Import MTS files to the program
Install, and launch the MTS to iDVD converter and click the Add Video button to import the MTS videos to be converted. You can also directly drag and drop your video files to the program. The converter supports converting multiple files at a time.
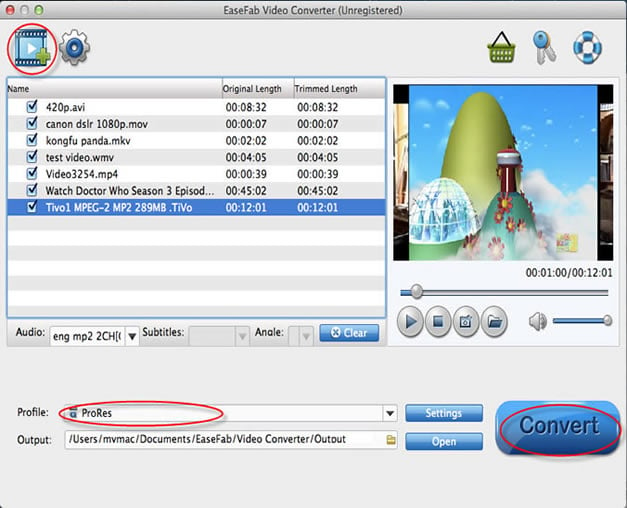
Step 2. Specify MOV as the output file format
Click the "Profile" drop down list to select "MOV" from "Commoon Video" category as the output format.
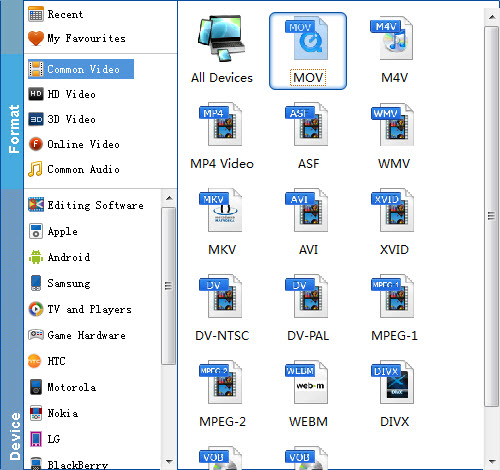
Tricks: If you want to convert MP4 to MOV for Final Cut Pro, iMovie, you are recommended to directly choose the corresponding format from "Editing Software" category.
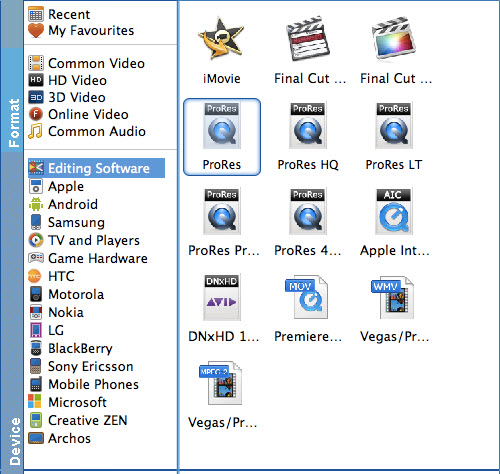
Tips: You can also adjust resolution, frame rate, encoder, bitrate for audio, bitrate for video, sample rate, and channels to optimize the output file by clicking "Settings" button.
Step 3. Convert AVCHD MTS to iDVD
Click the big button "Convert" to start MTS to iDVD MOV conversion. When the conversion task is one, click "Open" button to get the converted files for creating DVD with iDVD.
The way iDVD works is simply by dragging the converted MTS files into the Drop Zone shown in the image above. It gives you all the tools to create professional-quality DVDs using your own AVCHD videos. Sharing your memories has never been easier.
