Nero is one of the popular DVD burning programs that have proven to work so well. It comes bundled with many computers as well as DVD drives. As the matter of fact, Nero handles overwhelming popular video and audio formats, even the AVCHD m2ts footage can be directly imported to be the suite without decoding. However, Nero does not work with the .tivo format. What if we want to load the TiVo files to Nero? If you're looking for an easy way to achieve this goal, you've come to the right place. Read on to learn more.

To burn TiVo files with Nero, what you need is a TiVo encoding tool which can remove commercials from Tivo recordings and convert them to Nero supported video formats. There are some free programs can assist you to remove commercials from Tivo recordings, one of them is the Perl program KMTTG, but you may find the process is too complicated or operate. If you want to find a more simple to use application, you can try EaseFab Video Converter. The program can help you effortlessly remove DRM protection automatically while converting TiVo files into a more common-used file format like MP4, MKV, AVI, WMV, MOV, etc. with fast encoding speed and zero quality loss.
To save storage, you can shrink the TiVo recordings; to burn CD album, you can extract audios from TiVo files; to cut the commercials, you can "trim" the ads out; to eliminate the black edges, you can "crop"the image and remain the part you like. And, to conclude, it is worth trying. Now download the app and follow the tutorial below to start converting TiVo recordings to Nero.
Simple steps to convert TiVo recordings for burning DVD with Nero
Before the conversion, you'll need to transfer your TiVo shows from your TiVo box to your PC. Follow Windows (Windows 8) users, follow the Instructions to Transfer TV shows from TiVo to PC.
Step 1. Load TiVo recordings
Start up this program, and then click "Add Video" to import all .tivo files that you want to convert.
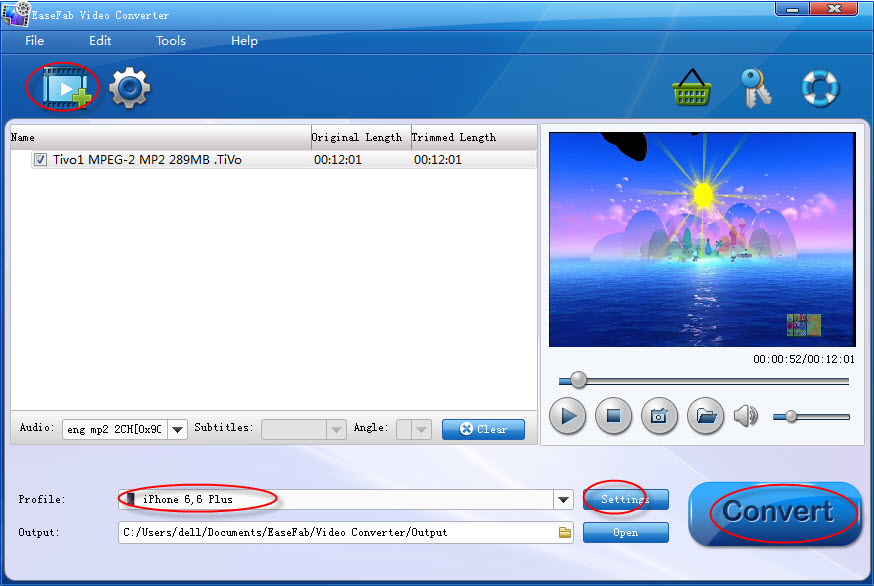
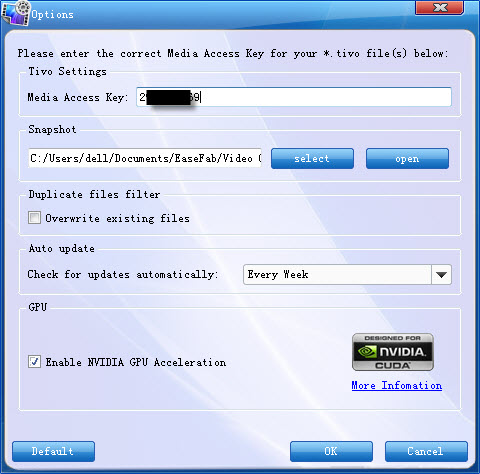
Note: When first loading, The TiVo HD Video Converter will ask you to input your Media Access Key. Simply enter your Media Access Key, and click "OK" to confirm.
Step 2. Select an output format for burning in Nero
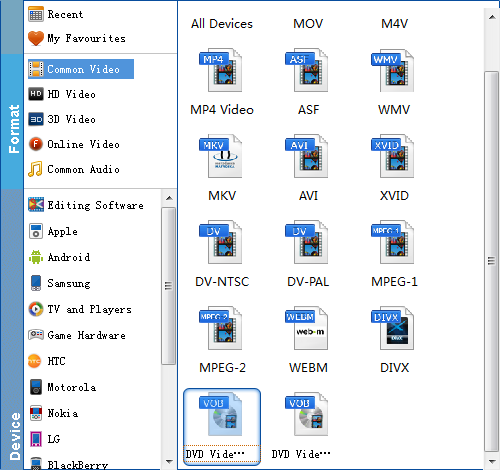
Click on the pull down menu of "Profile" to select output format. Most of the recordings are HD 1920*1080 videos, which can be burned to blu-ray discs after being converted to TS format (in the row of HD Video). For me, I'd like to compress the HD recordings so as to fit 4.7G DVDs, I used to select the optimized presets for DVD burning, you can directly select "Common Video" > "DVD Video-NTSC" or "DVD Video-PAL" (What is NTSC and PAL?).
Step 3. Edit the TiVo recordings to keep proper length and size
Click on "Edit" button to enter "Video Editor" Window.
1. Cut unwanted black edges
Switch to Crop tab to cut unwanted edges. You can crop the video by adjusting the crop frame (drag the green dotted green square frame to circle the part you want to retain) or setting values (Left, Top, Width and Height) of crop area.
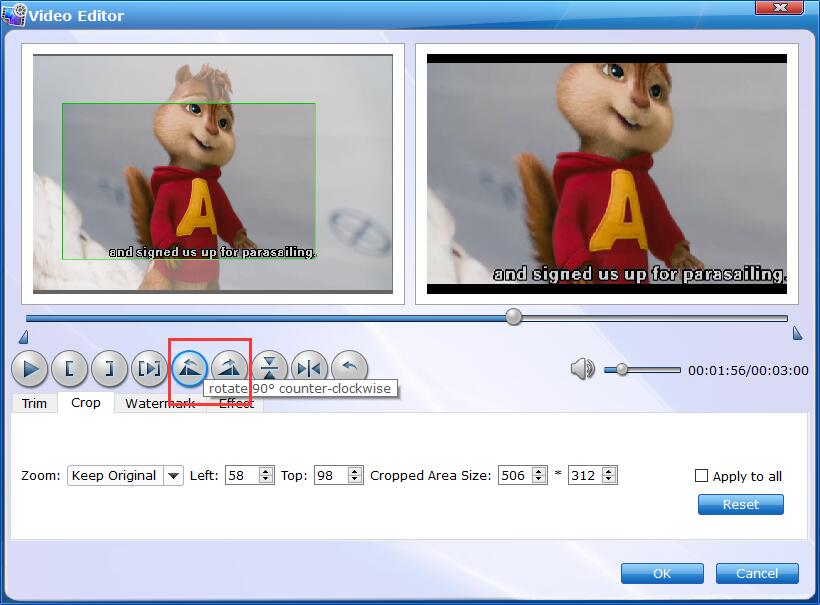
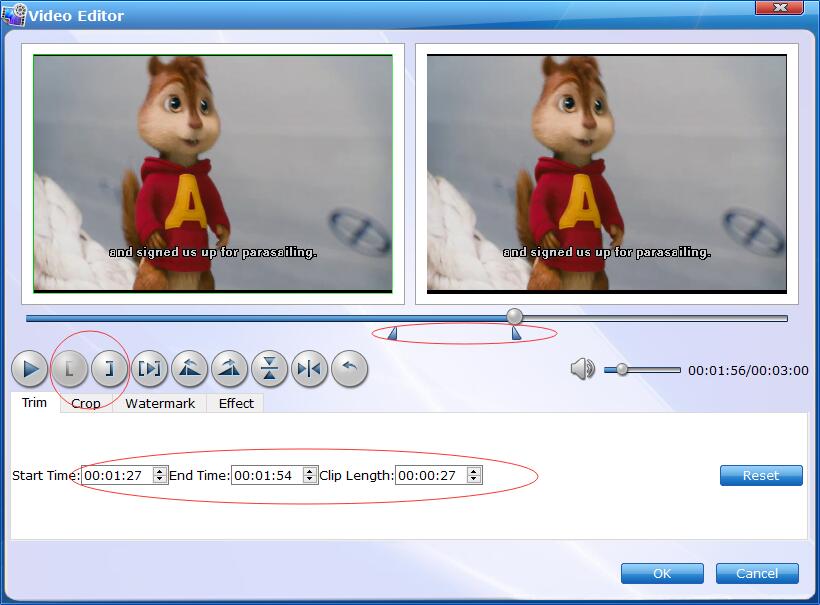
2. Trim out bothering commercial ads
From the Trim workspace, you can create a custom clip from a larger scene. To adjust the duration of your clip, move the sliders below the screen to the start and end points you want.
Step 5. Click "Convert" button to start converting TiVo to Nero compatible format
Back to main interface and click "Convert"button, the TiVo converter will generates videos that are compatible with Nero. After conversion you can click the "Open"button next to output path to find converted recordings. Now you can feel free to run Nero and load them for burning DVDs.