Convert DVD to Video Editors
EaseFab DVD Ripper supports converting DVD files to various professinal encoders - DNxHD, DVCPRO, HDV, MPEG-2 - ensuring maximum editing quality and efficiency when working with Avid Media Composer, Adobe Premiere, After Effects, Premiere Elements, Sony Vegas, Windows Movie Maker, PowerDirector, EDIUS, Sony Movie Studio, and more. Before starting, please launch the software first and then follow the step-by-step guide below.
Step 1
Add DVD
Insert a DVD into your DVD drive, and click the  button. The program will add the DVD to the program and list all the titles. Double-click one of the titles, and you can preview the movie in the Preview window on the right. See the picture below. You can also import ISO files, IFO files or DVD folder for conversion. If you want to convert all the DVD titles into one large file, tick Merge all videos into one file to combine the added files.
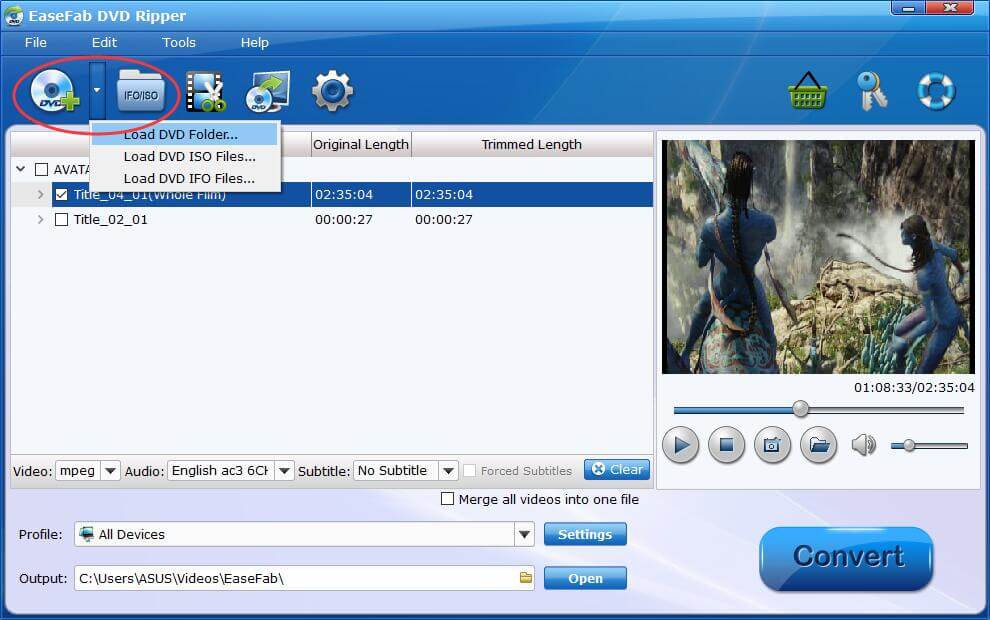
Tips: A DVD may contain many titles more than the main movie, such as the trailers or commercials. By default, EaseFab DVD Ripper choose the longest title which is usually contains the main movie. And this helps ripping without converting unnecessary titles.
Step 2
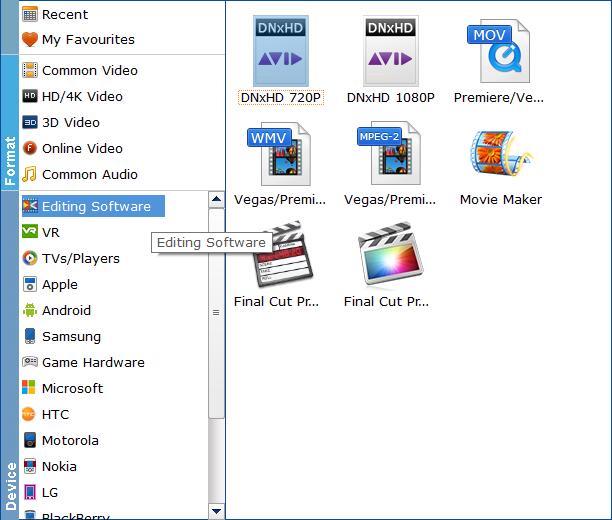
Choose Output Format for your Video Editors.
Click Profile (located below where your files are displayed) and select the optimized preset according from the drop-down list of Editing Software category. As you see, optimized presets for Avid, Adobe Premiere/Premiere Elements, Sony Vegas, Windows Movie Maker, Final Cut Pro are provided.
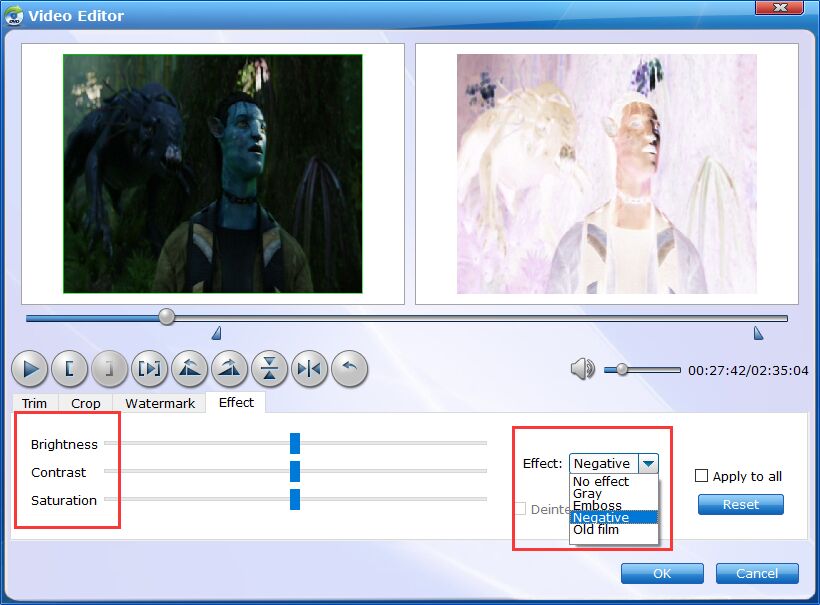
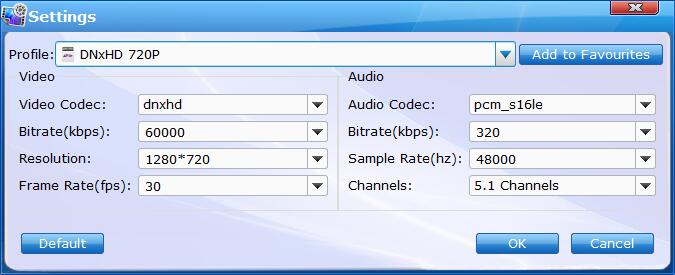
Tips: The default setting works well. Of course, if you want to customize video and audio encoding settings, just click the Settings button to customize these settings. You can adjust the output video/audio resolution, frame rate, bit rate, etc. to customize the output files to get the best quality you want.
Step 4
Convert the DVD file
Once you've selected the output file format you want, you're ready to rip. Simply click the  button to let the software start converting your DVD files to NLE compatible video formats. The conversion time depends on the quality and duration of the output movie. Wait for the conversion to be done and click Open button to get the converted DVD files.
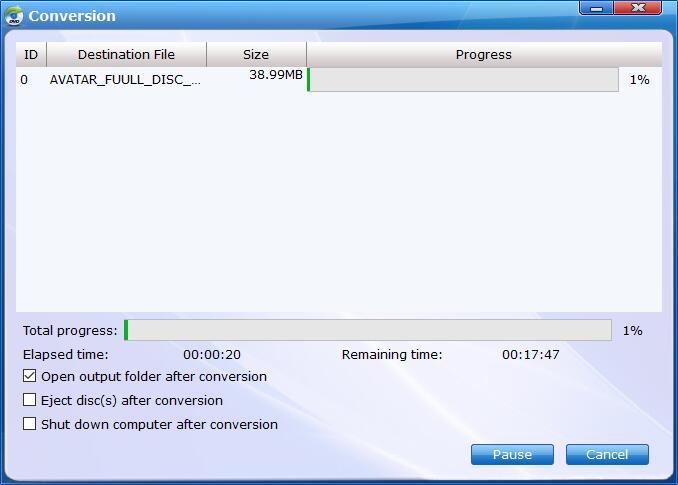
By default, the Open output folder after conversion option is kicked off. You can also tick off Eject disc(s) after conversion and Shut download computer after conversion.