Developed by Apple, MOV file is a common multimedia container file format which is compatible with both Mac OS and Windows platforms. MOV files may contain video, audio, time code, and text tracks, which can be used to store and synchronize different types of media. MOV files can be played on your PC, but enjoying them with your dear ones on big TV screen through DVD player will be a different experience. Most of the DVD players do not support playing MOV files directly and thus you need to first convert MOV to DVD player supported digital file formats (e.g. MPEG-2) or burn MOV to a DVD disc for further playback. In this article, we will mainly talk about how to convert MOV to DVD easily.
In order to burn MOV to DVD in good quality on your Mac system, a professional tool is needed and EaseFab DVD Creator for Mac (DVD Creator for Windows is also available) is a great choice. The software ensures that you get the best quality videos on your DVD disc without any hassles. In addition to MOV, all other major and popular formats like AVI, MP4, WMV, FLV, MKV, and others are supported for DVD conversion.
Key Features of the MOV to DVD Converter:
· Support over 150 video formats for disc burning including MOV, MP4, MKV, AVI, and others. Burn MOV to DVD Mac in quick and simple steps.
· Allows burning multiple MOV or different formats file to DVD at a time.
· Customize DVD with free DVD templates and DVD parameters like Aspect ratio, TV standard, quality, etc.
· Built-in video editor allows trimming, cropping, adding watermark, applying effects, and adding subtitles to MOV files before burning to a DVD disc.
· Supported OS: Supported OS: Mac OS X 10.14, 10.13, 10.12, 10.11, 10.10, 10.9, 10.8, 10.7, 10.6, Windows 10/8/7/XP/Vista.
Simple Steps to burn QuickTime MOV files to DVD on Mac (macOS Mojave included)
Converting MOV to DVD is simple as ABC. After downloading, follow the wizard to install and run the program. Then follow the steps below to burn MOV files to a DVD disc in a few clicks! The below guide takes EaseFab DVD Creator for Mac screenshots for example. The way on the Windows is almost the same.
Step 1. Import MOV files
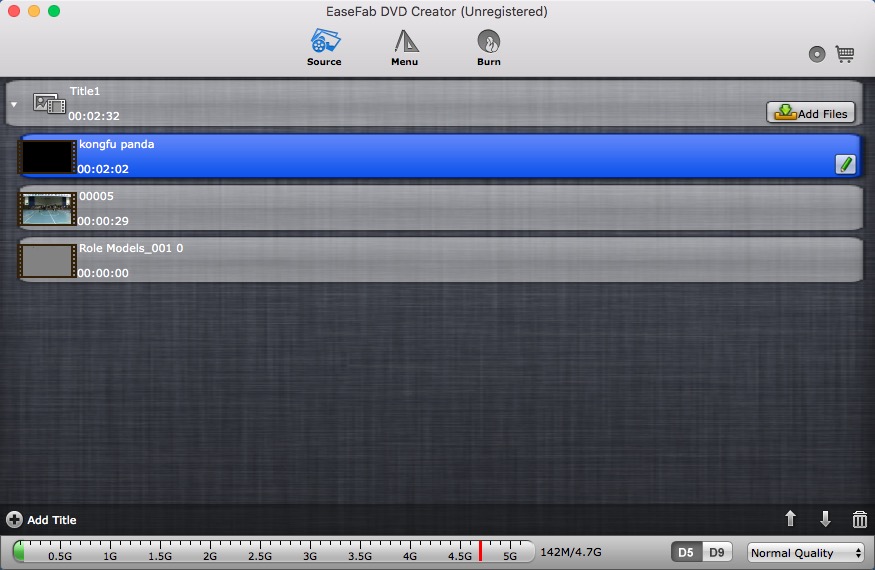
Click "Add Files" button to add MOV files into the program. Please repeat the steps if you wish to add more files.
Step 2. Edit MOV videos (Optional)
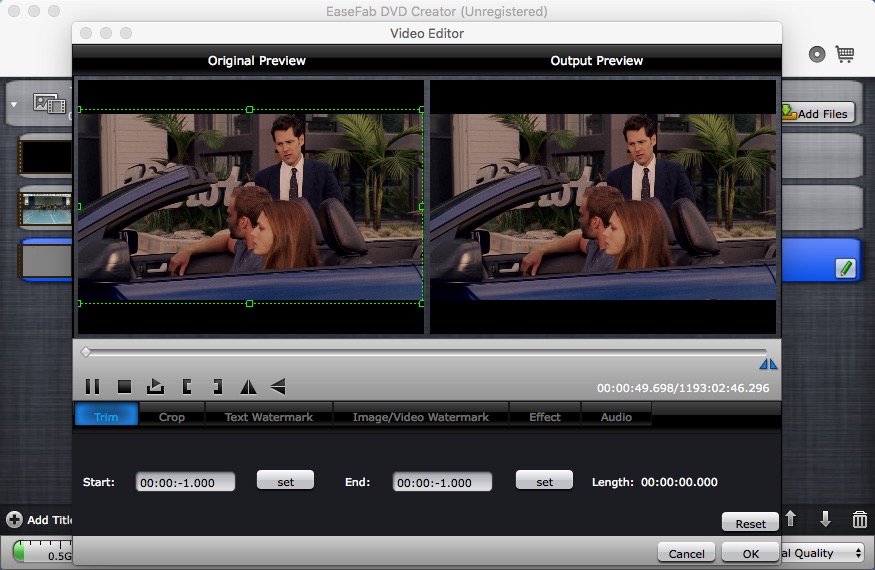
Click the 'Pencil' icon or highlight and then 'right-click' to access it's editing options. In Video Editor there are six editing features available: Trim, Crop, Text Watermark, Image/Video Watermark, Effect, and Audio Replace. Click on the tab to switch among editing facilities.
Step 3. Customize DVD's Template & Menu
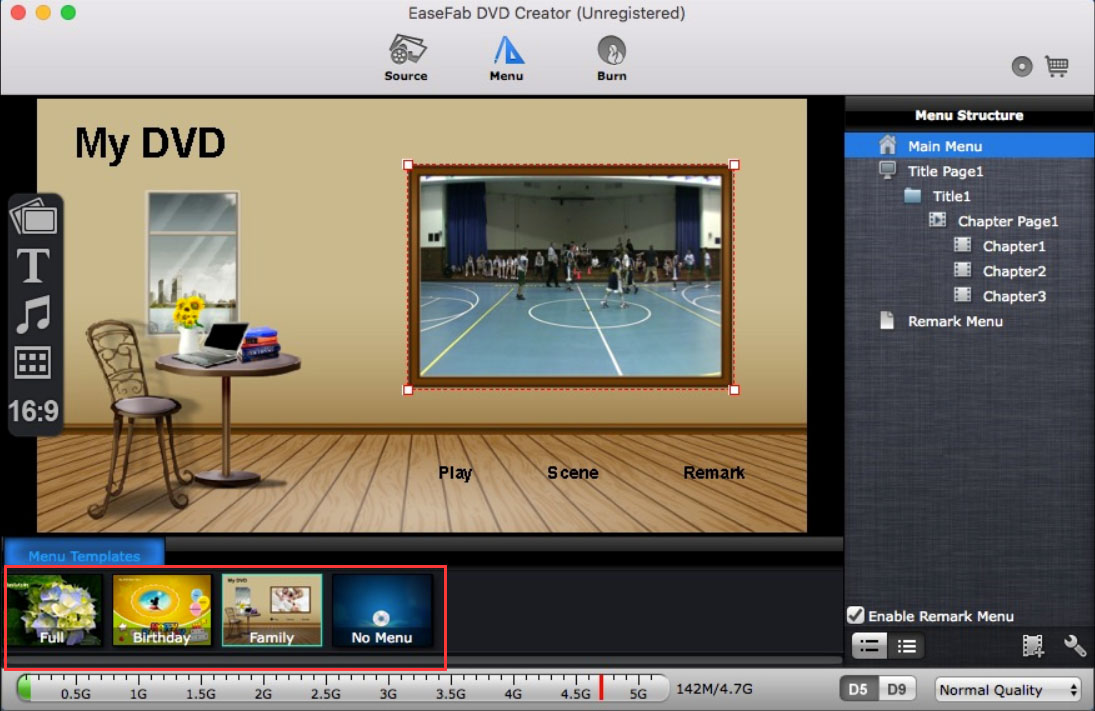
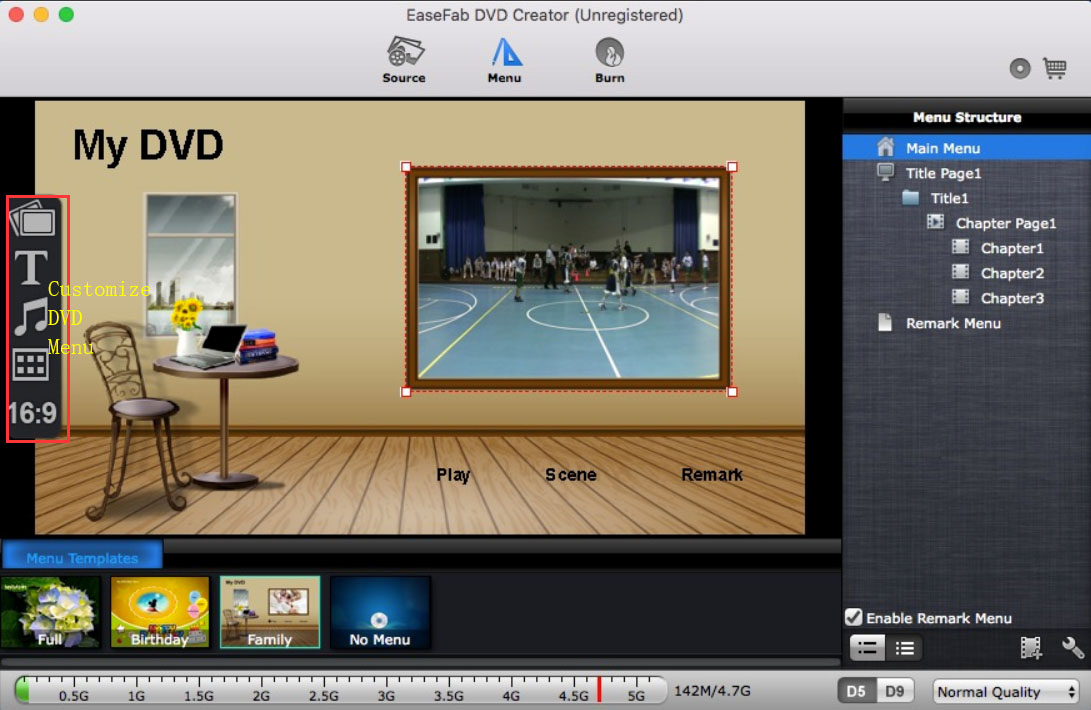
To use a preset menu template from DVD Creator, simply double-click on the template. When/if you don't need DVD menu, use "No Menu" from Menu Templates area.
Customize DVD Menu:
To customize an object, you have to select it first. Cut over in the Menu Structure area to select the page that you'd like to custom. Custom includes changing the DVD menu template/style, menu text, display aspect ratio and background for the DVD menu. You can also set chapter mark, and playback mode.
Step 4. Start burning MOV to DVD
After above steps, insert a blank DVD disc to your DVD drive. Switch to "Burn" screen when you finished authoring DVD and feel like to burn created DVD-video onto a writable DVD that will play standard DVD player. DVD Creator writes content to single-layer 4.7 GB and dual layer 8.5GB DVDs. At the bottom of the main interface you can set DVD-5(D5) or DVD-9(D9) as target disc type. When burning Quicktime MOV file to DVD disc is finished, you can play it with your home DVD player and watch the video on TV.
