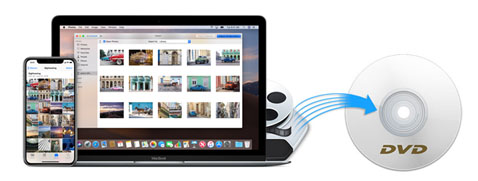
Nowadays, more and more people like to use their iPhone to record their daily life as the present-day iPhone feature high-end camera that not only captures the bright and lively picture but also good quality video as well. However, those memories are kept locked away on a single person's device - sometimes never to be seen again. So if you have short clips and videos of our special moments on your iPhone, you can transfer these iPhone videos to a DVD for your entire family to enjoy. That way, your memories aren't lost on your iPhone, and you can relive your favorite moments over and over again. In addition to playback, you can also burn your iPhone videos to DVD for backup purpose. Your videos will be safe on disc and there will be some additional space on your handset.
For all your DVD burning needs in the most professional manner, we recommend EaseFab DVD Creator. This expert program supports Windows10/8/7/Vista/XP/2003 and all Mac systems as well. Almost all types of file formats are supported by the software including HD, SD and others. With it, you can directly add your iPhone videos/photos/audio files and burn to DVD, DVD Folder and ISO Image ifles with simple steps. There are a variety of dynamic and static templates available to match your video theme. Creating new chapters, adding background image or music, and other template customization options are also available. It also has a built-in video editor for you to personalize phone videos before burning.
How to Burn iPhone Videos to DVD on Windows and Mac
The guide below take EaseFab DVD Creator for Windows for example. The way for converting iPhone videos to a DVD disc on Mac OS X (macOS Mojave included) is almost the same.
PS: At the very beginning, you should connect your iPhone with your PC via a USB cable and transfer photos and videos from your iPhone to your computer first. If you no idea about that, please refer to Apple official instructions here.
Step 1. Add iPhone videos
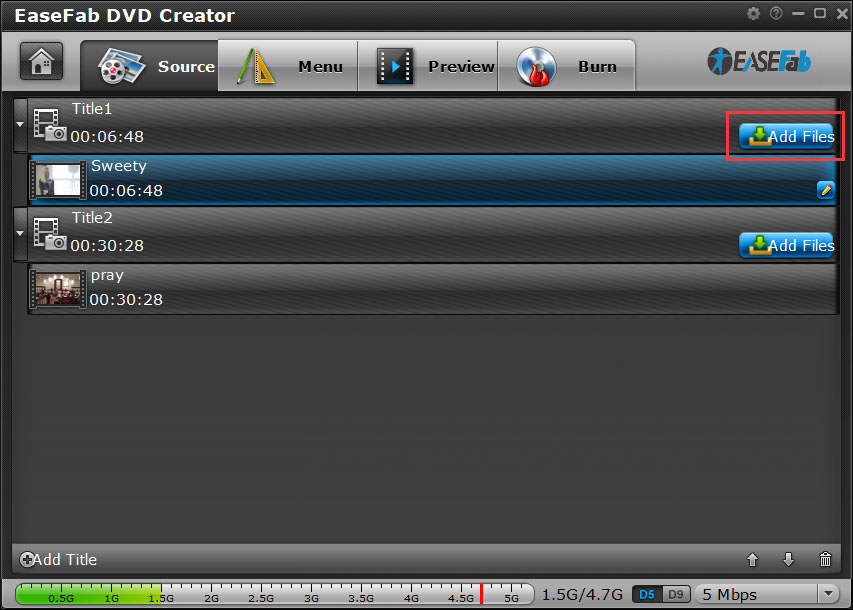
Click "Add Files" button to add iPhone video files into the program. Please repeat the steps if you wish to add more files.
Step 2. Edit iPhone Videos Before Burning
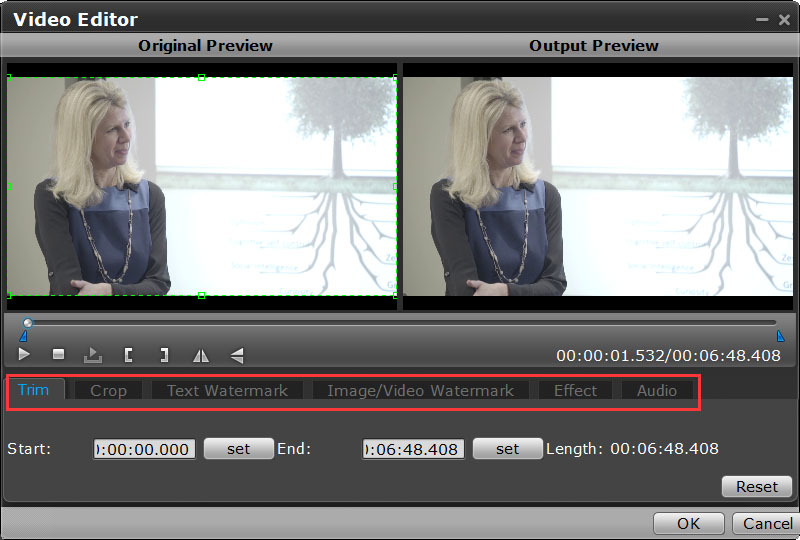
If you want to customize your iPhone files before burning it to DVD, you can click the pencil-like icon or highlight and then 'right-click' to access its editing options. In Video Editor, you can crop video, apply effects, add subtitles, add watermark and more.
Step 3. Customize iPhone to DVD Menu Template
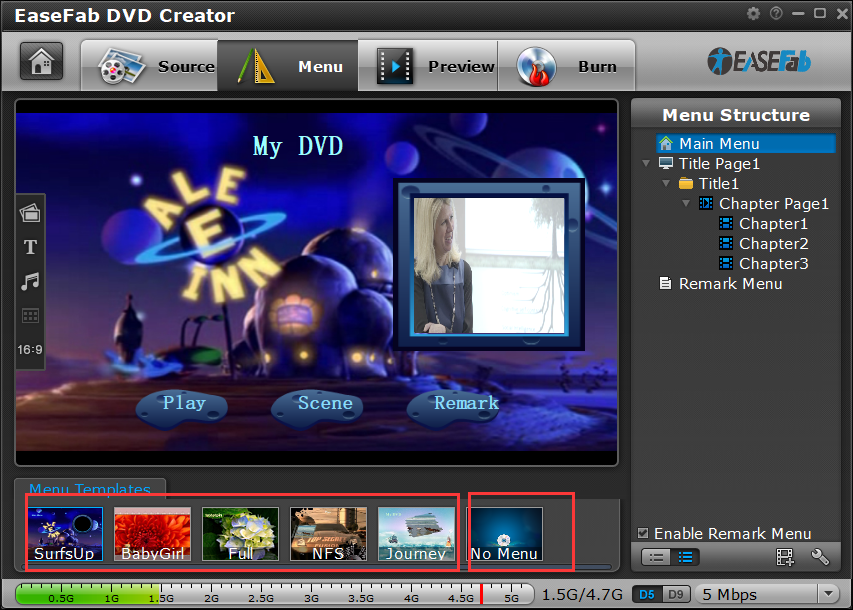
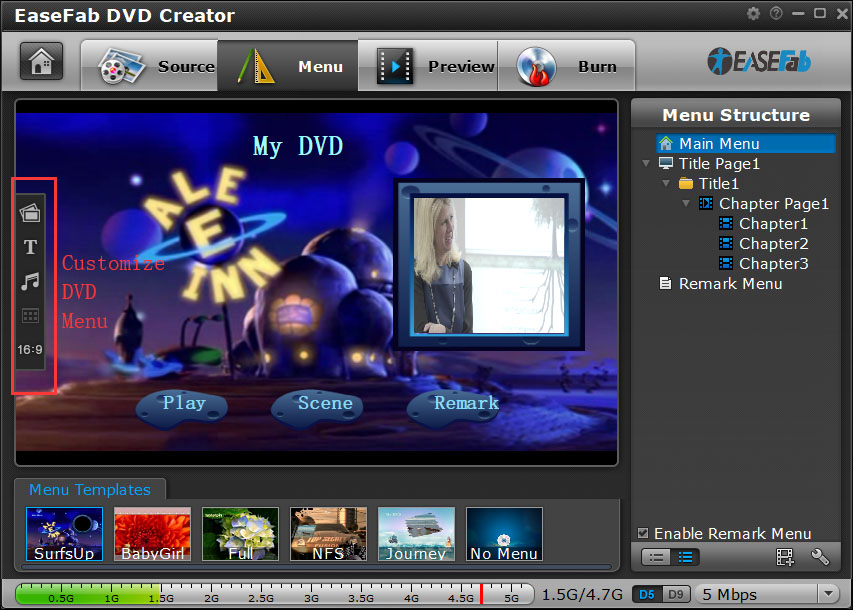
Next, go to the Menu tab to choose a DVD menu template from the free menu designs provided on the below panel. To use a preset menu template from DVD Creator, simply double-click on the template. When/if you don't need DVD menu, use "No Menu" from Menu Templates area.
Customize DVD Menu:
To customize an object, you have to select it first. Cut over in the Menu Structure area to select the page that you'd like to custom. Custom includes changing the DVD menu template/style, menu text, display aspect ratio and background for the DVD menu. You can also set chapter mark, and playback mode.
Step 4. Burn iPhone Videos to DVD
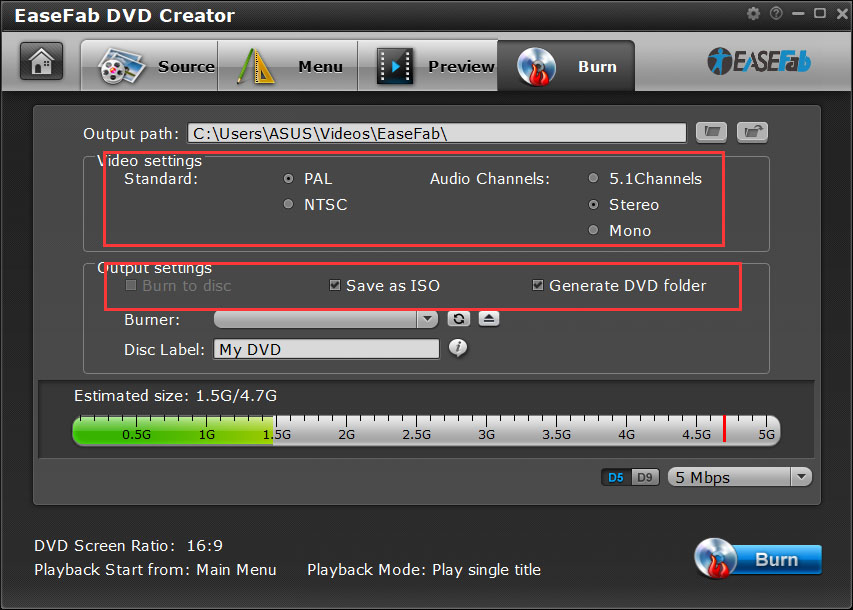
Click the Preview tab to check all your creation, you can go back to make changes if something you're not satisfied. Finally, move to the Burn tab to burn iPhone videos to DVD. Choose Burn to disc option on the interface and finish the Burn Settings it asked. Then click the Burn button to start burning iPhone videos to DVD.
The burning time depends on the size of your videos. After finished, you can put the burned iPhone videos on DVD player and enjoy your videos on your TV with family and friends.
Tips: EaseFab DVD Creator writes content to single-layer 4.7 GB and dual layer 8.5GB DVDs. At the bottom of the main interface you can set DVD-5(D5) or DVD-9(D9) as target disc type.
Editor's Note: There are free solutions to burn your iPhone videos to DVD as well. Though the freeware does not contain advanced features, they cater to your basic DVD burning needs. You can refer to this article "Top 5 Free DVD Burning Softwares for Windows" to find a suitable one.
