How to Convert Video/Audio Files
Add source video files
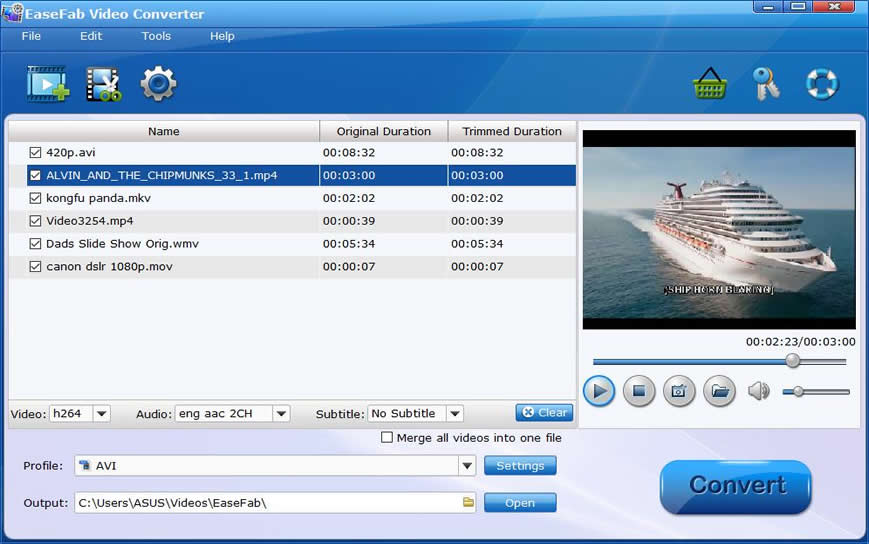
Click the Add Video button to load video or audio files from your computer or other devices like USB device, camcorder, MP4 player, etc. You can also directly drag and drop the files you want to convert to the main interface. Note that batch conversion is supported so you can add as many files as you like at one time.
Select an export format or device and destination folder
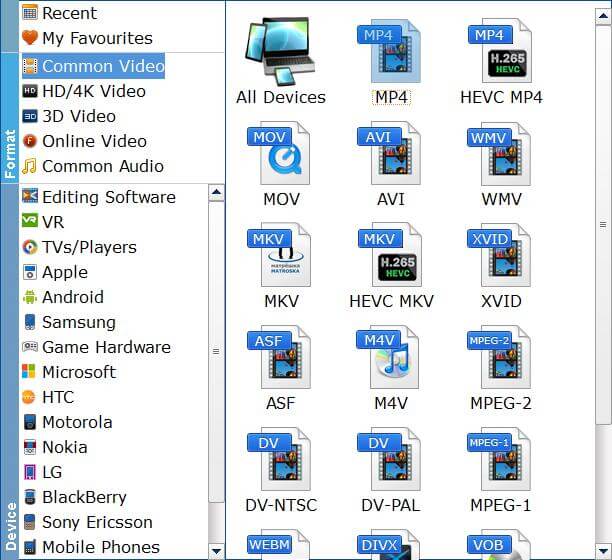
Click Profile (located below where your files are displayed) and select the format you want from the drop-down list. Just below Profile is Output, here you can browse your computer for a better destination folder for Video Converter to save your converted movies. As you see, all regular video and audio formats like MP4, MOV, MKV, WMV, AVI, FLV, MP3, WMA, WAV, M4A, etc. are provided.
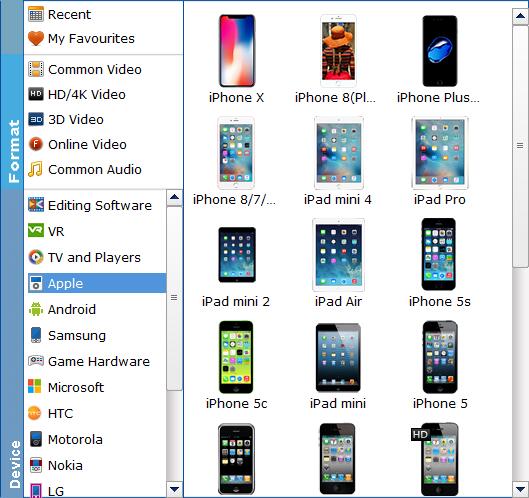
If you want to convert your movies for play on portable devices, including iPhone, iPad, iPod, HTC, Samsung Galaxy Tab S, Galaxy S5, S4, Nokia, SSony, PSP, Xbox 360 and more, you can simply browse to find the icon of your device and select it as the output format to get videos with optimized settings. All Idevices output files can be synced to iTunes automatically.
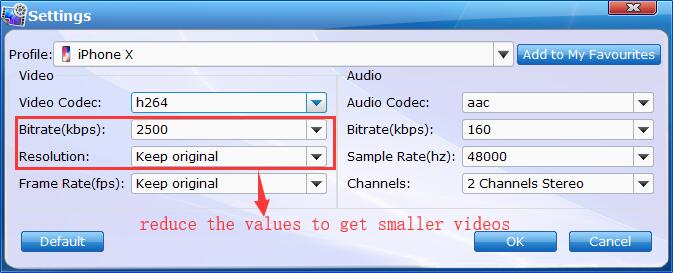
Tips: The default setting works well. Of course, if you want to customize video and audio encoding settings, just click the Settings button to customize these settings. You can adjust the output video/audio resolution, frame rate, bit rate, etc. to customize the output files to get the best quality you want.
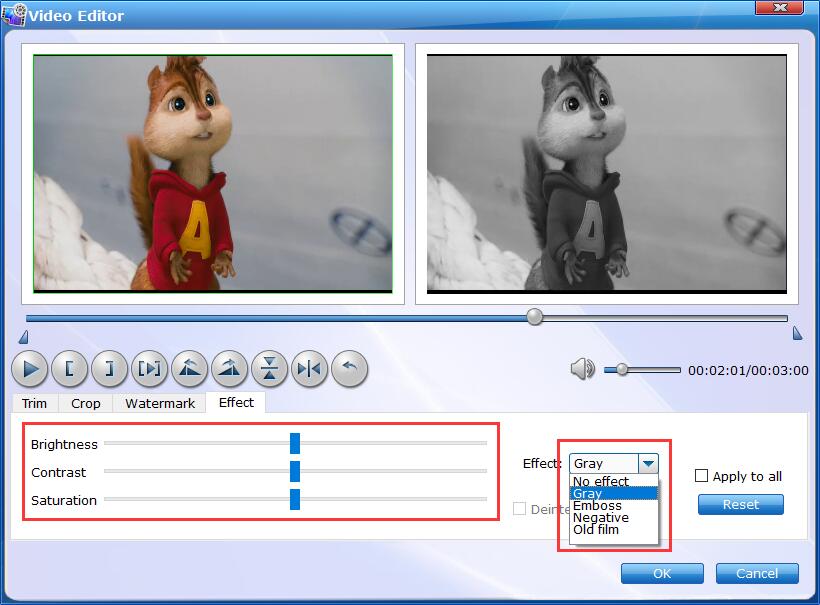
Edit the media files (optional).
you can click Edit button to personalize and touch up your videos in clicks. Video editing functions like Trim, Crop, Effect, Watermark, etc. are provided.
Learn More About Editing Videos >
Start conversion
Once you've selected the output file format you want, you're ready to rip. Simply click the Convert button to let the software start converting your movie files. The ripping time depends on the quality and duration of the output movie. Wait for the conversion to be done and click Open to get the converted video files.
