Although Apple claims that Final Cut Pro support processing H.264 video clips, you may encounter problems when editing some H.264 footage in Fina Cut Pro X, especially the H.264 video clips from digital SLRs.In fact, the H.264 compression format is a final deivery codec, it's not an ideal one you want to use for editing. In order to make your editing process simpler and less resource-intensive, you're recommended to transcode H.264 footage to Apple ProRes codec and import it into FCP X or FCP 7/6. For this purpose, this article will show you how to easily convert H.264 to Final Cut Pro's editing-friendly ProRes codec without quality loss.
Note: This workflow can be used for any camera which capture in .mov or .mp4 container with H.264 codec. For example: Canon 5D Mark III/II, Canon T6i/T6s/T5i/T4i/T3i/T2i, Canon EOS 7D, EOS 60D, Nikon D800, Nikon D810, Nikon D5300, Nikon D3200, Nikon D4, etc. This workflow can also be used for "found footage" which is H.264 with a container of .mov or .mp4. For example, footage pulled from Youtube, Vimeo, or the iPhone 6, 6 Plus, etc.
Converting H.264 to ProRes for Editing in Final Cut Pro X
The quick workaround is to use the easy-to-use yet professional app called EaseFab Video Converter for Mac, which is compatible with macOS Big Sur(10.16), macOS Catalina 10.15, 10.14 and lower. Even though most used post-production applications allow H264 to ProRes transcoding using their built-in export features, sometimes the process takes a significant amount of time, or the settings box has numerous confusing options that newbies find hard to understand. EaseFab bridges this gap by providing one of the simplest user interfaces, and the pre-configured presets that you can use to transcode H.264 or any other video format to ProRes without any hurdles or complications.
This excellent H.264 to FCP converter can process 4K/HD H.264 video files you shot with GoPro, DJI, iPhone, Android, camcoder or any other 4K/HD cameras (DSLR or mirrorless). With it, you can effortlessly transcode any H.264 footage to Apple ProRes 422, ProRes 422 HD, ProRes 422 LT, ProRes 4444 for using in Final Cut Pro and it works well and converts flawlessly. This program also comes a Windows version which allows you to convert videos to ProRes on a Windows (Windows 10 included).
Step 1. Import H.264 files into the Mac program
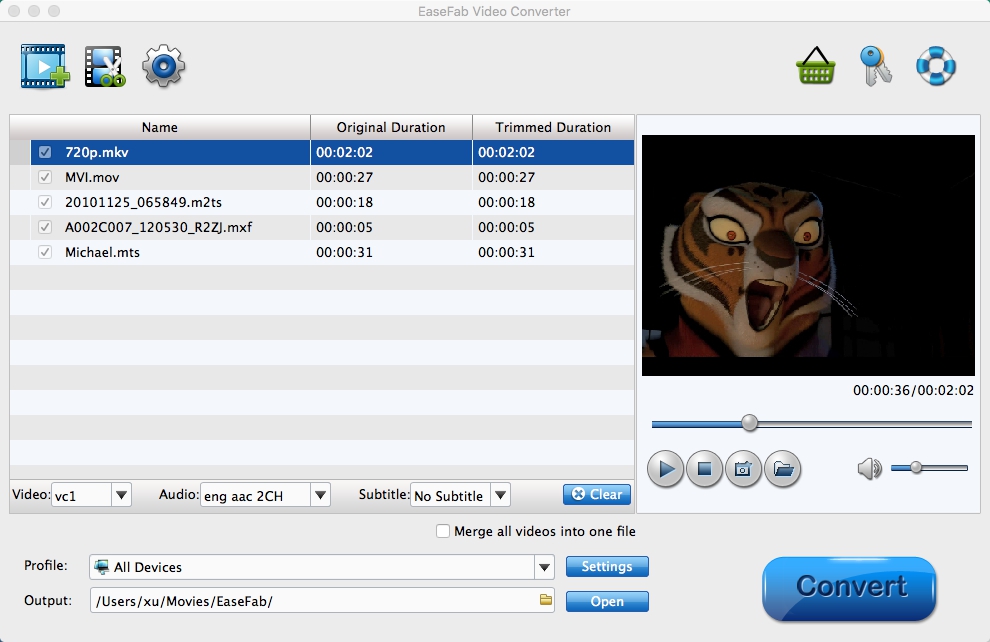
Download and launch EaseFab Video Converter on Mac. Click Add Video button to import your MP4 video. Dragging and droppping works too. (Note: batch conversion is supported, so you can several mov videos to the program to convert at a time.)

Step 2. Choose ProRes as the output format
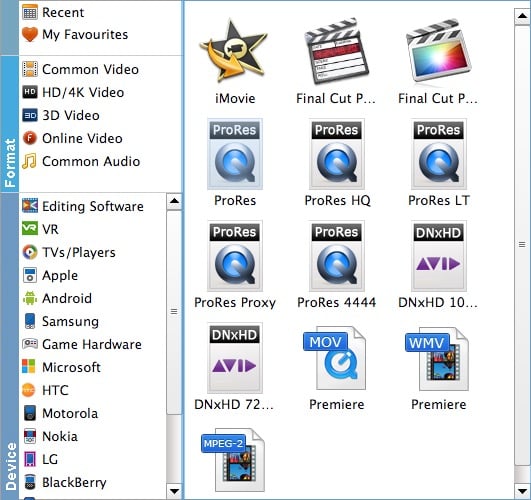
Click Profile bar and move mouse cursor to Editing Software category and you will see many options to convert your H.264 video for certain video editing software. Since you will be importing the video to Final Cut Pro after the conversion, have ProRes be your selected output format. You can also choose ProRes HQ or ProRes LT as the output format.
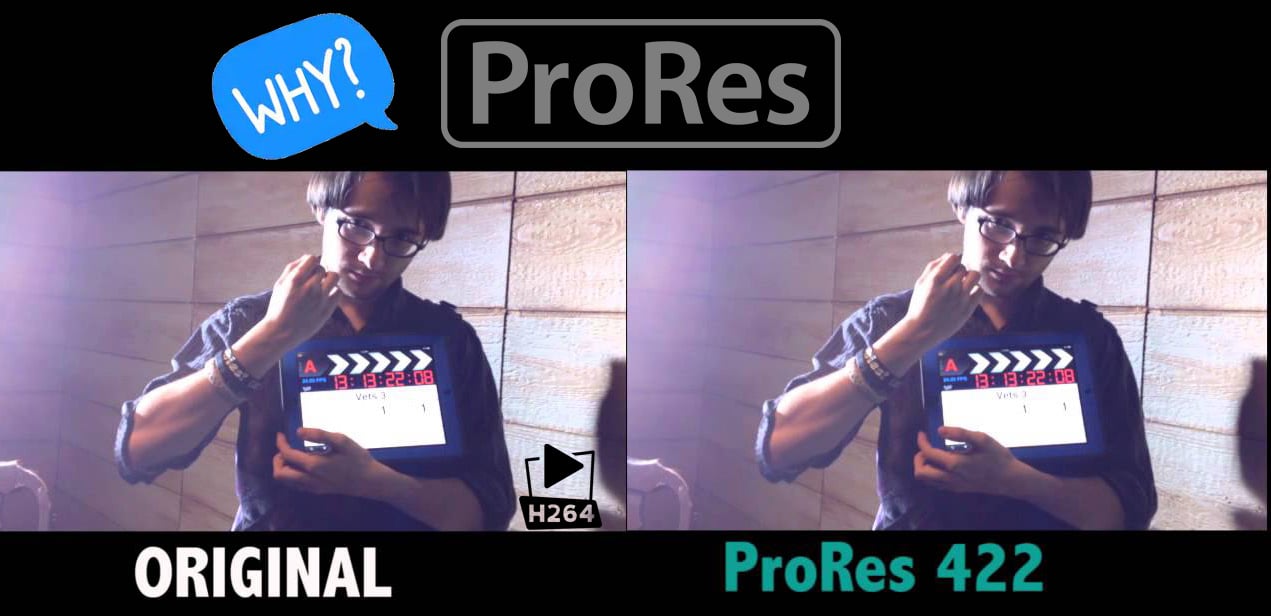
The ProRes files can preserve the best image quality and provide better performance when editing in Final Cut Pro, but please not that ProRes files typically need ten times as much storage of H.264-based files.

Step 3. Sart the conversion.
At this point, you can change the output filename or output path if you wish. If you feel satisfied with your options, Just hit the Convert button to activate H.264 file to FCP ProRes conversion.
After the conversion, click Open output folder to locate the result videos and then you can start fun away with editing H.264 footage in Final Cut Pro X or FCP 7/6 without crashing problem and avoid rendering.
What's so good about Apple ProRes compared with H.264 codec for editing?
To scratch the surface, ProRes files are loosely compressed, and your GPU finds it easy to process them during both editing and playback. This is not the case with H.264 files, and they do require more processing than ProRes. You can still work with H.264 video in Final Cut Pro, if you stuff your computer with RAM and it has enough processing power, but this is always going to be second-best to working with a codec (e.g. ProRes, DNxHD) that is designed for editing.

So, what's so good about Apple ProRes?
What's good is that Apple ProRes doesn't compress the video as much. It trades storage space and bitrate for quality and ease of processing. ProRes typically needs ten times as much storage. That's a lot, but hard drives are tending towards being free, so it hardly matters these days. Because ProRes files are already loosely compressed, your computer's GPU doesn't have to put additional efforts to decompress the data for processing when footage is opened in a media player or imported to a post-production program for editing.
ProRes is a 10-bit codec. This means that in contrast with others, ProRes files have more shades while working with Color Grading options in a post-production tool. In ProRes, each frame of footage is compressed individually (I-frame). This is the reason the files are big. However, such type of approach puts less load on the GPU as it doesn't have to decompress complex compression architecture while editing.
Overall, H.264 is really optimized to be a delivery codec while ProRes is optimized to be an editing codec. That said, if you just need to do a simple edit and your Mac has the power to edit H.264 you can get away with it no problem, but if you plan to do a heavy edit with lots of transitions and effects and color grading you will be best served by ProRes.
Once you've converted from H.264 to Apple ProRes, your edits with on Mac with Final Cut Pro X, iMovie, Adobe Premiere, DaVinci Resolve, Avid, etc. will fly. These codec is so efficient that you can play multiple streams with a fraction of the effort you need for a single stream of H.264-based videos. As an example, on my Macbook Air, playing any HD Long-Gop clip will cause the fan to come on at full power within seconds, but with ProRes, I can play a clip - in much higher quality - with no sign of the fan.
