VirtualDub dedicates to processing AVI files and can be extended with third-party video filters. Although it's not so fully-featured as other professional video editors, it certainly can accomplish more than a few tasks that you might think you need other separate applications for. As you may know, VirtualDub, as stand-alone, cannot handle MP4, MKV, FLV, MOV or any other files besides AVI. And that's why you will encounter problems when you try to open MP4 files in VirtualDub like these:
"Hi, How to open .MP4 files in virtualdub? it says file is not supported or something.. i hope there's a plugin that allows me to open .mp4 files. The reason i want to open it in virtualdub is so that i can run a sharpen filter for the mp4 video. this is so tahti can watch on my PSP."
"How can edit Android-grabbed MP4 files in VirtualDub?"

Then, how to get MP4 files and VirtualDub to play nicely? Don't worry! Actually, there are three different methods to use MP4 files as input in VirtualDub other than AVI. Now try out the following methods.
Method 1: Download plugins for different formats
The stand-along VirtualDub supports AVI related video files only. But with the help of plugins, you can load different file formats. You can download the plugin you need, and unpack it into the VirtualDub plugin folder. But remember that those plugins only allow you to load certain file formats. You cannot save those files in MP4, MOV, FLV and other formats, but in AVI. Here four plugins are recommended:
# 1. Ffmpeg Input Driver: The plugin is based, as the name may suggest, of the ffmpeg libraries. It can handle 31 different file formats, among them are the popular MP4, MKV, FLV, MOV, RM, RVMB, WMV and TS.
# 2. fccHandler: It can handle MPEG-2, FLV, WMV, MKV, FLC as well as AC-3 ACM codec. However, the its website is unavailable at the moment for some reasons. But there are two mirrors with his stuff: Mirror 1, Mirror 2.
# 3. Haali Media Splitter: Handles MP4, MKV, MTS, M2TS.
# 4. ffdshow-tryouts: Handles MP4, MKV, MTS, M2TS.
Method 2: Create an AVISynth script
If you know how how to use AVISynth, you can simply open different kinds of video formats in VirtualDub. Basically, it works like this: First, you create a simple text document with special commands, called a script. These commands make references to one or more videos and the filters you wish to run on them. After that you run VirtualDub and open the script file. Then VirtualDub doesn't aware that AVISynth is working in the background, but thinks it's directly opening a filtered AVI file. Now let's see how to make the magic happen:
1. Install K-lite Codec Pack and update FFDShow
First, ensure that the target file is playable in Windows Media Player. So you need to install the necessary codecs to your computer. K-lite Codec Pack which always provides the latest and complete codecs is just fine. You can select a suitable version and choose the codecs you need.
Then open the target video file with Windows Media Player and it should play. If not, you should update your FFDShow to the latest version.
2. Install AVISynth
Then download and install AVISynth, and tick all the options during the installation.
3. Create an AVISynth Script
Open NotePad. Type DirectShowSource("c:locationtovideo.mp4"). Then replace c:locationtovideo.mp4 with the location to your video file (right click the video file to gain the location). Then go to "File" > "Save as" > "Save as Type: All files" and name your video file as video.avs. You can now import the video.avs file in Virtualdub.
Method 3: Convert MP4 to VirtualDub supported AVI
Another way to edit MP4 in VirtualDub is to convert it to AVI so that you can import the media into the application. EaseFab Video Converter is the recommended program you can use for this task. With it, you can easily convert any MP4 (HD, 4K also included), MKV, MTS, MOV, FLV and many other formats to AVI for smoothly editing in VirtualDub. In this converter, professional editing functions are provided to you: split, merge, trim, crop, add watermark, adjust video effect, edit audio and insert subtitles. For basic video editing tasks, you can even replace your VirtualDub with it.
How to convert MP4 to AVI for VirtualDub?
Step 1: Install and launch EaseFab Video Converter in your PC. And then click "Add Video" button to load your MP4 videos into it. Batch conversion is supported so you can import multiple video files at a time.
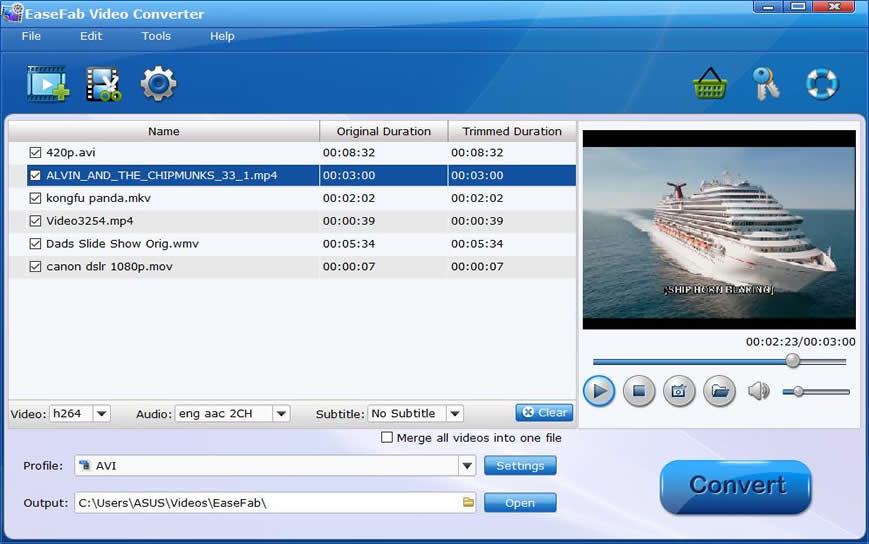
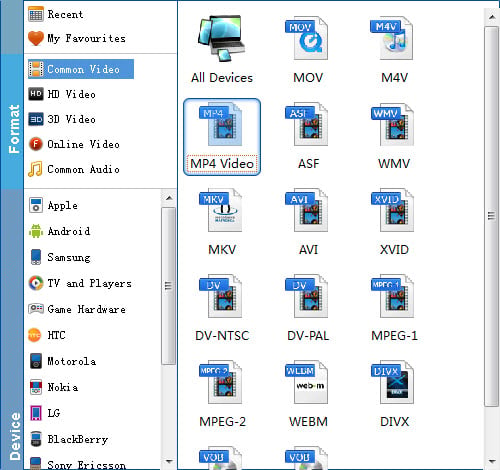
Step 2: From the drop-down list of "Profile" you can select "AVI" from "Common Video" category as the output format. When you have selected the output format, you should select a destination folder for the output file by clicking "Output Folder", you can also let it be the default one.
Tips:
1. Click the "Settings" button to adjust the parameters of Video Settings and Audio Settings before conversion. You can also change the destination folder before converting MP4 to VirtualDub or converting VirtualDub to MP4 or related portable devices.
2. By clicking "Edit" button, you can trim, crop the video, or add watermark, adjust effect, attaching subtitles for pre-editing your video files so that you can simplify your editing.
Step 3: Click the "Convert" button on the main interface and the software will start to convert MP4 to VirtualDub friendly video formats immediately. When the conversion finishes, click "Open" to find the converted video files. Then you can effortless transfer the video files to VirtualDub for easy editing.