The Canon C300 camera is a dream to shoot with and hold. It's a very natural progression from any one of Canon's digital SLRs, and holds its own against all of the other manufacturers, especially with the low-light performance. However, with every camera, comes many questions about workflow. The term 'workflow' can be fairly broad, but today we're looking at importing Canon C300 MXF footage into Final Cut Pro (FCP X/7/6) without using Canon XF Plugin.
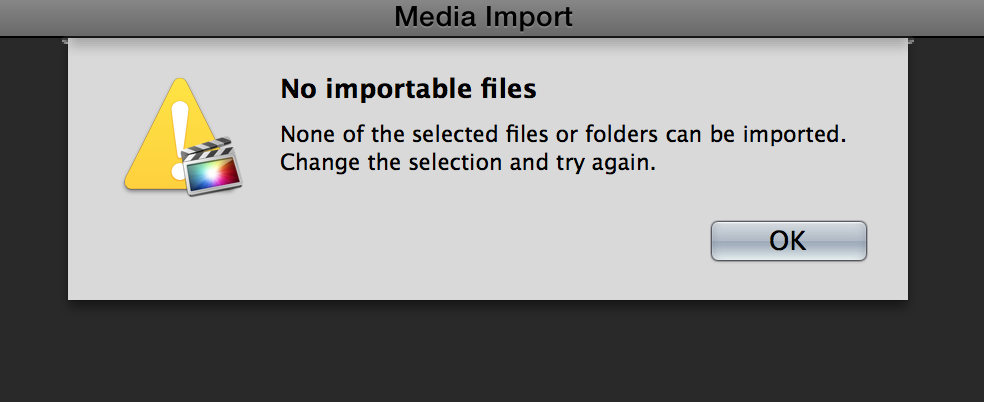
As you know, Canon provides a piece of software called the Canon XF utility. You can use the Canon XF Utility download clips off your original media from a CF card (The C300 records to Compact Flash cards) and backing up the clips in a unique folder based on the date and time of the transfer. Everything ready? No! Next step you'll need to install Canon XF plugin and finally launch Final Cut Pro to begin the import process. Despite of the tedious process, many folks are facing problems when importing Canon C300 MXF files to Final Cut Pro X or FCP 7 like this:
"FCP X 10.1.3 not recognizing Canon C300 MXF footage - Have some footage from the field on a drive sent to me. All folder paths seem fine. Installed latest Canon software/driver for FCPX ( Canon XF Plugin for Final Cut Pro X 2.2 [released 6/26/14]) FCP is showing an error and when trying to import."

In fact, there is an alternative easy way to fix the issue. Final Cut X and FCP 7 work best with clips in the ProRes encoded MOV format, but Canon clips are stored in the MXF format. So the easy workaround is to convert the Canon C300 footage to ProRes format. Actually, it's not as difficult as you imagine. What's need is a just a common video converter like EaseFab Video Converter for Mac. It supports creating high quality ProRes video, which ensures maximum editing quality and efficiency when working with Final Cut Pro. It can convert almost any video to ProRes so you can import your video to Final Cut Pro for editing. The guide below will teach you how to convert and import Canon C300 MXF files into Final Cut Pro X/7 so you can make engaging movies with your C300 footage.
Guide: Transcoding Canon C300 MXF to ProRes for FCP
Step 1. Load Source C300 footage
Launch EaseFab Video Converter for Mac and click the Add Video button to import C300 MXF files. Note that you need to transfer MXF files from your Canon C300 to Mac Hard Drive before conversion.

Step 2. Choose ProRes as output format
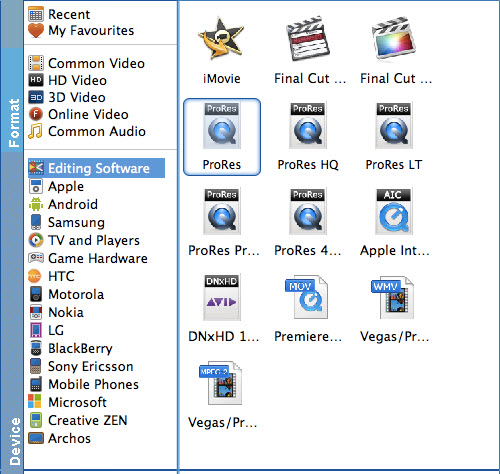
Click on the "Editing Software" and you will see options to convert your .avi video for certain video editing software. Since you will be importing the video to Final Cut Pro after the conversion, have Final Cut Pro or ProRes (the same outputs) be your selected output format.

Tip: You can customize the video/audio settings for Final Cut Pro: 1920*1080 vide size; 30fps frame rate(for original 60fps videos) or 25fps frame rate(for original 50fps videos).
Step 3. Start converting MXF to ProRes
Finally, click "Convert" button and your Canon MXF files will be converted into ProRes .MOV files ready to be imported into Final Cut Pro X or FCP 7.
Open Final Cut Pro. To import your convert video files, head to the menu bar and click on File > Import, then "Files". A small window will appear and allow you to browse through files in your Mac to locate and import your video. You also have an option to drag-and-drop your file to the left pane of the Final Cut Pro window. Once your video is imported successfully, you can do all you want with it in Final Cut Pro.
