Adobe Premiere Elements with stunning features is a popular video editing tool for us to edit and make personalized videos or movies on both Mac and Windows. For those who want to import DVD footage to Premiere Elements for editing, it isn't without hiccups because Premiere Elements does not support DVD importing. Fortunately, there is an easy way to fix this problem. Read on for details.
To get the clips off of DVD dics and into Adobe Premiere Elements for editing, you'll need to convert your DVD footage into a format that works natively within Premiere Elements. To finish the task, EaseFab DVD Ripper (or DVD Ripper for Mac) will be a great helper. By running it, there is no need to set the codec yourself: the program has optimized presets for Adobe Premiere Elements. With it, you can effortlessly convert your DVD files including DVD discs, Video_TS folder, ISO/IFO files for smoothly importing and editing in various non-linear editing systems (NLE), including Adobe Premiere, Premiere Elements, Sony Vegas, Final Cut Pro, iMovie, Avid Media Composer, Cyberlink PowerDirector and more.
Download the DVD to Premiere Elements Converter free trial:
How to convert DVD for editing in Premiere Elements
Note that the guide takes the Windows (Windows 10 included) version screenshots for example. The way to rip DVD to Adobe Premiere Elements on Mac (El Capitan included) is the same. Just make sure you get the right version.
Step 1. Add DVD Movie
Launch EaseFab DVD Ripper and click "Load DVD" button to select the DVD files from your DVD disc, DVD folder, ISO image file or IFO file to rip. Then loaded files will be displayed on the left source pane with titles listed. You can then select the chapters you want by clicking the checkbox.
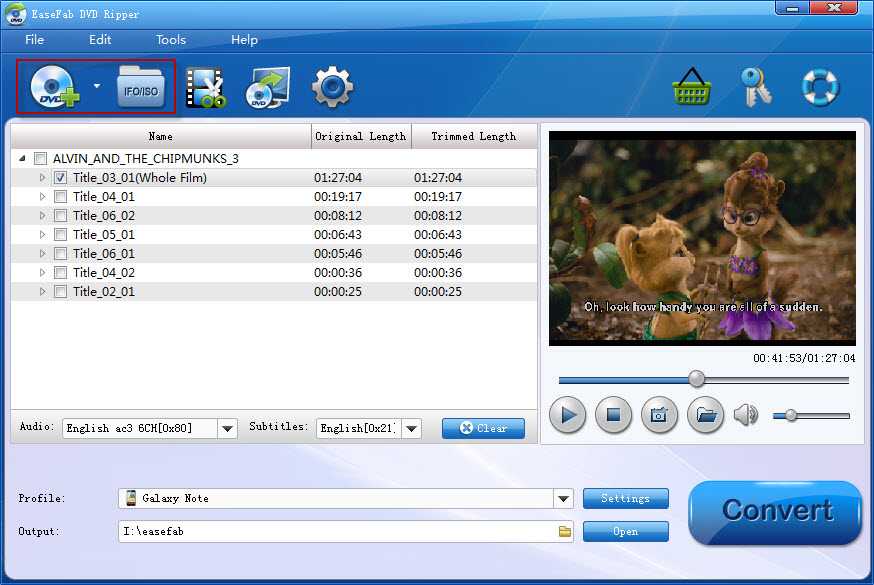
Tips: A DVD may contain many titles more than the main movie, such as the trailers or commercials. By default, EaseFab DVD Ripper choose the longest title which is usually contains the main movie. And this helps ripping without converting unnecessary titles. Of course, you can trim to select your wanted clips.
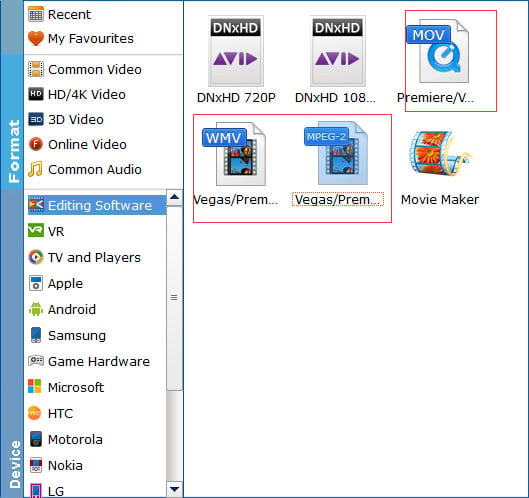
Step 2. Select the output format
Click "Profile" column, and move mouse cursor to "Editing Software" category. Here you're recommended to choose "MPEG-2" as the output format. The output videos will keep the original quality of DVD video and seamlessly fit Adobe Premiere Elements.
Step 3. Start the conversion
When all is done, click "Convert" to begin the DVD to Premiere Elements conversion. Just wait for the process to finish. After that, you can get the MPG videos and just open Premiere Elements and import the converted DVD videos for editing.