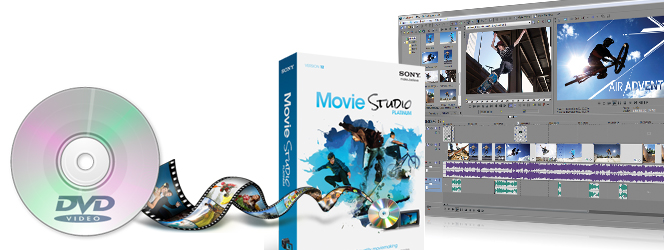
Sony Movie Studio (formerly Sony Vegas Movie Studio) is a consumer-based nonlinear video editing software designed for the PC. It lets you turn your videos into eye-catching movies in clicks! No wonder so many people want to import video scenes from DVD to Sony Movie Studio for further editing. However, it isn't without hiccups because Sony Movie Studio does not support DVD importing. Luckily, there are always solutions out there that allow us to achieve our goal smoothly. In this article, we will outline two possible ways to load DVD footage to Sony Movie Studio. Just go through the page to learn details.
Solution 1:
PS: Only For homemade DVD
Sony Movie Studio allows you to open up a DVD .IFO file. This imports the entire .VOB chain for both video and audio tracks.
Click File / Open, then navigate to your VIDEO_TS sub directory and enter *.IFO in the File name input field.
For a regular DVD you will see a VIDEO_TS.IFO, and a VTS_01_0.IFO. Select the VTS_01_0.IFO file and click on Open.
Note: Don't try this on a DVD disk because Sony Movie Studio will try to build an .sfk file containing audio peaks in the VIDEO_TS directory.
Solution 2: Rip DVD to Sony Movie Studio Compatible Formats
PS: Available for both homemade and commercial DVDs
Sometimes, you may want to extract some clips from your purchased DVD and put into Sony Movie Studio to create a new project file for further use. On this occassion, Movie Studio won't allow you to import it because it's a copyrighted video. Fortunately, there are many tools out there that allow you to rip DVDs into a fully compatible format with Sony Movie Studio. One of the best programs out there is EaseFab DVD Ripper, which has optimized Sony Movie Studio presets for easy access. Here I will take the program as example to show you how to import DVD footage into Sony Movie Studio easily and quickly.
Simple steps to convert and import DVD to Sony Movie Studio
Step 1. Import DVD movie
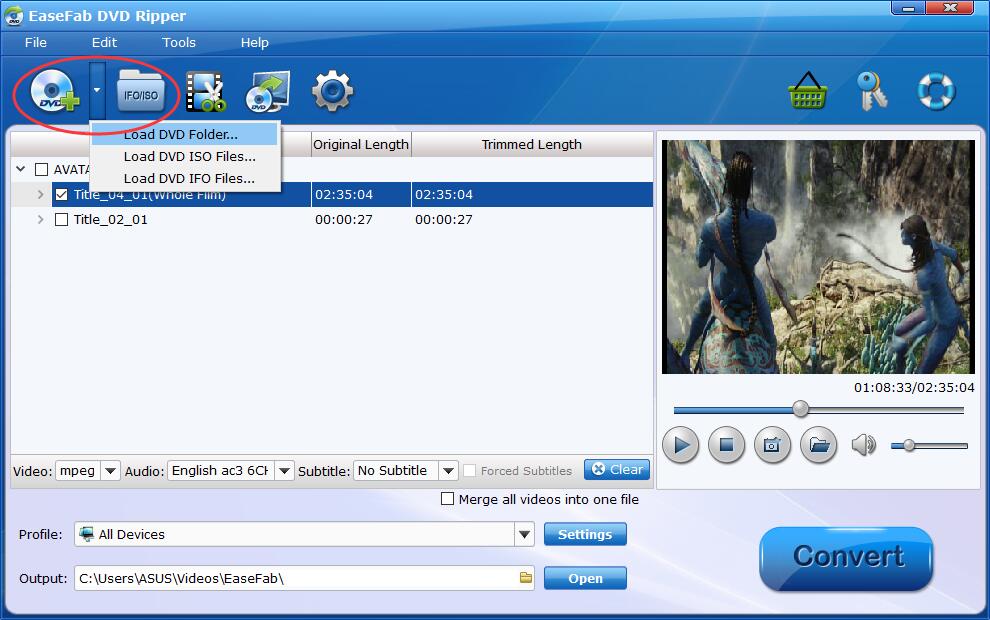
Insert the DVD disc into your computer's DVD drive and click the "Load DVD" button on the top left to select and load the DVD movies you want to edit in PowerDirector. ISO and IFO files are also supported. After the movies are loaded, you can preview them on the right viewing window and adjust volume or take snapshots freely.

Step 2. Select the output format
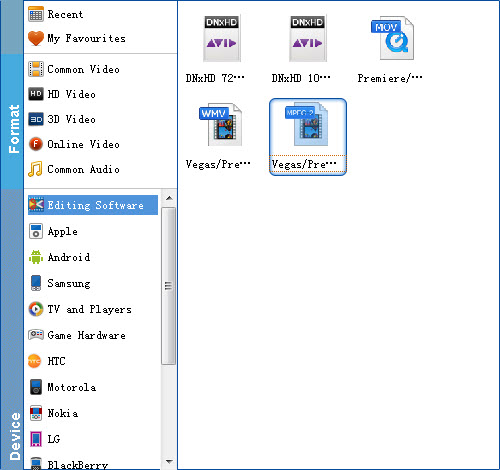
Click the Profile bar, and move mouse cursor to "Editing Software" and then choose "MPEG-2" as the output format. The output video will keep the original quality of DVD video and seamlessly fit Sony Movie Studio 13, 12, 11, 10, 9, etc.

Tip: Video editing functions like Trim, Crop, Effect, Watermark and Subtitles are provided. For example, if you just want to import a clip from DVD to PowerDirector for editing, you can click Edit button to enter Video Editor Windows and then from "Trim" workspace to create a custom clip from a larger scene. To adjust the duration of your clip, move the sliders below the screen to the start and end points you want.

Step 3. Start conversion and then add videos to Powerdirector
When all the settings are fine, click the Convert button to start converting your DVD movies to optimized MPEG-2 video files for Sony Movie Studio.
Soon after the conversion is finished, just click "Open" button to get the converted DVD files. Now it would be easy to import DVD footage to Sony Movie Studio for further editing perfectly.
