-- So I have a large mkv file (900 mb) and I want to upload it. Will YouTube accept it or should I somehow convert it to mp4?
-- How do you upload MKV files directly to YouTube if they aren't supported? Doesn't make sense. I keep getting "invalid file." I convert my MKV with subtitles that when converted, takes all the text away just to make it a file format YouTube will accept, yet I need the subtitles in it too! How to get both?
YouTube is a popular video-sharing site, allowing us to view and upload digital videos. But there is also restriction on video format. Only those videos in MOV, 3GP, MPEG-4, FLV, AVI, WMV and WebM can be accepted by YouTube for uploading. So, if you want to upload MKV files to YouTube, firstly you need to convert MKV to YouTube supported file formats (MP4 is highly recommended).

Part 1: How to Convert MKV to YouTube Accepted File Format
Incompatibility is the reason why YouTube won't accept MKV files for uploading. Therefore, converting MKV files to YouTube could get everything done. To do this, you can adopt EaseFab Video Converter for help. This program can convert all your 8K/4K/1080P/720P MKV video files to YouTube supported format like MP4, FLV, AVI, WMV, WebM, etc. for uploading with ease. Intel QSV and Nvidia CUDA/NVENC hardware acceleration to boost video processing speed. And, it outputs high quality video.
Besides conversion, it also comes with a built-in editor which can help you edit MKV video for uploading onto YouTube by trimming, cropping, merging, inserting extra subtitles, etc. You can also adjust video audio parameters like aspect ratio, resolution, frame rate, etc for uploading on YouTube.
[Tutorial] How to decode MKV to YouTube supported format/size/length
To begin with, you need to download and install EaseFab Video Converter Windows or Mac version on your computer. The guide below takes the Windows version for an example. The Mac version has the same process.
Step 1. Load the MKV files
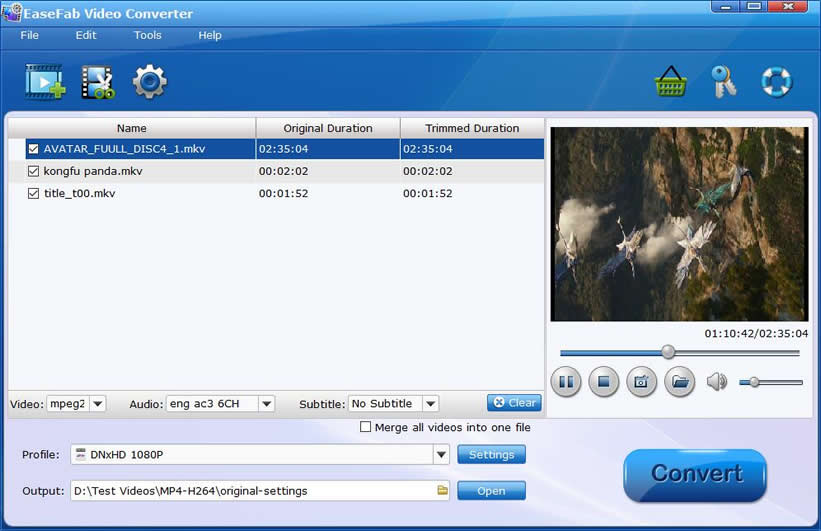
After downloading, install and run EaseFab Video Converter on your PC or Mac, simply drag and drop your MKV files to the program. You can also click Add Video button to load your source files. (Note: batch conversion is supported, so you can load more than one file to save time.)

Step 2. Select output profile.
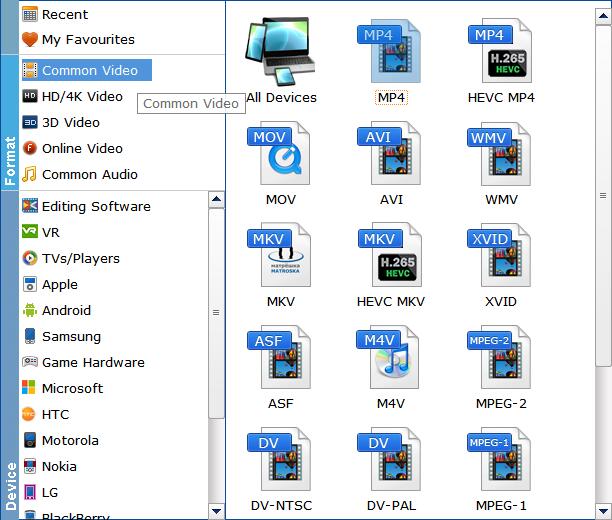
Click Profile bar and move mouse cursor to Common Video category, then select MP4 (codec: h.264+aac) as the output format. According to YouTube Help Center, a MP4 video format with H.264 video codec and AAC audio codec is the best choice for uploading on YouTube.

Step 3. Edit MKV video for uploading to YouTube. (Optional)
If you want to trim, crop or add effects/watermark, click Edit button (See how to edit video >>). If you want to adjust video audio parameters, such as resolution, bit rate, and frame rate, please click the Settings button.
Note:
▶ By default, users are allowed to upload videos no longer than 15 minutes. If you want to put longer MKV video on to YouTube, you should verify your account to increase your limit.
▶ With an up-to-date browser version, you can upload MKV files more than 20GB. And the maximum file size is 128GB and maximum duration is 11 hours.
▶ YouTube applies 16:9 aspect ratio players. If you are uploading a non-16:9 MKV video, it will be processed and displayed correctly as well, but with pillar boxes (black bars on the left and right) or letter boxes (black bars at the top and bottom) provided by the player.
Step 4. Start conversion.
Tap small Folder icon in the Output bar to specify a folder to store encoded MKV video. When all settings are done, you can hit Convert button to MKV to YouTube conversion started.
Part 2: How to Upload MKV to YouTube on Windows/Mac
Once done, you can upload the converted MKV file to YouTube following those steps:
1. Open YouTube website on your web browser;
2. Click "Upload" at the top right corner;
3. Click "Select Files to Upload" button to choose the new file you just get;
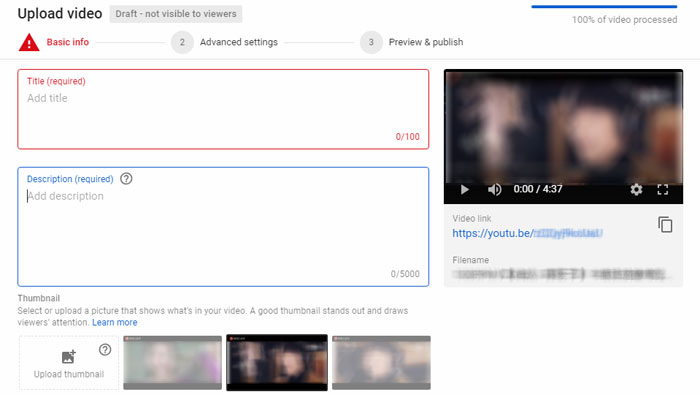
4. Fill in video information like title and description;
5. Press "Publish", then your converted MKV video will be successfully uploaded to YouTube.

