How to Rip and Upload Blu-ray Library to Cloud Storage Device


"So I've got a bunch of DVDs and Blu-rays that I never take out of the case any more, I want to get them ripped and on to a cloud service like Plex (or a different one if there's a better service, that's just the only one I know.) I'm looking for advice on the best software to rip the movies, ideally with the menu and everything intact."
We keeping seeing posts like this on Reddit, Facebook, etc. Porting your Blu-ray library to cloud storage services opens up a world of possibilities, allowing you to stream and play your favorite movies through Internet on whatever cloud-compatible devices anywhere anytime. On ther othe hand, you can save up your local storage space and keep your Blu-ray discs from from troubles like disc loss, scratch and damage. It's time to embrace the flexibility of cloud playback.
Obviously, you cannot directly upload Blu-ray to cloud storage services, whether it's Google Drive, Dropbox, Apple iCloud, iDrive, OneDrive or Amazon Cloud. To achieve your goal smoothly, the proper solution is to rip Blu-ray to cloud-friendly formats with a simple disc-ripping program and then upload the ripped Blu-ray movies to cloud for further streaming to Plex, TV, Roku, Apple TV, etc. Here is how to do it.
Table of Contents
Part 1. What You Need to Uploading Blu-rays to Cloud Storage?
To finish taks, there are something you need to prepare in advance. First of all, you need to the proper hardware—specifically, a Blu-ray drive that can read, burn, and rip and the proper Blu-ray ripppiing software that can decrypt, rip and encode the Blu-ray discs to a digital file format that your cloud storage supports.
- Your Blu-ray discs.
- A Blu-ray disc drive. You should be picking a Blu-ray drive that can read, burn, and rip (4K UHD) Blu-rays. For internal options, the ASUS BW-16D1HT is a great option, and the price isn't going to shatter the bank. For external options, the Archgon MD-8107 is also easy on a budget; however, you're limited to just Blu-rays if you connect to a Mac.
- A program to rip the files. In this article, we'll be using EaseFab Blu-ray Ripper (available for both Windows and Mac users). It's a time-tested and reliable software that allows you to effortlessly rip Blu-rays and DVDs to cloud compatible formats with just a few clicks.
Why Should you Use EaseFab Blu-ray Ripper instead of MakeMKV?
MakeMKV is the first choice of many users when it comes to ripping Blu-ray discs. However, the output format is limited to MKV and the generated MKV file from Blu-ray disc is always in huge size (almost as the same as the original Blu-ray discs at 25-50GB). The huge MKV files will takes lots of time to be uploaded, or even can be uploaded to almost all cloud storage services. Let alone stream them to your smartphone, tablet or other device.
Part 2. How to Rip Blu-ray to Cloud-Friendly Formats
EaseFab Blu-ray Ripper is the best Blu-ray to cloud ripper in the market which is able to rip any copy-protected Blu-rays. It's the best choice if you need to save your entire Blu-ray movie collection to the cloud as it can rip a Blu-ray to MP4 in 10~15 minutes. You can use it to convert Blu-rays and DVDs to any format with good quality-size balance for Dropbox, Google Drive, Apple iCloud, OneDrive, Amazon Cloud and more.
To begin with, you need to download and install the Blu-ray to cloud converter on your PC or Mac. The guide below takes the Windows version for an example. Mac version has the same process.
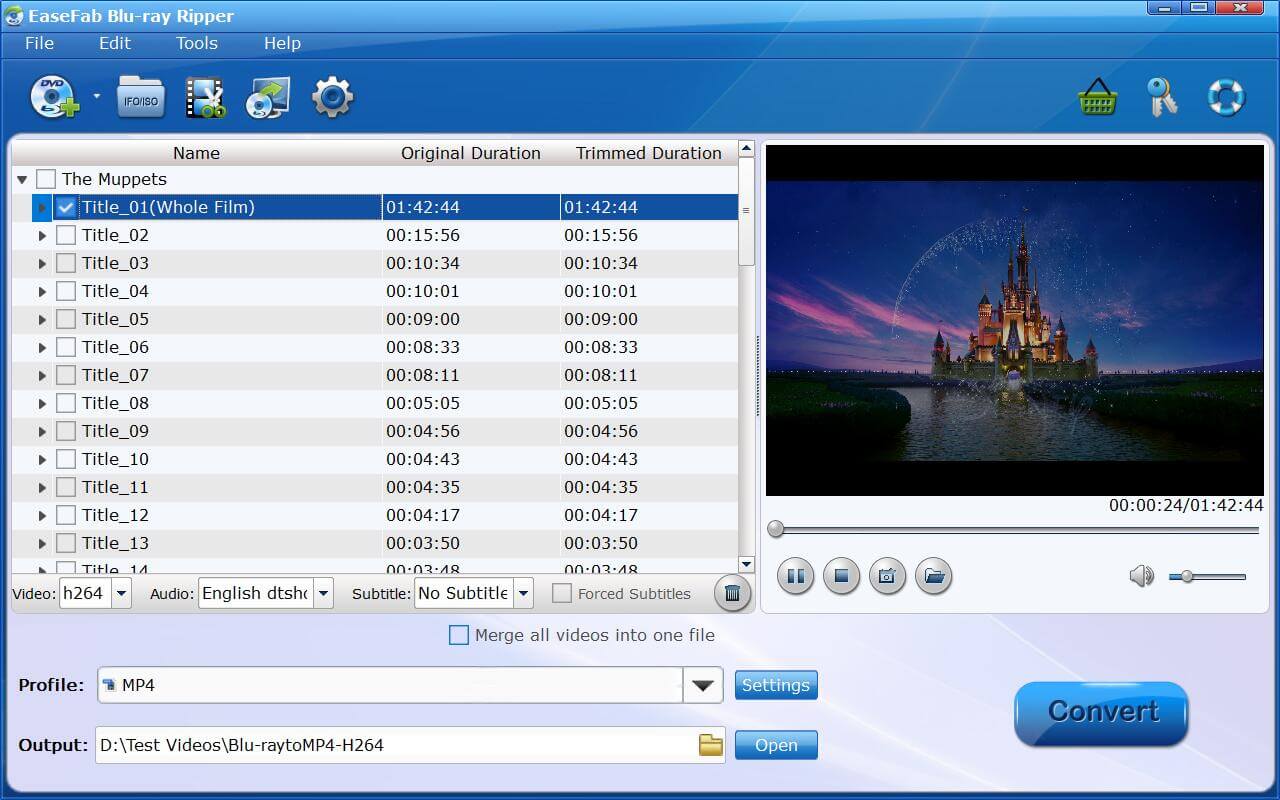
Step 1. Load your Blu-rays.
Launch EaseFab Blu-ray Ripper and then insert your Blu-ray disc into your Blu-ray drive that have been connected to your PC. Click Load Disc button to load the Blu-ray movie you want to rip for cloud storage. BDMV Folder, ISO image and VIDEO_TS folder can also be taken as source for decoding.
This Blu-ray ripper will easily detect the correct title hiden in Blu-rays. At the bottom, you can select your desired subtitle and audio track.
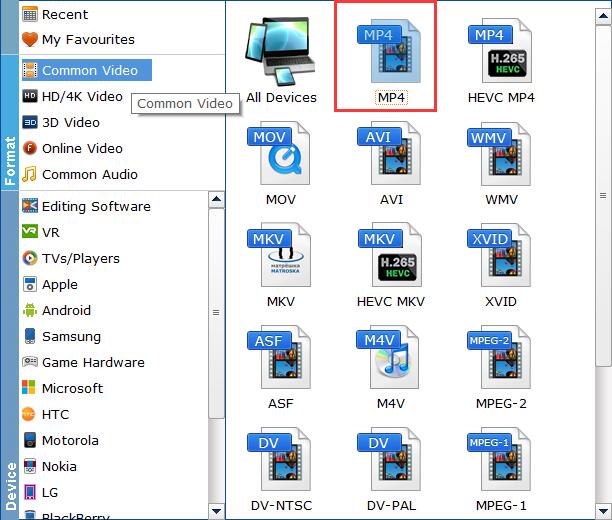
Step 2. Choose a proper output format for cloud storage.
The selection of output format depends on your specific need:
1. If you only need to store Blu-ray digitally and put the movie library to the cloud, you don't need to consider about the format matter. Generally, almost all the mainstream video and audio formats are supported by the cloud service. If you are still unsure of the media format, check the table below.
Cloud storage service |
Supported Video Formats |
Supported Audio Formats |
Google Drive |
WebM, .MPEG4, .3GPP, .MOV, .AVI, .MPEGPS, .WMV, .FLV, .ogg |
MP3, MPEG, WAV, .ogg, .opus |
Dropbox |
.mp4, .mov, .mkv, .mpeg, .mpg, .mts, .avi, .dv, .3gp, .asf, m2ts, .webm, .vob, .wmv. |
.aac, .aif, .aiff, .flac, .m4a, .mp3, .wav |
Amazon Cloud |
MP4, QuickTime, AVI, MTS, MPG, ASF, WMV, Flash, HEIF, HEVC, and OGG. |
MP3, MP4, FLAC, OGA, OGG, and WAV |
Microsoft OneDrive |
3G2, 3GP, ASF, BMP, HEVC, M2TS, M4V, MOV, MP4, MP4V, MTS, TS, WMV |
MP3. AC3 is not supported |
iCloud |
MP4, MOV |
AAC, MP3, FLAC, AC3 |
2. If you desire to play the converted Blu-rays on Apple TV, iPad, iPhone Samsung table, PS4, Xbox One and any of other portable device, you can choose directly from the device profile listed on corresponding device category.
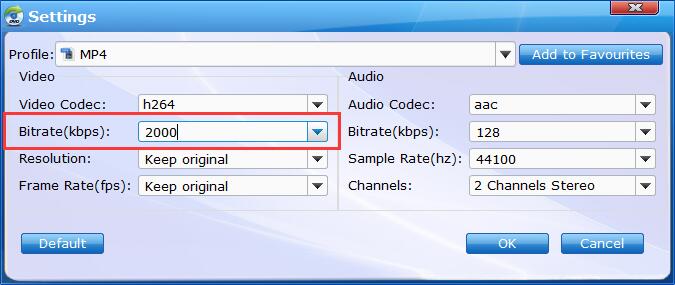
3. For general uses, MP4 (codec: h.264+aac) in Common Video is recommended, as it is widely supported by many devices and media players. If need to get a good balance between file size and output quality, flexible options are offered to further reduce the size of the ripped video. Click Settings button beside the profile bar and enter into the parameter settings page. A slew of other variables such the video/audio codecs, pixel dimensions, frame rate, bit rate, audio sampel rate, etc. will help convert a Blu-ray at 40.1GB to a smaller MP4 file at about 1.5-2.5GB in size to make more room.
Recommended video size settings:
- You're not suggested to adjust the frame rate and aspect ratio, if not necessary.
- Lower the bitrate to a lower level. Adjusting the original Normal quality to bitrates of around 1800-2000 is acceptable and can make your ripped MP4 movie around 1.5-2.5GB in size, 94% smaller than the original Blu-ray movie, and to the naked eyes, it's highly unlikely to distinguish the difference between the original movie and the re-encoded video.<
- Lower the resolution. Typical Blu-ray videos are 1920×1080 (Full HD). Adjust the resolution to lower 1280×720 or higher won't make any quality difference.
Step 3. Define the output directory.
Click "Folder" button in the Output bar, and select a destination folder to save your rip.
Step 4. Ready for Blu-ray to Cloud Storage ripping.
Just click "Convert" button to start ripping the movie to the digital file accepted by your cloud storage device.
Part 3. How to Put Ripped Blu-ray Movies to Cloud Storage Service?
Once being converted to digital files, your Blu-ray rips can be transferred to the cloud service, and streamed later for different uses. The steps of uploading Blu-ray movies to Amazon Cloud, OneDrive, iCloud, Box, Google Drive etc. go the similar with Dropbox. So here we take Dropbox as an example. Just follow the on-screen wizard to save the converted Blu-ray movies to your cloud storage.
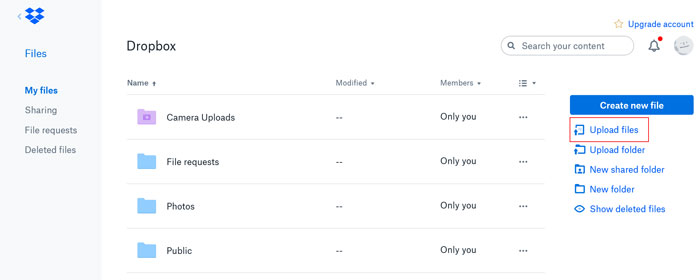
Step 1: Navigate to Dropbox site and log in your account.
Step 2: Click the "Upload files" button. Then you can find a window pop up, click "Choose Files".
Step 3: Choose the converted DVD files and click "Open" to upload to the Dropbox.
Note: The total movie size should be less than 50GB if you upload the movies through your web browser. In another word, you can just upload around 20-40 Blu-ray rips to dropbox.com at a time.
Outstandingly, cloud service makes movies, music and photos more portable. Only if you have an online account, you can use the movies on your home PC, work PC and portable PC, stream it to an app, Chromecast, Smart TV, Roku player or a set-top box.